Author: chaz (page 5 of 20)

manual jeep grand cherokee 2012

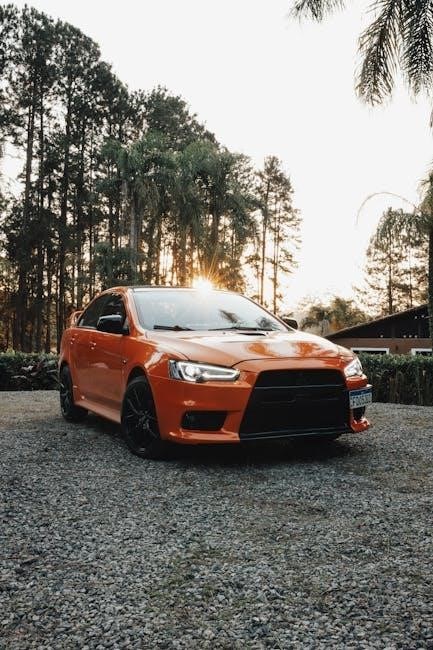
Overview of the 2012 Jeep Grand Cherokee

The 2012 Jeep Grand Cherokee combines robust design with advanced technology, offering a blend of on-road comfort and off-road capability․ It features a refined interior, improved safety, and enhanced fuel efficiency, making it a versatile choice for both urban and adventurous drivers․

1․1 Key Features and Updates for the 2012 Model Year

The 2012 Jeep Grand Cherokee introduced a new 3․6L V6 engine, offering improved power and efficiency․ Updates included a refined interior with premium materials, enhanced infotainment systems, and added safety features like electronic stability control․ Exterior styling was refreshed with a modern grille and LED lighting․ The model also featured improved suspension for better on-road handling while maintaining its legendary off-road capabilities․ These updates positioned the Grand Cherokee as a leader in its class․

1․2 Target Audience and Vehicle Purpose

The 2012 Jeep Grand Cherokee is designed for outdoor enthusiasts, families, and individuals requiring a versatile SUV․ It serves both on-road comfort and off-road adventures, making it ideal for those needing space, durability, and performance in various conditions․ Its capability appeals to urban commuters and rural drivers alike, ensuring a balance between daily practicality and adventurous pursuits․

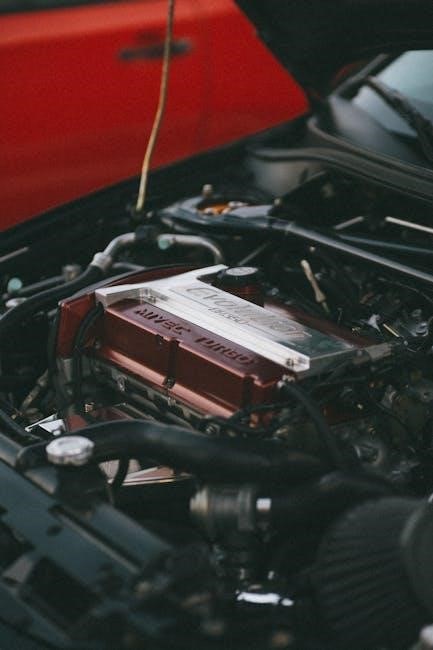
Engine Specifications

The 2012 Jeep Grand Cherokee features a powerful 3․6L V6 engine, delivering 290 horsepower and 260 lb-ft of torque, ensuring strong performance for both on-road and off-road use․

2․1 Available Engine Options

The 2012 Jeep Grand Cherokee offers three engine options: a 3․6L Pentastar V6 producing 290 horsepower, a 5․7L HEMI V8 delivering 360 horsepower, and a 3․0L V6 EcoDiesel for international markets․ The V6 provides balanced performance for everyday driving, while the V8 offers superior towing capacity․ The EcoDiesel combines power with fuel efficiency, making it ideal for long-distance travel․ Each engine is paired with a smooth-shifting automatic transmission․

2․2 Performance and Power Output

The 2012 Jeep Grand Cherokee delivers strong performance with its engine lineup․ The 3․6L V6 engine produces 290 horsepower and 260 lb-ft of torque, ideal for towing and hauling․ The 5․7L HEMI V8 offers 360 horsepower and 390 lb-ft of torque, providing exceptional power for demanding tasks․ Both engines ensure smooth acceleration and responsive handling, making the vehicle capable for both urban commutes and off-road adventures while maintaining a balance of power and efficiency․

Transmission Details

The 2012 Jeep Grand Cherokee features a 5-speed automatic transmission with manual shift mode, offering smooth and responsive gear changes for enhanced driving experience․

3․1 Automatic Transmission Features

The 2012 Jeep Grand Cherokee is equipped with a 5-speed automatic transmission, featuring a manual shift mode for driver control․ This system includes adaptive torque converter lockup, ensuring smooth and responsive gear transitions․ The automatic transmission is designed to optimize fuel efficiency while delivering robust performance, making it suitable for both city driving and off-road adventures․ Its advanced electronics provide seamless shifting, enhancing the overall driving experience․

3․2 Manual Transmission Options

The 2012 Jeep Grand Cherokee offers a 6-speed manual transmission option, providing drivers with precise control and a more engaging driving experience․ This transmission is paired with a dual dry clutch system, enhancing smoothness and reducing wear․ Designed for off-road enthusiasts, it includes a hill-start assist feature to prevent rollback on steep inclines․ The manual transmission is available on select trim levels, catering to those who prefer a hands-on approach to driving in challenging terrains․

Fuel Efficiency

The 2012 Jeep Grand Cherokee offers EPA ratings of up to 17 MPG city and 23 MPG highway, depending on engine and drivetrain configuration․

4․1 EPA Ratings for City and Highway Driving

The 2012 Jeep Grand Cherokee offers EPA ratings of 17 MPG in the city and 23 MPG on the highway for the 3․6L V6 engine with rear-wheel drive․ The 5․7L V8 model achieves 14 MPG city and 20 MPG highway․ These ratings provide a balance between power and efficiency, making the Grand Cherokee a practical choice for both daily commuting and long-distance travel․

4․2 Tips for Improving Fuel Economy

Regular maintenance, such as oil changes and air filter replacements, can enhance fuel efficiency․ Driving habits like smooth acceleration and maintaining consistent speeds also help․ Properly inflated tires and reducing unnecessary weight in the vehicle can further improve mileage․ Avoiding excessive idling and using cruise control on highways are additional ways to optimize fuel economy for the 2012 Jeep Grand Cherokee․

Maintenance Schedule

Regular oil changes, tire pressure checks, and brake inspections are essential․ Follow the recommended intervals in the manual to ensure optimal performance and longevity․

5․1 Recommended Service Intervals

The 2012 Jeep Grand Cherokee manual outlines specific maintenance intervals to ensure reliability․ Oil changes are recommended every 5,000 to 7,500 miles, while tire rotations should occur every 6,000 miles․ Brake pads and rotors should be inspected every 12,000 miles, and the air filter replaced every 15,000 miles․ Timing belts and serpentine belts should be checked at 50,000 and 100,000 miles, respectively․ Adhering to these intervals helps maintain performance and prevents costly repairs․

5․2 Importance of Regular Maintenance

Safety Features

The 2012 Jeep Grand Cherokee offers multiple airbags, electronic stability control, and anti-lock brakes․ Advanced features like adaptive cruise control and lane departure warning enhance safety and confidence․

6․1 Standard Safety Equipment

The 2012 Jeep Grand Cherokee includes a comprehensive suite of standard safety features․ Seven airbags, including a driver’s knee airbag, provide protection in various collision scenarios․ Electronic stability control and anti-lock brakes (ABS) enhance traction and control․ A robust body structure and advanced restraint systems meet rigorous safety standards, ensuring occupant protection․ These features contribute to a safe driving experience, aligning with Jeep’s commitment to durability and reliability․

6․2 Advanced Safety Technologies

The 2012 Jeep Grand Cherokee offers advanced safety technologies to enhance driver confidence․ Features like Forward Collision Warning, Blind-Spot Monitoring, and Rear Cross Path Detection provide real-time alerts and assistance․ Adaptive cruise control maintains a safe distance, while the ParkSense system aids in tight parking spaces․ These technologies, combined with responsive handling, create a secure and controlled driving environment, reflecting Jeep’s dedication to innovation and driver protection․

Performance

The 2012 Jeep Grand Cherokee delivers strong performance with its 3․6L V6 engine, producing 290 horsepower and 260 lb-ft of torque․ It balances power and efficiency, offering smooth acceleration and responsive handling for both on-road driving and off-road adventures․

7․1 On-Road Handling and Comfort

The 2012 Jeep Grand Cherokee offers a refined on-road experience with its responsive steering and smooth ride․ The updated suspension system enhances comfort, reducing noise and vibrations․ Drivers can enjoy a quiet cabin thanks to improved insulation, while supportive seating ensures long-drive comfort․ The vehicle’s balanced chassis provides stability, making it suitable for both city commutes and highway cruising․ Its on-road manners are complemented by precise handling, delivering a confident and controlled driving experience․

7․2 Off-Road Capabilities

The 2012 Jeep Grand Cherokee excels in off-road environments, featuring a robust four-wheel-drive system and advanced traction control․ The Quadra-Trac II and Quadra-Drive II systems provide superior grip on uneven terrain․ With features like hill descent control and a responsive suspension, the vehicle navigates challenging landscapes with ease․ Its high ground clearance and water fording capability further enhance its off-road versatility, making it a reliable choice for adventurous enthusiasts seeking unmatched trail performance and durability․

Interior Features

The 2012 Jeep Grand Cherokee offers a refined interior with premium materials, comfortable seating for five, and ample cargo space․ It features a spacious cabin designed for both driver comfort and passenger convenience, blending practicality with modern amenities․

8․1 Seating and Cargo Space

The 2012 Jeep Grand Cherokee provides comfortable seating for up to five passengers, with premium cloth or leather upholstery options․ The rear seats fold flat, offering ample cargo space for luggage, gear, or larger items․ Additional storage compartments and cupholders enhance practicality, making it ideal for both daily commutes and adventurous trips․ The spacious interior ensures a balanced blend of comfort and versatility for various needs․

8․2 Infotainment and Connectivity Options

The 2012 Jeep Grand Cherokee features a Uconnect infotainment system with a 6․5-inch touchscreen display, offering Bluetooth connectivity, USB ports, and an auxiliary input․ It supports CD/DVD playback and optional navigation․ Voice command functionality enhances convenience, while steering-wheel-mounted controls provide easy access to audio and phone functions․ These features ensure seamless connectivity and entertainment, making every drive enjoyable and stress-free․
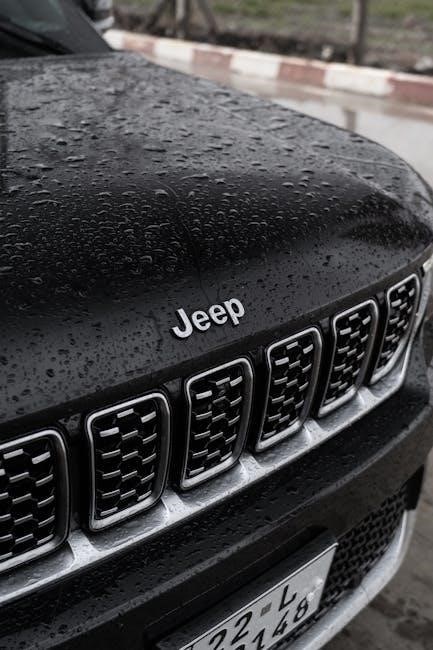
Exterior Design

The 2012 Jeep Grand Cherokee boasts a refined exterior design with aerodynamic lines, LED lighting, and aggressive styling cues, blending ruggedness with sophistication for a modern appeal․

9․1 Styling and aerodynamics

The 2012 Jeep Grand Cherokee features a aerodynamic design with sleek lines, LED lighting, and a bold front grille, enhancing both visual appeal and airflow efficiency․ The exterior styling balances ruggedness with sophistication, incorporating elements like a sloped hood and tapered roofline to improve aerodynamic performance while maintaining the iconic Jeep look․ This design approach ensures a harmonious blend of style, functionality, and on-road efficiency․

9․2 Available Trim Levels

The 2012 Jeep Grand Cherokee is offered in multiple trim levels, including Laredo, Limited, Overland, and the performance-oriented SRT8․ Each trim provides distinct features, ranging from the base Laredo’s essential amenities to the Overland’s premium luxury and advanced technology․ The SRT8 model emphasizes high-performance capabilities, making it ideal for enthusiasts․ These trim options cater to diverse preferences, ensuring drivers can choose the perfect balance of capability, comfort, and style for their needs․

Common Issues and Problems

The 2012 Jeep Grand Cherokee has some common issues like transmission problems, electrical system glitches, and cooling system concerns, which owners should be aware of to maintain their vehicle’s performance and reliability․

10․1 Frequently Reported Issues by Owners

Owners of the 2012 Jeep Grand Cherokee often report issues with the transmission, such as erratic shifting and failure to engage gears․ Electrical system problems, including faulty TIPM modules, are also common․ Additionally, some drivers have experienced cooling system leaks and water pump failures, which can lead to overheating․ These issues highlight the importance of regular maintenance and monitoring to prevent more severe damage to the vehicle․

10․2 Solutions and Fixes

To address common issues, owners often update the TIPM module software and replace faulty sensors․ Rebuilding or replacing the transmission is recommended for persistent shifting problems․ Cooling system leaks can be resolved by replacing corroded hoses and the water pump․ Regular maintenance, such as checking fluid levels and electrical connections, helps prevent these issues․ Consulting the owner’s manual and seeking professional assistance are strongly advised for reliable fixes․

Troubleshooting Guide

Consult the owner’s manual for diagnostic steps and resetting warning lights․ Identify common issues like error codes or sensor malfunctions and address them promptly for optimal performance․

11․1 Diagnosing Common Problems

The 2012 Jeep Grand Cherokee manual provides essential diagnostic steps for common issues․ Start by checking the owner’s manual for specific error codes or warning lights․ Look for symptoms like unusual noises, reduced performance, or fluid leaks․ Inspect battery connections, sensors, and fluid levels․ Use a code reader to identify fault codes․ Address issues promptly to prevent further damage․ Regular inspections can help catch problems early, ensuring reliable operation and extending the vehicle’s lifespan․

11․2 Resetting Warning Lights and Codes

To reset warning lights on the 2012 Jeep Grand Cherokee, start by turning the ignition to the “ON” position without starting the engine․ Press and release the odometer reset button located on the instrument cluster․ Cycle the ignition off and back on, then check if the lights have cleared․ For specific codes, use a code scanner or refer to the owner’s manual․ Some codes may require professional reset at a certified service center to ensure proper resolution․

d500 nikon manual

Welcome to the Nikon D500 manual. This guide helps you master the camera’s features‚ from autofocus to video‚ ensuring you get the most out of photography.

1.1 Overview of the Nikon D500 Camera

The Nikon D500 is a high-performance DSLR camera designed for professional photographers. It features a 20.9MP APS-C sensor‚ 153 AF points‚ and 4K video capabilities. Known for its speed and versatility‚ it excels in wildlife‚ sports‚ and action photography.

With advanced autofocus and ISO range‚ it delivers exceptional image quality in various lighting conditions‚ making it a reliable choice for enthusiasts and professionals alike.

1.2 Importance of the User Manual

The Nikon D500 user manual is essential for understanding the camera’s advanced features and optimizing its performance. It provides detailed instructions‚ troubleshooting tips‚ and insights into maximizing creativity. Whether you’re a novice or an expert‚ the manual ensures you unlock the full potential of your D500.

1.3 Where to Download the Nikon D500 Manual

The Nikon D500 manual is available for free download from Nikon’s official website‚ App Store‚ or Google Play. Ensure you access it from trusted sources to avoid unauthorized versions. The manual is also accessible via the Nikon Manual Viewer 2 app for convenient offline use.

Key Features of the Nikon D500

The Nikon D500 features a high-resolution sensor‚ advanced autofocus‚ wide ISO range‚ fast burst mode‚ and excellent video capabilities‚ making it versatile for various photography needs.

2;1 Sensor and Resolution

The Nikon D500 is equipped with a 20.9-megapixel CMOS sensor‚ delivering high-resolution images with excellent detail and clarity. Its APS-C sensor size ensures optimal performance across various lighting conditions‚ capturing vibrant colors and textures with precision.

2.2 Autofocus System

The Nikon D500 features a highly advanced 153-point autofocus system‚ providing exceptional speed and accuracy. With 99 cross-type sensors‚ it excels in tracking subjects‚ ensuring sharp focus even during dynamic movements. Customizable AF modes enhance versatility for diverse photography scenarios‚ making it ideal for action‚ wildlife‚ and portrait photography.

2.3 ISO Range and Noise Performance

The Nikon D500 offers an ISO range of 100-51‚200‚ extendable to 50-1‚640‚000. It delivers excellent noise performance‚ maintaining detail in low-light conditions. Advanced noise reduction ensures clean images‚ making it suitable for professional use in various lighting environments without compromising quality.

2.4 Burst Mode and Buffer Capacity

The Nikon D500 supports continuous shooting at up to 10 fps in burst mode. The buffer capacity allows for approximately 200 RAW images with an XQD card or 100 with a standard SD card. This ensures smooth performance during fast-paced photography sessions‚ making it ideal for sports and wildlife photography.

2.5 Video Capabilities

The Nikon D500 excels in video recording‚ offering 4K UHD at 30p and 1080p at 60p for smooth motion. It supports external microphones for superior audio and features zebra stripes for exposure control. The flat Picture Control enhances color grading flexibility‚ making it a robust tool for professional videography and cinematic needs.

Mastering the Autofocus System

The Nikon D500’s autofocus system offers 153 focus points with group-area AF and subject tracking‚ ensuring precise and fast focus acquisition in various lighting conditions and subjects.

3.1 Understanding the AF Modes

The Nikon D500 offers AF-C‚ AF-S‚ and AF-A modes. AF-C is ideal for dynamic subjects‚ AF-S for stationary ones‚ and AF-A automatically switches modes. These settings ensure precise focus in various shooting scenarios‚ enhancing your photography experience. The Nikon Manual Viewer 2 app provides detailed guidance on optimizing AF performance.

3.2 Customizing AF Settings

Customize AF settings to suit your needs. Adjust AF-C track sensitivity‚ focus point wrapping‚ and assign AF modes to buttons. Use the Nikon Manual Viewer 2 app for detailed instructions on personalizing AF settings for optimal performance in different photography scenarios‚ ensuring sharper images and improved workflow.

3.3 Best Practices for AF Usage

For optimal AF performance‚ select the right AF mode (AF-C or AF-S) based on your subject. Use Dynamic Area or 3D Tracking for moving subjects. Place focus points on eyes for portraits and predict movement for action shots. Regularly update firmware and use back-button focus for better control and precision.

Shooting Modes and Settings

Explore the Nikon D500’s shooting modes for precise control. Aperture Priority‚ Shutter Priority‚ Manual Mode‚ and Custom Settings offer flexibility for every photography scenario.

4.1 Aperture Priority Mode

Aperture Priority Mode (A/Av) allows you to set the aperture while the camera adjusts the shutter speed. This mode is ideal for controlling depth of field‚ ensuring sharp subjects and blurred backgrounds. Use it for portraits‚ landscapes‚ or creative depth effects with precise control over aperture settings.

4.2 Shutter Priority Mode

Shutter Priority Mode (S/Tv) lets you set the shutter speed‚ with the camera adjusting the aperture. Ideal for capturing motion‚ from freezing action to creating blur. Adjust speeds to suit your creative vision‚ ensuring sharp images or artistic effects in various lighting conditions.

4.3 Manual Mode

Manual Mode (M) offers full control‚ allowing you to set both aperture and shutter speed. This mode is perfect for creative photography‚ enabling precise adjustments for unique effects. Use the exposure compensation dial for fine-tuning and achieve optimal results in challenging lighting scenarios with the Nikon D500.

4.4 Custom Settings

Custom Settings on the Nikon D500 allow you to personalize camera functions to suit your preferences. Configure button assignments‚ autofocus behaviors‚ and shooting parameters to streamline your workflow. Save custom presets for quick access‚ enhancing efficiency and ensuring consistent results tailored to your photography style and needs.

Customizing Your Camera

Unlock your Nikon D500’s full potential by tailoring settings to your needs. Customize button assignments‚ AF settings‚ and save presets for quick access‚ enhancing productivity and creativity.

5.1 Menu System Navigation

Navigating the Nikon D500’s menu system allows you to customize settings efficiently. Use the multi-selector to scroll through options and the OK button to select. The menu is organized into logical categories‚ making it easy to adjust settings like autofocus‚ ISO‚ and burst mode. Familiarize yourself with the layout for quick access to key functions.

5.2 Configuring Button Assignments

Customize button assignments on your Nikon D500 to streamline your workflow. Access the Custom Setting Menu and select Button Assignments to modify functions for buttons like AF-On or the Fn buttons. Assign frequently used settings such as focus modes or metering to these buttons for quick access‚ enhancing your shooting efficiency and productivity.

5.3 Saving Custom Presets

Save custom presets on your Nikon D500 to maintain personalized settings. Use the Menu System to store configurations for ISO‚ white balance‚ and autofocus. Presets can be saved to the camera or exported to a memory card. Utilize the Nikon Manual Viewer 2 app to organize and retrieve your custom settings efficiently for future use.

Battery and Storage Management

Optimize your Nikon D500’s performance with efficient battery life and storage solutions. Use genuine EN-EL15 batteries and follow charging tips. Choose high-speed memory cards for reliable data management and storage.

6.1 Battery Life and Charging Tips

The Nikon D500 uses the EN-EL15 battery‚ offering approximately 1‚240 shots per charge. For optimal performance‚ charge batteries when they reach 1% capacity. Avoid overcharging‚ as it can reduce battery lifespan. Use genuine Nikon chargers to ensure safety and efficiency. Regularly clean the battery contacts for proper connections.

6.2 Memory Card Recommendations

The Nikon D500 supports SD‚ SDHC‚ SDXC‚ and XQD memory cards. For optimal performance‚ use high-speed cards with a minimum U3 or V30 rating. This ensures smooth operation during burst mode and 4K video recording. Always format cards in-camera for compatibility and reliability.

6.3 Data Management Best Practices

Regularly transfer images to a computer and organize them in clearly labeled folders. Use external hard drives or cloud storage for backups. Avoid overfilling memory cards to prevent data loss. Format cards in-camera before use and keep backups of important files. This ensures your photos are safe and easily accessible.

Troubleshooting Common Issues

Troubleshoot autofocus‚ exposure‚ and connectivity problems by resetting settings‚ updating firmware‚ and cleaning sensors. Refer to the manual for detailed solutions to ensure optimal performance.

7.1 Resolving Autofocus Problems

Address autofocus issues by resetting AF settings‚ updating firmware‚ and cleaning the sensor. Ensure lenses are compatible and free from debris. Consult the Nikon D500 manual for detailed troubleshooting steps to restore sharp focus and optimal performance in various shooting conditions effectively.

7.2 Fixing Exposure Issues

Troubleshoot exposure problems by adjusting settings like ISO‚ aperture‚ and shutter speed. Use the histogram for accurate exposure assessment. Enable exposure compensation and bracketing for better results. Refer to the Nikon D500 manual for step-by-step guidance to achieve balanced lighting in your photos effortlessly and professionally.

7.3 Solving Connectivity Problems

Resolve connectivity issues by restarting your camera and device. Ensure Wi-Fi and Bluetooth settings are enabled and properly configured. Check for firmware updates and reset network settings if needed. Refer to the Nikon D500 manual for detailed troubleshooting steps to restore connectivity and ensure seamless image transfer and remote operations.

Compatible Accessories

Explore compatible accessories for the Nikon D500‚ including high-quality lenses‚ external flash units‚ and ergonomic grips‚ to enhance your photography experience and workflow efficiency.

8.1 Recommended Lenses

For the Nikon D500‚ popular lenses include the AF-P NIKKOR 70-300mm f/4.5-6.3G ED VR for telephoto needs‚ the NIKKOR 18-200mm f/3.5-5.6G ED VR II for versatility‚ and the AF-S NIKKOR 10-24mm f/3.5-4.5G ED DX for wide-angle shots. Prime lens enthusiasts may prefer the NIKKOR 35mm f/1.8G FX for exceptional low-light performance. These lenses enhance creativity and image quality‚ catering to various photography styles.

8;2 External Flash Units

The Nikon D500 supports external flash units like the Speedlight SB-5000 and SB-700‚ offering advanced lighting control. These units provide wireless operation‚ TTL metering‚ and compatibility with the camera’s AF system. They enhance creativity in low-light conditions and are ideal for portrait and event photography‚ ensuring professional-grade lighting solutions;

8.3 Remote Shutter Releases

Remote shutter releases like the MC-30A and MC-36A enable wireless or wired camera control‚ minimizing vibrations. These accessories are ideal for long exposures‚ macros‚ or time-lapse photography. They ensure sharp images by eliminating camera shake‚ offering precise control and enhancing your photography experience with the Nikon D500.

Downloading and Using the Nikon Manual Viewer 2 App

The Nikon Manual Viewer 2 app is a free resource available on the App Store and Google Play. It provides easy access to the Nikon D500 manual‚ allowing you to explore features‚ settings‚ and troubleshooting guides on the go. This app is essential for mastering your camera anywhere‚ anytime.

9.1 App Features and Benefits

The Nikon Manual Viewer 2 app offers a user-friendly interface‚ allowing quick access to the D500 manual. Key features include a search function‚ zoom capability‚ and bookmarks for easy navigation. It’s available for free on the App Store and Google Play‚ making it a convenient tool for photographers on the go.

9.2 How to Use the App Effectively

Download the Nikon Manual Viewer 2 app from the App Store or Google Play. Open the app‚ select your camera model‚ and access the Nikon D500 manual. Use the search function to find specific features quickly. Zoom in on text for better readability and bookmark important sections for easy reference later.

Advanced Shooting Techniques

Explore advanced methods like HDR bracketing‚ manual mode for creative control‚ and focus stacking to enhance your photography with the Nikon D500.

10.1 Using Manual Mode for Creative Control

Manual mode on the Nikon D500 allows full control over aperture‚ shutter speed‚ and ISO. This mode is ideal for creative photography‚ enabling long exposures and precise adjustments to capture unique effects. Use bulb mode for extended exposures to create stunning light trails or starry skies in your images.

10.2 Mastering Focus Stacking

Focus stacking on the Nikon D500 involves capturing multiple shots at varying focus points‚ then combining them for extended depth of field. Shoot up to 10 images‚ using the focus shift mode‚ and merge them in post-processing. This technique is ideal for macros or landscapes requiring sharpness across the entire frame.

10.3 Bracketing for HDR Photography

Bracketing on the Nikon D500 simplifies HDR photography by capturing multiple exposures of the same scene. Use the BKT button in Aperture Priority mode to shoot up to 10 frames at 1 EV intervals. Combine these images in post-processing for stunning detail in highlights and shadows‚ ensuring dynamic range is maximized.

Mastering the Nikon D500 requires practice and exploration. Experiment with modes‚ customize settings‚ and stay updated with the latest techniques to enhance your photography skills continuously.

11.1 Summary of Key Takeaways

The Nikon D500 manual provides essential insights into camera features like autofocus‚ ISO‚ and shooting modes. Regular practice‚ custom settings‚ and leveraging resources like the Nikon Manual Viewer 2 app will help you optimize performance and achieve professional-grade results in photography and videography.

11.2 Continuous Learning and Improvement

Continuous learning is key to mastering the Nikon D500. Regularly review the manual‚ explore new techniques‚ and stay updated with firmware updates. Experimenting with different settings and modes will enhance creativity and ensure optimal camera performance for professional results.

printable woodworking worksheets pdf

Printable woodworking worksheets PDF provide a comprehensive guide for projects‚ including material lists‚ step-by-step instructions‚ and diagrams. Perfect for all skill levels‚ they ensure accuracy and efficiency in woodworking.

Overview of Woodworking Worksheets

Woodworking worksheets are detailed guides designed to assist craftsmen in planning and executing projects efficiently. They typically include material lists‚ cutting plans‚ and step-by-step instructions. These worksheets often feature diagrams and illustrations to clarify complex steps‚ ensuring accuracy. They cater to all skill levels‚ from beginners to experienced woodworkers. By organizing tasks and resources‚ woodworking worksheets help users avoid errors and save time. They are widely available in PDF format‚ making them easy to download and print for workshop use. These resources are invaluable for both educational and professional woodworking projects.

Importance of Printable Woodworking Worksheets

Printable woodworking worksheets are essential for ensuring accuracy and efficiency in projects. They provide clear instructions‚ material lists‚ and safety guidelines‚ reducing errors and waste. These worksheets are particularly valuable for beginners‚ offering step-by-step guidance and diagrams. They also serve as a convenient reference‚ easily downloadable and printable. By following these worksheets‚ woodworkers can improve their skills and complete projects confidently. They are a vital resource for both hobbyists and professionals‚ promoting safe and successful woodworking practices. Their versatility makes them indispensable for any woodworking task.

Types of Woodworking Worksheets

Woodworking worksheets include material lists‚ cutting plans‚ and step-by-step instructions. They also feature safety guidelines‚ tool usage tips‚ and diagrams for various projects‚ ensuring clarity and precision.

Material Usage and Cutting Lists

Material usage and cutting lists are essential components of woodworking worksheets‚ providing detailed quantities and dimensions of lumber required for projects. These lists help woodworkers plan efficiently‚ reducing waste and saving time. They often include specifications for various wood types‚ such as softwood‚ hardwood‚ or manufactured boards‚ ensuring the right materials are selected. Cutting lists are typically organized by material type and size‚ making it easier to prepare stock before starting a project. This section is crucial for accurate budgeting and workflow optimization‚ especially for complex designs or large-scale productions.

Detailed Project Instructions

Detailed project instructions in printable woodworking worksheets guide users through every stage of a project‚ from preparation to completion. These instructions are clear‚ concise‚ and easy to follow‚ ensuring woodworkers understand each step. They often include tool usage‚ assembly processes‚ and specific techniques required. Whether for beginners or experienced craftsmen‚ these instructions help avoid mistakes and ensure projects turn out as intended. The step-by-step format makes complex tasks manageable‚ allowing users to focus on precision and quality. This section is vital for achieving professional-grade results efficiently.

Illustrations and Diagrams

Printable woodworking worksheets often include detailed illustrations and diagrams to visually guide users through projects. These visuals provide clear representations of tools‚ techniques‚ and assembly processes‚ making complex steps easier to understand. Diagrams highlight measurements‚ joints‚ and material placement‚ ensuring accuracy. Illustrations are particularly helpful for beginners‚ as they complement written instructions and reduce the likelihood of errors. This visual aid enhances the learning experience‚ making woodworking more accessible and enjoyable for craftsmen of all skill levels.

Safety and Tool Usage Guidelines

Printable woodworking worksheets PDFs include essential safety guidelines‚ tool handling tips‚ and emergency procedures to ensure a secure working environment for all projects.

Safe Handling of Chisels and Other Tools

Printable woodworking worksheets PDF emphasize proper tool handling to prevent accidents. Chisels require a firm grip‚ with fingers away from the cutting edge. Always cut away from the body and use a mallet for striking. Sharpen tools regularly to avoid slipping. Store tools in a dry place‚ protected from damage. When not in use‚ cover sharp edges; Proper tool maintenance and storage ensure longevity and safety. These guidelines help woodworkers maintain a secure and efficient workshop environment for all projects.

First Aid for Common Woodworking Injuries

Printable woodworking worksheets PDF often include first aid guides for common injuries. For cuts‚ apply direct pressure with a clean cloth and elevate the wound. Burns should be cooled with running water for 10 minutes. Splinters can be removed with tweezers after cleaning the area. Seek medical attention for deep wounds or excessive bleeding. Always keep a first aid kit nearby and ensure proper wound cleaning to prevent infection. These steps help woodworkers address accidents promptly and safely‚ minimizing downtime and ensuring quick recovery.

Wood Types and Their Characteristics

Wood types include softwood‚ hardwood‚ and manufactured boards. Softwood is lightweight‚ ideal for construction‚ while hardwood is dense and durable‚ perfect for furniture. Manufactured boards offer versatility and affordability.

Softwood‚ Hardwood‚ and Manufactured Boards

Softwood‚ derived from coniferous trees‚ is lightweight‚ easy to work with‚ and ideal for construction and flooring. Hardwood‚ from deciduous trees‚ is dense‚ durable‚ and perfect for furniture-making. Manufactured boards‚ like plywood‚ offer versatility and cost-effectiveness for various projects. Printable woodworking worksheets provide detailed insights into these wood types‚ helping craftsmen choose the right material for their needs. Understanding their characteristics ensures better project planning and execution‚ whether for DIY enthusiasts or professional woodworkers.

Grain and Finish Quality

Understanding wood grain and finish quality is crucial for achieving professional results. Printable woodworking worksheets emphasize the importance of working with the wood grain to enhance durability and aesthetics. Proper sanding and sealing techniques‚ as outlined in these guides‚ ensure a smooth‚ even finish. The grain direction affects both strength and visual appeal‚ making it essential to consider when designing projects. By following the tips in woodworking worksheets‚ craftsmen can achieve high-quality finishes that highlight the natural beauty of the wood‚ whether for furniture‚ flooring‚ or decorative items.

Wood Joints and Joinery Techniques

Wood joints and joinery techniques are essential for creating durable and functional woodworking projects. Printable worksheets provide detailed guidance on various joints‚ ensuring strong and precise connections.

Butt Joints and Their Applications

A butt joint is the simplest and most common woodworking joint‚ involving two pieces of wood aligned end-to-end. It is widely used in framing and basic projects due to its ease of creation. Despite its simplicity‚ the butt joint is strong when properly reinforced with nails‚ screws‚ or adhesives. Printable woodworking worksheets often detail how to execute butt joints effectively‚ ensuring they hold securely under stress. This joint is particularly useful for beginners‚ as it requires minimal tools and expertise while providing a solid foundation for more complex techniques.

Other Common Wood Joints

Beyond butt joints‚ other essential woodworking joints include mortise and tenon‚ dovetail‚ lap‚ and dado joints. The mortise and tenon joint is ideal for heavy-duty projects‚ offering exceptional strength. Dovetail joints are renowned for their resistance to pulling forces‚ commonly used in drawers. Lap joints involve overlapping wood pieces‚ providing stability‚ while dado joints are perfect for shelving or cabinetry. Printable woodworking worksheets often include detailed instructions for these joints‚ helping woodworkers master various techniques to enhance project durability and aesthetics.

Project Planning and Design

Project planning and design involve creating detailed blueprints‚ measuring‚ and listing materials. Printable worksheets offer design ideas and step-by-step guides‚ ensuring accuracy and professional results.

Design Ideas for Beginners

Printable woodworking worksheets offer a variety of design ideas perfect for beginners. These include simple projects like birdhouses‚ picture frames‚ and small furniture. Worksheets provide inspiration and guidance‚ helping users create functional and decorative pieces. They often feature step-by-step plans‚ material lists‚ and diagrams to ensure clarity. Beginners can explore different styles‚ from modern to rustic‚ while learning essential techniques. These resources make it easy to start woodworking with confidence‚ fostering creativity and skill development.

Step-by-Step Project Guides

Printable woodworking worksheets PDF offer detailed‚ step-by-step project guides to help users complete tasks efficiently. These guides break down projects into manageable tasks‚ providing clear instructions‚ material lists‚ and diagrams. They cater to all skill levels‚ ensuring even beginners can follow along with confidence. Many guides include practical tips and safety advice‚ making them invaluable for learning proper techniques. With these resources‚ woodworkers can tackle a wide range of projects‚ from simple crafts to complex furniture‚ with precision and success.

Free Printable Woodworking Plans

Discover a wide variety of free printable woodworking plans for DIY enthusiasts. These downloadable PDFs include detailed instructions‚ material lists‚ and diagrams for projects of all skill levels.

Popular Projects for DIY Enthusiasts

DIY enthusiasts can explore a variety of popular woodworking projects‚ from simple birdhouses to intricate furniture. Free printable plans often feature items like shelves‚ tables‚ and decorative boxes. These projects cater to all skill levels‚ offering step-by-step guides and material lists. Many plans include customizable designs‚ allowing creators to personalize their work. Printable PDFs provide clear instructions‚ making it easier to tackle projects like cutting boards‚ coat racks‚ and outdoor planters. These affordable and creative ideas are perfect for beginners and experienced woodworkers alike‚ ensuring fun and rewarding DIY experiences.

Downloading and Using PDF Plans

Downloading printable woodworking worksheets as PDFs is a straightforward process‚ offering easy access to detailed project plans. These files typically include step-by-step instructions‚ material lists‚ and diagrams‚ ensuring clarity and precision. Many PDF plans are compatible with various devices‚ allowing users to view and print them conveniently. Before downloading‚ ensure you have the necessary software to open and edit PDFs. Once downloaded‚ organize your files for easy access and consider printing them for hands-on use during projects. Always check for updates or additional resources provided with the plans to enhance your woodworking experience.

Printable woodworking worksheets PDF are invaluable for precise project execution‚ ensuring accuracy and safety. They empower woodworkers of all levels to create high-quality projects with confidence and ease.

Final Tips for Successful Woodworking Projects

For successful woodworking projects‚ always use high-quality materials and tools. Follow safety guidelines‚ such as wearing protective gear and handling tools with care. Double-check measurements and plans before cutting wood to avoid errors. Practice techniques like joint-making and finishing to achieve professional results. Stay organized by keeping tools and materials within reach. Consider environmental factors‚ like proper wood seasoning‚ to ensure durability. Finally‚ take your time and enjoy the creative process—precision and patience lead to outstanding outcomes.

i love you rituals pdf

“I Love You Rituals” are playful, research-based activities designed by Dr. Bailey to foster optimal brain development, reduce hyperactivity, and build self-esteem in children. The program offers 75 engaging rituals, including rhymes, games, and finger plays, suitable for children from infancy to age eight. These activities strengthen adult-child bonds, improve attention span, and enhance social-emotional development. The accompanying I Love You Rituals PDF guide provides a comprehensive resource for parents and educators to implement these transformative practices effectively.

1.1 Overview of the Concept

“I Love You Rituals” are playful, research-based activities designed to strengthen adult-child relationships. These rituals, created by Dr. Rebecca Anne Bailey, promote optimal brain development, reduce hyperactivity, and foster self-esteem. The program includes 75 engaging rhymes, games, and finger plays, suitable for children from infancy to age eight. The activities aim to create meaningful connections, enhancing emotional and social development while encouraging cooperation and language skills.

1.2 Importance of Rituals in Relationships

Rituals foster meaningful connections, shifting focus from material wealth to valuing one another. They create moments solely for bonding, reducing power struggles and promoting a sense of security. These practices strengthen relationships by encouraging cooperation, empathy, and unconditional love, benefiting both adults and children and fostering a lifelong sense of belonging and togetherness.

1.3 Brief History and Development

Developed by Dr. Rebecca Anne Bailey, “I Love You Rituals” emerged as a playful approach to promote brain development and social-emotional growth in children. First introduced in 2000, the program gained popularity for its engaging activities, earning a Parents’ Guide Award. It has since evolved, offering a PDF guide and supplementary resources to enhance its accessibility and effectiveness worldwide.

Core Principles of “I Love You Rituals”

The core principles focus on promoting optimal brain development, enhancing attention span, reducing hyperactivity, and building self-esteem. These rituals foster cooperation, improve language skills, and strengthen emotional connections through playful, engaging activities designed for children and adults to share meaningful moments together.

2.1 Promoting Optimal Brain Development

The rituals are designed to enhance brain development by stimulating neural connections through interactive activities. Rhymes, games, and playful interactions encourage cognitive growth, improve emotional resilience, and support language skills, creating a strong foundation for lifelong learning and emotional well-being in children.

2.2 Enhancing Attention Span and Reducing Hyperactivity

Interactive rituals, such as rhymes and structured games, help children focus and engage calmly. These activities promote self-regulation, reducing hyperactivity while improving concentration. By encouraging mindful participation, the rituals foster a balanced and attentive demeanor, preparing children for academic and social success.

2.3 Building Self-Esteem and Cooperation

Rituals like rhymes and interactive games foster self-esteem by celebrating individuality and achievements. Cooperative activities encourage teamwork, teaching children to value collaboration and mutual respect. Positive reinforcement and shared joy in these moments help build confidence and create a sense of belonging, essential for healthy emotional and social growth in children from infancy to age eight.

Benefits of Implementing “I Love You Rituals”

Implementing “I Love You Rituals” strengthens adult-child bonds, enhances attention span, builds self-esteem, fosters cooperation, improves language skills, and promotes emotional development. The I Love You Rituals PDF guide provides practical tools for these benefits.

3.1 Strengthening Adult-Child Bonds

“I Love You Rituals” foster meaningful connections through interactive activities, creating positive interactions and shared moments. Consistency in these rituals nurtures trust and unconditional love, enhancing emotional closeness. The I Love You Rituals PDF guide offers structured tools to deepen these bonds, ensuring lasting, loving relationships between adults and children.

3.2 Fostering Emotional and Social Development

“I Love You Rituals” use playful rhymes, games, and activities to enhance emotional intelligence and social skills. These rituals promote empathy, cooperation, and self-awareness, helping children navigate relationships confidently. The I Love You Rituals PDF provides structured guidance, ensuring children develop essential life skills through joyful, meaningful interactions, fostering resilience and emotional well-being.

3.4 Improving Language and Literacy Skills

The I Love You Rituals PDF includes rhymes, songs, and interactive games that enhance phonological awareness and vocabulary. These activities encourage verbal participation, fostering language development and early literacy skills. By engaging in rhythmic and repetitive play, children build foundational abilities that support reading and communication, making learning joyful and effective from an early age.

Dr. Sue Johnson’s Approach to Love Rituals

Dr. Sue Johnson’s Emotionally Focused Therapy (EFT) emphasizes consistent, meaningful interactions to strengthen attachment bonds. Her approach aligns with love rituals by fostering emotional connection and trust.

Emotionally Focused Therapy (EFT), developed by Dr. Sue Johnson, is a groundbreaking approach to understanding and improving relationships. It focuses on attachment bonds, helping couples and families create secure connections. EFT emphasizes emotional responsiveness and consistency, aligning with the principles of “I Love You Rituals” by fostering trust and intimacy through structured interactions.

4.2 The Role of Consistency in Rituals

Consistency is essential in rituals, as it builds trust and security in relationships. Dr. Sue Johnson emphasizes that regular, predictable interactions strengthen emotional bonds. In “I Love You Rituals,” consistent practices foster a sense of safety, reducing power struggles and enhancing cooperation. This reliability is key to promoting healthy attachment and emotional well-being in both children and adults.

4.3 Applying EFT Principles to Daily Interactions

Emotionally Focused Therapy (EFT) principles, developed by Dr. Sue Johnson, emphasize creating safe emotional environments. Applying EFT to daily interactions involves being attuned to emotional needs, fostering responsiveness, and strengthening attachment bonds. By integrating these principles into “I Love You Rituals,” adults can promote emotional security, encourage open communication, and build lasting connections with children, enhancing their emotional and social development.

Practical Implementation of “I Love You Rituals”

Implementing “I Love You Rituals” involves using the book’s 75 activities, incorporating music and rhymes, and adapting rituals for different age groups to promote development.

5.1 Using the “I Love You Rituals” Book and Resources

The “I Love You Rituals” book provides 75 engaging activities designed to strengthen adult-child relationships. Resources like songs and printable guides complement the rituals, making implementation easy and effective for fostering emotional and cognitive growth in children. The book and its supplementary materials offer a comprehensive toolkit for parents and educators to promote connection and development.

5.2 Incorporating Music and Rhymes

Music and rhymes play a central role in “I Love You Rituals,” enhancing engagement and emotional connection. Songs like “Songs for I Love You Rituals” and “Rhyme the Rhyme on Kindness Counts” provide playful ways to promote bonding, language development, and social skills. These musical elements make rituals enjoyable and effective for fostering lifelong connections and growth in children.

5.3 Adapting Rituals for Different Age Groups

The “I Love You Rituals” program is adaptable for children from infancy to age eight, ensuring developmental appropriateness. For infants, simple rhymes and gentle movements foster connection. Toddlers enjoy interactive games that encourage exploration and vocabulary. Older children benefit from complex rhymes and group activities, enhancing social and emotional growth. The I Love You Rituals PDF guide provides tailored strategies for each age group, ensuring meaningful engagement and lasting impact.

The “I Love You Rituals” PDF Guide

The I Love You Rituals PDF offers 75 engaging activities designed to promote brain development, reduce hyperactivity, and foster self-esteem in children, adaptable from infancy to age eight.

6.1 Content Overview

The I Love You Rituals PDF guide provides a comprehensive collection of 75 activities, including rhymes, games, and interactive exercises. These tools are designed to enhance brain development, improve attention span, and reduce hyperactivity in children. The guide is structured to be user-friendly, offering adaptable rituals suitable for children from infancy to age eight, fostering emotional and social growth while strengthening adult-child relationships through playful and meaningful interactions. It also includes supplementary materials to support consistent implementation, ensuring long-term benefits for children’s development and family bonding. The PDF format allows easy access and convenience for parents and educators to integrate these practices into daily routines, making it a valuable resource for promoting a nurturing and connected environment. Additionally, the guide emphasizes the importance of consistency and creativity in applying the rituals, providing practical tips and examples to help users maximize their effectiveness. The content is backed by research and designed to be both enjoyable and educational, ensuring that children develop essential life skills while experiencing unconditional love and support.

6.2 How to Effectively Use the Guide

To effectively use the I Love You Rituals PDF, start by incorporating activities into daily routines, ensuring consistency and creativity. Choose age-appropriate rituals, fostering participation and joy. Use the guide’s structured approach to enhance brain development, attention span, and emotional growth. Regularly review and adapt rituals to meet individual needs, ensuring meaningful connections and lasting benefits for children and families alike.

6.3 Supplementary Materials and Resources

The I Love You Rituals PDF is complemented by supplementary materials such as the “I Love You Rituals Poster Set” and music albums like “Songs for I Love You Rituals” Volumes 1 and 2. These resources enhance engagement, providing visual and auditory aids to make rituals more interactive and enjoyable for children. They support consistent implementation and meaningful connection.

Success Stories and Testimonials

The I Love You Rituals PDF has received widespread acclaim, earning a 1999 Parents Guide Children’s Media Award. Parents and educators report improved attention spans, reduced hyperactivity, and enhanced language skills in children. Families praise the rituals for fostering emotional connections and creating lasting, positive bonds between adults and children.

7.1 Real-Life Examples of Rituals in Action

The I Love You Rituals PDF shares inspiring stories of families who used these rituals to strengthen bonds. For instance, one parent reported using rhymes and games to reduce a child’s hyperactivity, while another noted improved language skills through interactive activities; These real-life examples highlight the practical benefits of implementing the rituals in daily life, fostering connection and development.

7.2 Feedback from Parents and Educators

Parents and educators praise the I Love You Rituals PDF for its practical, engaging approach. Many report improved behavior, increased confidence, and stronger adult-child bonds. Educators highlight the rituals’ effectiveness in classrooms, noting enhanced focus and cooperation. The guide’s clarity and creativity have made it a valued resource for fostering emotional and social growth in children of all ages.

7.3 Measurable Outcomes and Impact

The I Love You Rituals PDF guide provides 75 activities that enhance brain development, reduce hyperactivity, and boost self-esteem; Parents and educators report improved attention spans, cooperation, and language skills in children. The rituals foster emotional connection and social growth, earning the 1999 Parents Guide Children’s Media Award, demonstrating their proven positive impact on child development.

Cultural and Universal Significance

The I Love You Rituals PDF emphasizes universal themes of love and connection, transcending cultural boundaries. Its adaptable activities promote unity and bonding across diverse backgrounds worldwide.

8.1 Rituals Across Different Cultures

Rituals like those in the I Love You Rituals PDF are celebrated across cultures, fostering connection and love universally. The guide offers adaptable activities, ensuring cultural relevance while promoting unity and emotional bonding. These rituals transcend boundaries, making them a powerful tool for global communities seeking to strengthen relationships and nurture emotional well-being.

8.2 Universality of Love and Connection

Love and connection are universal human needs, transcending cultures and backgrounds. The I Love You Rituals PDF emphasizes this universality by offering activities that foster emotional bonds, mutual respect, and understanding. These rituals highlight the shared human desire for closeness and affection, making them a powerful tool for building relationships across diverse communities and age groups.

8.3 Adapting Rituals to Cultural Contexts

The I Love You Rituals PDF encourages adapting rituals to fit diverse cultural practices, ensuring they remain meaningful and respectful. By incorporating local traditions and values, these activities promote cross-cultural understanding while maintaining their core purpose of fostering love and connection. This adaptability ensures the rituals resonate deeply within varied cultural settings and communities.

Overcoming Challenges in Implementing Rituals

Consistency and adaptability are key to overcoming challenges. Tailoring rituals to individual needs ensures they remain effective, fostering meaningful connections despite obstacles like time constraints or resistance.

9.1 Common Obstacles and Solutions

Common challenges include time constraints, resistance from children, and maintaining consistency; Solutions involve integrating rituals into daily routines, adapting activities to individual needs, and ensuring they remain engaging and meaningful. Resources like the I Love You Rituals PDF offer practical strategies to address these obstacles effectively, ensuring long-term success and connection.

9.2 Maintaining Consistency and Commitment

Consistency is key to the success of “I Love You Rituals.” The I Love You Rituals PDF guide offers practical strategies to maintain regular practice, such as scheduling rituals into daily routines and using reminders. Staying committed fosters trust and strengthens relationships, ensuring the long-term benefits of enhanced emotional connection and developmental growth for children.

9.3 Tailoring Rituals to Individual Needs

Rituals can be adapted to suit each child’s unique needs and developmental stage. The I Love You Rituals PDF guide provides flexible strategies to modify activities, ensuring they remain engaging and effective for diverse personalities and abilities. This adaptability allows parents and educators to maximize the benefits of rituals for every child, fostering personalized growth and connection.

The Future of “I Love You Rituals”

The future of “I Love You Rituals” lies in innovation and expansion, integrating technology and modern practices to reach more families globally, ensuring love and connection remain central to child development.

10.1 Evolution and Innovation

As “I Love You Rituals” evolve, digital platforms and interactive tools are being developed to enhance accessibility and engagement. Innovations include mobile apps, virtual workshops, and customizable PDF guides, ensuring the rituals adapt to modern lifestyles while maintaining their core focus on fostering connection and development in children.

10.2 Expanding Applications Beyond the Home

Beyond home use, “I Love You Rituals” are being integrated into schools, community programs, and therapeutic settings. Educators and therapists utilize the PDF guide to foster connection and development in group environments. This expansion broadens the rituals’ impact, helping children thrive socially, emotionally, and academically in diverse contexts, supported by Dr. Sue Johnson’s EFT principles of attachment and bonding.

10.3 Integrating Technology and Modern Practices

The “I Love You Rituals” PDF guide is now complemented by digital tools, apps, and multimedia resources, enhancing accessibility for modern families. Interactive activities, videos, and online platforms make rituals engaging for tech-savvy children. This integration aligns with Dr. Sue Johnson’s EFT principles, ensuring love and connection remain central in a fast-paced, technology-driven world.

11.3 Encouragement for Implementation

“I Love You Rituals” offers a timeless approach to nurturing relationships through playful, research-backed activities. The PDF guide provides practical tools for fostering emotional growth, brain development, and lifelong connections, encouraging families to embrace love and togetherness in a busy world.

mitsubishi lancer manual

The Mitsubishi Lancer manual is a comprehensive guide for owners and mechanics‚ offering detailed instructions for maintenance‚ repairs‚ and diagnostics. It covers various models and systems‚ ensuring optimal vehicle performance and longevity.

1.1 Importance of the Manual for Car Owners and Mechanics

The Mitsubishi Lancer manual is essential for car owners and mechanics‚ providing detailed instructions for maintenance‚ repairs‚ and diagnostics. It ensures proper handling of complex systems‚ enhancing safety‚ efficiency‚ and vehicle longevity. The manual is a vital resource for both DIY enthusiasts and professionals‚ offering step-by-step guidance and technical specifications to streamline troubleshooting and repair processes effectively.

1.2 Overview of the Mitsubishi Lancer Model Range

The Mitsubishi Lancer spans multiple generations‚ offering a diverse range of models from compact sedans to high-performance variants like the Evolution series. Produced from the 1970s to 2017‚ the Lancer features various engine options‚ including the 4G6 series‚ and transmissions. Its popularity stems from its reliability‚ versatility‚ and adaptability to different markets‚ catering to both everyday drivers and enthusiasts seeking enhanced performance.

Types of Mitsubishi Lancer Manuals

Mitsubishi Lancer manuals are categorized into service‚ repair‚ and workshop types‚ each tailored for specific needs. They provide detailed instructions for maintenance‚ diagnostics‚ and complex repairs‚ ensuring comprehensive coverage for all vehicle aspects.

2.1 Service Manuals

Mitsubishi Lancer service manuals provide detailed maintenance schedules‚ troubleshooting guides‚ and repair procedures. They include information on general maintenance‚ electrical systems‚ and engine service‚ ensuring owners and mechanics can perform routine checks and repairs efficiently. These manuals are essential for keeping the vehicle in optimal condition and preventing potential issues. They are designed for both DIY enthusiasts and professional technicians;

2.2 Repair Manuals

Mitsubishi Lancer repair manuals offer in-depth instructions for fixing specific components‚ such as engines‚ transmissions‚ and brake systems. They include step-by-step guides‚ wiring diagrams‚ and technical specifications to help diagnose and resolve issues. These manuals are crucial for comprehensive repairs‚ ensuring precision and safety. They cater to both professional mechanics and experienced DIYers‚ providing detailed solutions for complex problems.

2.3 Workshop Manuals

Mitsubishi Lancer workshop manuals provide detailed procedures for dismantling‚ inspecting‚ and reassembling vehicle components. They include technical specifications‚ torque settings‚ and troubleshooting guides. These manuals are essential for advanced repairs and overhauls‚ offering clear instructions for complex tasks. They are designed for professional mechanics and workshops‚ ensuring precise and efficient service. They cover a wide range of models and systems‚ including engines‚ transmissions‚ and electrical systems.

General Maintenance Guidelines

Regular inspections‚ fluid checks‚ and timely part replacements are crucial for maintaining the Mitsubishi Lancer’s performance and longevity. Adhering to scheduled maintenance ensures optimal functionality and prevents potential issues.

3.1 Scheduled Maintenance Intervals

Regular maintenance is essential for the Mitsubishi Lancer’s longevity. Follow the manufacturer’s schedule‚ including oil changes every 5‚000 to 7‚500 miles‚ tire rotations‚ and fluid checks; Inspect belts‚ hoses‚ and battery health annually. Adhering to these intervals ensures optimal performance‚ prevents wear‚ and avoids costly repairs‚ keeping your vehicle in top condition throughout its lifespan.

3.2 DIY Maintenance Tips

DIY maintenance can save time and money. Check oil and fluid levels regularly‚ ensuring proper lubrication. Replace air filters every 15‚000 miles for improved performance. Inspect and top off coolant‚ transmission‚ and brake fluids as needed. Monitor tire pressure for optimal efficiency and safety. Replace wiper blades yearly for clear visibility; These simple tasks keep your Mitsubishi Lancer running smoothly and prolong its lifespan.

Troubleshooting Common Issues

This section covers common issues in Mitsubishi Lancer models‚ focusing on electrical system diagnostics‚ engine problems‚ and transmission concerns. It provides tools and methods to identify and resolve issues effectively.

4.1 Diagnosing Electrical System Problems

Diagnosing electrical issues in the Mitsubishi Lancer involves identifying faults in wiring‚ sensors‚ and components. Use tools like M.U.T;-II/III for accurate diagnostics. Check connections‚ fuses‚ and relays. Consult wiring diagrams for system understanding. Common issues include faulty sensors‚ blown fuses‚ or damaged wires. Follow step-by-step procedures to isolate and repair problems efficiently‚ ensuring proper system functionality and safety.

4.2 Identifying Engine and Transmission Issues

Identifying engine and transmission problems in the Mitsubishi Lancer requires checking for unusual noises‚ leaks‚ or performance issues. Monitor warning lights and scan for error codes using diagnostic tools. Common engine issues include worn piston rings or faulty sensors‚ while transmission problems may involve slipping gears or fluid degradation. Refer to the service manual for detailed troubleshooting steps and repair guidance to address these concerns effectively.

Engine Service and Repair

This section provides essential guidelines for servicing and repairing the Mitsubishi Lancer’s engine. It includes maintenance schedules‚ troubleshooting tips‚ and procedures for common engine repairs.

5.1 4G6 Series Engine Repair Overview

The 4G6 series engine repair manual provides detailed procedures for diagnosing and fixing common issues. It covers cylinder head replacement‚ timing belt adjustments‚ and oil leak repairs. The guide emphasizes proper tools and safety precautions‚ ensuring reliable engine performance and longevity for Mitsubishi Lancer models equipped with this engine.

5.2 Replacing Engine Components

Replacing engine components in the Mitsubishi Lancer requires precise adherence to the manual’s instructions. Procedures include replacing piston rings‚ timing belts‚ and valve trains. Torque specifications and proper tool usage are emphasized to ensure reliability. Always consult the manual for specific part numbers and step-by-step guidance to maintain engine integrity and performance.

Transmission Service and Repair

Transmission service and repair are critical for maintaining smooth gear operation. Regular maintenance‚ including fluid checks and filter replacements‚ prevents premature wear. Diagnostics and repair procedures are detailed in the manual to ensure optimal performance and longevity of both automatic and manual transmissions.

6.1 Automatic Transmission Maintenance

Regular maintenance of the automatic transmission ensures smooth operation and prevents costly repairs. This includes checking and replacing the transmission fluid‚ inspecting the filter‚ and monitoring the torque converter. The manual provides detailed procedures for fluid replacement‚ filter cleaning‚ and diagnostic checks to maintain optimal performance and extend the transmission’s lifespan. Proper maintenance enhances reliability and fuel efficiency.

6.2 Manual Transmission Repair Procedures

Manual transmission repair involves disassembling the unit to inspect gears‚ bearings‚ and synchronizers. Common issues include gear wear and synchronizer damage. Special tools are required for proper disassembly and reassembly. The manual provides step-by-step instructions for replacing components‚ adjusting gears‚ and ensuring proper lubrication. Following torque specifications and alignment procedures is crucial for smooth operation and longevity of the transmission system.

Brake System Service and Repair

The Mitsubishi Lancer manual provides detailed procedures for servicing and repairing the brake system‚ including rotor inspection‚ pad replacement‚ and fluid checks to ensure safe and reliable braking performance.

7.1 Replacing Brake Pads and Rotors

Replacing brake pads and rotors on a Mitsubishi Lancer involves removing the wheel‚ caliper‚ and old pads. Inspect rotors for wear; replace if necessary. Use a C-clamp to compress the caliper and install new pads. Ensure proper alignment to avoid uneven braking. The manual provides detailed steps‚ torque specifications‚ and safety guidelines for a successful replacement‚ ensuring optimal braking performance and safety.

7.2 Bleeding the Brake System

Bleeding the Mitsubishi Lancer’s brake system removes air from the lines‚ ensuring proper brake function. Use a brake bleeding kit and follow the manual’s sequence. Start with the farthest wheel from the master cylinder‚ working inward. Pump the brake pedal to pressurize the system‚ then release slowly. Repeat until fluid flows without bubbles‚ ensuring reliable braking performance and safety.

Model-Specific Guides

Model-specific guides provide detailed repair and maintenance instructions for particular Mitsubishi Lancer variants‚ such as the Evolution X and 1995-2003 models‚ ensuring precise and accurate servicing.

8.1 Mitsubishi Lancer Evolution X Service Manual

The Mitsubishi Lancer Evolution X Service Manual provides detailed repair and maintenance instructions for the 2007 model year. It includes technical specifications‚ wiring diagrams‚ and step-by-step procedures for engine‚ transmission‚ and suspension repairs. Designed for both professionals and enthusiasts‚ this manual ensures accurate diagnostics and servicing of the Evolution X’s advanced systems‚ maintaining its high performance and reliability.

8.2 Mitsubishi Lancer (1995-2003) Factory Workshop Manual

The Mitsubishi Lancer Factory Workshop Manual covers models from 1995 to 2003‚ offering detailed procedures for removal‚ disassembly‚ inspection‚ and reassembly of components. It includes troubleshooting guides for electrical systems‚ engine‚ and transmission issues. This manual is essential for DIY enthusiasts and professionals‚ providing comprehensive technical information to ensure proper maintenance and repair of these classic Lancer models effectively.

Electrical and Wiring Systems

Understanding wiring diagrams is crucial for diagnosing electrical issues in the Mitsubishi Lancer. This section covers the Mitsubishi Multi Communication System (MMCS) and provides detailed electrical system troubleshooting procedures.

9.1 Understanding Wiring Diagrams

Wiring diagrams are essential for understanding the Mitsubishi Lancer’s electrical system. They provide detailed layouts of connectors‚ wires‚ and components‚ helping diagnose issues like open circuits or short circuits. These diagrams use colors and symbols to represent different wiring harnesses‚ making it easier to trace connections and identify faults efficiently.

9.2 Mitsubishi Multi Communication System (MMCS)

The Mitsubishi Multi Communication System (MMCS) integrates advanced features like navigation‚ audio‚ and hands-free calling. Found in models such as the Lancer Evolution X‚ it enhances driver convenience and connectivity. The system is supported by diagnostic tools like M.U.T.-III‚ enabling technicians to troubleshoot and update software efficiently‚ ensuring optimal performance and seamless user experience.

Diagnostic Tools and Procedures

This section outlines essential diagnostic tools like M.U.T.-II/III and procedures for effective troubleshooting. It guides disconnecting the negative battery terminal and using specialized tools for accurate diagnostics.

10.1 Using M.U.T.-II/III for Diagnostics

The M.U.T.-II/III is a specialized diagnostic tool for Mitsubishi vehicles. It provides real-time data‚ fault code reading‚ and system testing. By connecting to the car’s ECU‚ it aids in identifying issues efficiently‚ ensuring accurate repairs and maintenance‚ and is compatible with various Mitsubishi models‚ including the Lancer.

10.2 Special Tools for Repair and Maintenance

Special tools like circuit testers and compression gauges are essential for precise repairs. These tools help diagnose issues in the electrical and engine systems. They ensure accurate measurements and efficient troubleshooting‚ enabling mechanics to perform maintenance and repairs effectively‚ tailored to the Mitsubishi Lancer’s specific requirements and compatible with various models.

Advanced Repair Techniques

Advanced techniques involve specialized tools and procedures for complex repairs. These methods ensure precision and efficiency when dealing with intricate components‚ requiring expert knowledge and skill.

11.1 Rebuilding the Engine

Rebuilding the engine involves disassembling and inspecting components‚ replacing worn parts‚ and reassembling with precision. It requires specialized tools and adherence to manufacturer specifications to ensure optimal performance and longevity. The process includes honing cylinders‚ replacing piston rings‚ and reconditioning bearings‚ ensuring the engine operates efficiently and reliably after rebuilding.

11.2 Overhauling the Transmission

Overhauling the transmission involves a thorough inspection and replacement of worn or damaged components. This includes gears‚ bearings‚ and seals. Use genuine Mitsubishi parts to ensure quality and performance. Special tools and expertise are required for disassembly and reassembly. Follow the service manual for precise instructions to restore smooth operation and prevent future issues.

Resources and Downloads

Access official Mitsubishi Lancer manuals‚ wiring diagrams‚ and repair guides through authorized dealers or trusted online platforms. Download tools and software for diagnostics and maintenance‚ ensuring reliability and accuracy in repairs.

12.1 Online Platforms for Manual Downloads

Several online platforms offer Mitsubishi Lancer manuals‚ including official dealerships and reputable third-party sites. Websites like Scribd and specialized forums provide access to PDF versions of service‚ repair‚ and workshop manuals. These resources often include detailed diagrams‚ troubleshooting guides‚ and step-by-step instructions for various models‚ ensuring comprehensive support for DIY enthusiasts and professionals alike.

12.2 Recommended Tools and Software

The Mitsubishi Lancer manual recommends specific tools and software for efficient servicing. M.U.T.-II/III diagnostic tools are essential for advanced troubleshooting. Specialized software like MMCS and wiring diagram viewers aid in complex repairs. Additionally‚ torque wrenches and multimeters are indispensable for precise adjustments. These resources ensure accurate diagnostics and repairs‚ optimizing performance and longevity.

The Mitsubishi Lancer manual remains vital for car maintenance‚ emphasizing digital evolution. Future trends include AI-driven diagnostics and real-time repair guidance‚ enhancing efficiency and precision.

13.1 The Role of Digital Manuals in Modern Car Maintenance

Digital manuals revolutionize car maintenance by offering instant access to detailed guides‚ wiring diagrams‚ and repair procedures. They enhance efficiency‚ reduce errors‚ and provide real-time updates‚ making them indispensable for both professionals and DIY enthusiasts. The shift to digital platforms ensures comprehensive and up-to-date information‚ aligning with the evolving needs of modern automotive repair.

13.2 Advances in Mitsubishi Lancer Repair Technology

Recent advancements in Mitsubishi Lancer repair technology include enhanced diagnostic tools like M.U.T.-II/III and improved software for real-time troubleshooting. Digital manuals now integrate multimedia content‚ while advanced repair techniques‚ such as engine rebuilding and transmission overhauling‚ are more accessible. These innovations streamline processes‚ improve accuracy‚ and reduce repair times‚ making modern maintenance more efficient and reliable for technicians and enthusiasts alike.

2 way switch wiring diagram pdf

A 2-way switch wiring diagram is a visual guide for controlling electrical devices from two locations. Essential for DIY enthusiasts and electricians‚ it ensures safe and efficient connections.

What is a 2-Way Switch Wiring Diagram?

A 2-way switch wiring diagram is a detailed visual representation of the electrical connections required to control a light or appliance from two different locations. It illustrates the proper arrangement of wires‚ switches‚ and terminals‚ ensuring a safe and functional setup. This diagram typically includes the common (COM)‚ line (L)‚ and earth (E) terminals‚ along with traveler wires connecting the switches. It serves as a step-by-step guide for electricians and DIY enthusiasts‚ helping them understand how to connect wires correctly and avoid potential hazards. The diagram is essential for installing or troubleshooting a 2-way switch system.

Importance of Understanding 2-Way Switch Wiring

Understanding 2-way switch wiring is crucial for ensuring safety and functionality in electrical installations. Proper wiring prevents short circuits‚ electrical fires‚ and shocks. It allows for efficient control of lighting or appliances from multiple locations‚ enhancing convenience and flexibility. Knowledge of 2-way switch wiring also aids in troubleshooting common issues‚ such as faulty connections or incorrect terminal usage. Additionally‚ it empowers homeowners and electricians to perform installations and repairs confidently‚ saving time and resources. Accurate wiring ensures reliable performance and longevity of the electrical system‚ making it a fundamental skill for any electrical work.

Types of 2-Way Switch Wiring Diagrams

2-way switch wiring diagrams include standard setups and configurations with intermediate switches‚ offering clear visual representations for various electrical installations and control systems.

Standard 2-Way Switch Wiring Diagram

The standard 2-way switch wiring diagram involves two switches controlling a single light fixture. It uses a three-wire system‚ with common terminals connected between switches. The live wire connects to one terminal‚ while traveler wires link both switches. Neutral wires are directly connected to the light fixture. This setup ensures the light can be operated from either switch‚ providing flexibility and convenience in lighting control systems. It’s a straightforward configuration‚ making it ideal for beginners and common residential installations.

2-Way Switch with Intermediate Switch Diagram

A 2-way switch with an intermediate switch diagram adds flexibility by enabling control from three points. The intermediate switch‚ with three terminals‚ connects in series between two 2-way switches. The common terminal links to the previous switch‚ while traveler wires connect to the next‚ forming a circuit. This configuration allows the light to be operated from any of the three switches‚ enhancing control in larger spaces. Proper wiring ensures the circuit functions seamlessly‚ making it ideal for hallways or staircases where multiple control points are needed.

How a 2-Way Switch Works

A 2-way switch allows control of a light from two points by breaking and completing the circuit. It uses two terminals for live and feed wires. Toggling the switch connects or disconnects power‚ enabling on/off functionality efficiently.

Basic Components of a 2-Way Switch

A 2-way switch consists of three key terminals: the Common (COM) terminal‚ and two way terminals‚ L1 and L2. The COM terminal connects directly to the live wire‚ while the L1 and L2 terminals are connected to the load and neutral wires. Inside the switch‚ there is a moving contact that toggles between the L1 and L2 terminals‚ allowing the circuit to be opened or closed. The switch is housed in a durable plastic or metal casing and mounted on a backbox for secure installation. This simple yet efficient design ensures reliable control over electrical circuits.

Electrical Connections in a 2-Way Switch System

In a 2-way switch system‚ the electrical connections involve linking the common terminal to the live wire and the two way terminals to the load and neutral wires. The common (COM) terminal is connected to the live wire from the power source‚ while the L1 and L2 terminals are linked to the load (e;g.‚ a light fixture) and the neutral wire. The system ensures that electricity flows through the circuit when the switch is in the “on” position and is interrupted when the switch is “off.” Proper wiring ensures safe and efficient control of the electrical circuit.

Step-by-Step Guide to Wiring a 2-Way Switch

Start by preparing tools and materials. Connect the live wire to the COM terminal and the neutral wire to the L1 terminal. Ensure all connections are secure and test the circuit to confirm proper functionality.

Preparing the Tools and Materials

To begin wiring a 2-way switch‚ gather essential tools and materials. You will need a screwdriver‚ wire strippers‚ and pliers for handling wires. Ensure you have a 2-way switch‚ appropriate wires (live‚ neutral‚ and earth)‚ and a junction box if required; Safety gear like gloves and goggles is crucial. Verify the wiring diagram matches your setup. Double-check that all materials meet local electrical standards. Organize your tools and materials neatly to streamline the process. This preparation ensures a safe and efficient wiring experience.

Connecting the Wires to the Switch

Connect the wires to the 2-way switch by attaching the live wire to the common terminal (usually marked as COM). The neutral wire connects to the other terminal‚ while the earth wire is secured to the earth terminal. Ensure all connections are tight and insulated. Follow the wiring diagram to avoid mistakes. If using a 3-wire system‚ connect the travelers between switches. Double-check connections before powering on. Proper wire attachment ensures the switch functions correctly and safely. This step is critical for the circuit to operate as intended.

Testing the Circuit

After wiring‚ test the circuit to ensure proper functionality. Use a voltage tester to verify no live wires are present before switching on the power. Turn the power supply back on and test both switches to confirm the light or device turns on and off from either location. If the circuit works correctly‚ the switches will control the load seamlessly. Testing confirms the wiring is correct and the circuit operates safely. Any issues indicate a potential faulty connection‚ which should be investigated and resolved immediately for reliable operation.

Common Configurations for 2-Way Switches

2-way switches are commonly used to control lighting from multiple locations or integrate with home automation systems for enhanced convenience and energy efficiency.

Two-Way Switches for Lighting Systems

Two-way switches are widely used in lighting systems to control a single light fixture from two different locations‚ such as staircases or hallways. This configuration enhances flexibility and convenience‚ allowing users to operate lights from multiple points. The wiring diagram for a two-way switch in lighting systems typically involves connecting the switch to the power source and the load (light fixture). It ensures that the circuit remains closed or open based on the switch’s position. This setup is essential for modern lighting systems‚ offering ease of use and energy efficiency. Proper installation requires following the diagram carefully to avoid electrical issues.

Using 2-Way Switches in Home Automation

Integrating 2-way switches into home automation systems enhances control and convenience‚ offering flexible operation of lighting and devices. These switches can be connected to smart hubs‚ enabling voice or app-based control‚ and allow for scene settings and multi-device management. The wiring involves linking the switch to both the power source and the load‚ with additional connections for automation. Compatibility with standards like Zigbee or Z-Wave is crucial. Proper installation and understanding of wiring diagrams are essential to avoid malfunctions and ensure seamless integration with smart home systems for a customized and efficient user experience.

Safety Precautions and Best Practices

Always turn off the power supply before starting work. Use a voltage tester to confirm the circuit is dead. Ensure proper wire connections to avoid short circuits.

Safety Tips for Working with Electrical Wiring

When working with 2-way switch wiring‚ always disconnect the power supply at the circuit breaker. Use a voltage tester to confirm no electricity is present. Wear insulated gloves and safety goggles to protect against shocks or debris. Ensure all wires are securely connected to avoid short circuits. Never touch electrical components with wet hands or while standing on a wet surface. Keep tools and materials organized to prevent accidents. Follow the wiring diagram carefully to maintain circuit integrity. If unsure‚ consult a licensed electrician to avoid risks. Proper safety practices ensure a safe and successful wiring project.

Common Mistakes to Avoid

When wiring a 2-way switch‚ avoid reversing the live and neutral wires‚ as this can cause malfunction. Ensure the common terminal is correctly identified and connected. Mixing up traveler wires can disrupt the circuit‚ so label them during installation. Improper wire stripping or loose connections can lead to short circuits. Neglecting to turn off the power supply is a critical error‚ risking electrical shock. Always cross-reference the wiring diagram with your setup to prevent errors. Double-checking connections before testing ensures reliability and safety in the system.

Troubleshooting a 2-Way Switch Circuit

Identify common issues like faulty switches‚ loose connections‚ or incorrect wiring. Check for power at the switch and verify all wires are securely connected to the correct terminals. If the light doesn’t work‚ ensure the circuit isn’t overloaded or shorted. Use a multimeter to test continuity and voltage. Replace any damaged components and ensure the wiring diagram matches your setup for proper functionality and safety.

Identifying Common Issues

Common issues in a 2-way switch circuit include faulty switches‚ loose connections‚ or incorrect wiring. Symptoms may include lights not turning on‚ flickering‚ or switches failing to control the load. Check for power at the switch using a multimeter to ensure voltage is present. Verify all wires are securely connected to the correct terminals‚ as miswiring can cause the circuit to malfunction. Overloaded circuits or short circuits may also occur‚ requiring immediate attention to prevent damage. Always consult the wiring diagram to ensure connections match the intended setup and use proper tools for diagnosis and repair.

Fixing a Faulty 2-Way Switch Connection

To fix a faulty 2-way switch connection‚ start by turning off power at the circuit breaker. Use a multimeter to ensure no voltage is present. Check all connections for tightness and accuracy against the wiring diagram. Verify the common terminal is connected to the power source and travelers are linked between switches. Ensure the neutral wire is correctly connected to the load‚ not the switch. If issues persist‚ inspect for damaged wires or corrosion. Correct any miswiring and test the circuit to confirm proper function. If problems remain‚ consider consulting a professional or checking for more complex faults.

Understanding 2-way switch wiring diagrams empowers you to tackle lighting control projects with confidence‚ ensuring safe and efficient electrical connections in various setups. This guide helps solidify your understanding‚ making future projects easier.

Final Thoughts on 2-Way Switch Wiring

Mastering 2-way switch wiring is a fundamental skill for any DIY enthusiast or electrician. These diagrams provide clear guidance for controlling lights or devices from multiple locations. Understanding the basics ensures safe and efficient installations. With practice‚ you can confidently tackle more complex configurations‚ enhancing your electrical projects. Remember‚ patience and attention to detail are key to successful wiring. For further learning‚ explore resources like diagrams‚ tutorials‚ and expert guides to deepen your knowledge and expand your capabilities in electrical wiring systems.

Resources for Further Learning

For deeper understanding‚ explore resources like 2-way switch wiring diagram PDFs‚ online tutorials‚ and electrical guides. Websites such as CircuitDiagram.co offer detailed schematics and step-by-step instructions. Additionally‚ manufacturer manuals and DIY forums provide practical insights. Platforms like YouTube and Udemy feature courses on electrical wiring. Always refer to local electrical codes and safety standards. These resources will help you master 2-way switch wiring and expand your knowledge of electrical systems. Continuous learning ensures proficiency in handling more complex wiring projects with confidence and accuracy.

hallelujah music sheet pdf

Hallelujah‚ composed by Leonard Cohen‚ is a timeless classic celebrated for its lyrical and musical depth. This article explores the significance of its sheet music‚ offering insights into its structure‚ availability‚ and enduring appeal for musicians worldwide.

1.1. Brief History of “Hallelujah”

Hallelujah‚ written by Leonard Cohen‚ was first released in 1984 on his album Various Positions. Despite its initial lack of commercial success‚ the song gained popularity over time‚ becoming one of Cohen’s most celebrated works. The song’s poetic and emotionally charged lyrics‚ combined with its haunting melody‚ have made it a timeless classic. Over the years‚ Hallelujah has been covered by numerous artists‚ including Jeff Buckley‚ whose rendition further elevated its fame. The song’s versatility and depth have allowed it to transcend genres‚ resonating with audiences worldwide. Its enduring appeal has made it a staple in music culture‚ with its sheet music widely sought after by musicians and enthusiasts alike. The song’s history is a testament to the power of music to evoke emotion and connect people across generations.

1.2. Significance of Sheet Music in Music Distribution

Sheet music plays a pivotal role in the distribution and preservation of musical works‚ offering a universal format for artists and musicians to share compositions. Unlike digital audio‚ sheet music provides a tangible representation of a song’s melody‚ harmony‚ and lyrics‚ allowing for precise interpretation. For a song like Hallelujah‚ sheet music ensures that Leonard Cohen’s intricate lyrics and musical arrangements are accessible to performers and learners. With the rise of digital platforms‚ sheet music PDFs have become widely available‚ making it easier for enthusiasts to download and play Hallelujah on various instruments. This accessibility has contributed to the song’s enduring popularity‚ enabling it to reach a broader audience and inspiring new interpretations. Sheet music thus remains a cornerstone of music distribution‚ bridging the gap between creators and performers while fostering musical education and appreciation.

Musical Structure of “Hallelujah”

Hallelujah features a hauntingly beautiful structure with multiple verses‚ a memorable chorus‚ and a climactic bridge. Its moderate tempo in F Major allows for emotional expression‚ while the sheet music highlights its piano‚ vocal‚ and guitar arrangements.

2.1. Verses and Their lyrical Depth

2.1. Verses and Their Lyrical Depth

The verses of Hallelujah are renowned for their poetic richness and emotional complexity. Leonard Cohen masterfully weaves themes of love‚ spirituality‚ and vulnerability‚ creating a narrative that resonates deeply with listeners. Each verse explores different facets of human experience‚ from romantic longing to existential reflection. The lyrics are layered with symbolism‚ such as the “secret chord” and the “holy or the broken‚” inviting interpretation and connection. Musically‚ the verses follow a consistent structure‚ with subtle variations in melody that enhance the lyrical depth. The sheet music captures this intricacy‚ offering a clear arrangement of notes and chords that allow performers to convey the song’s emotional weight. Whether performed on piano‚ guitar‚ or vocally‚ the verses remain a testament to Cohen’s lyrical genius and the song’s enduring universality.

2.2. Chorus and Its Emotional Impact

The chorus of Hallelujah is its most recognizable and emotionally resonant element‚ captivating listeners with its haunting beauty. The repeated refrain of “Hallelujah” becomes a universal expression of both joy and longing‚ transcending specific narratives. Musically‚ the chorus features a simple yet powerful melody that ascends and descends‚ creating a sense of yearning. The chord progression‚ often in minor keys‚ underscores the song’s melancholic undertones‚ while the resolution in major chords offers moments of hope. Lyrically‚ the chorus ties together the song’s themes of love‚ spirituality‚ and existential questioning‚ making it deeply relatable. The sheet music highlights the chorus’s structure‚ emphasizing its singability and emotional impact. Performers often interpret the chorus with varying dynamics‚ further enhancing its expressive qualities. The chorus’s timeless appeal lies in its ability to evoke profound emotions‚ making it a cornerstone of the song’s enduring popularity and a focal point in its sheet music arrangements.

2.3. Bridge and Musical Climax

The bridge of Hallelujah serves as a pivotal moment‚ elevating the song to its emotional zenith. Lyrically‚ it often explores themes of vulnerability and redemption‚ with lines like‚ “I did my best‚ it wasn’t much‚” showcasing Cohen’s poetic depth. Musically‚ the bridge typically features a key modulation or a shift in dynamics‚ creating a sense of tension and release. The sheet music reveals how the melody ascends‚ building towards a crescendo that underscores the song’s dramatic arc. Instrumental arrangements often swell during this section‚ adding layers of complexity and intensity. The bridge’s emotional climax is further amplified by the interplay of chords and lyrics‚ creating a hauntingly beautiful contrast. This section is where many performers leave their mark‚ interpreting the bridge with personal flair while staying true to Cohen’s original vision. The sheet music captures this complexity‚ offering musicians a roadmap to navigate the song’s most powerful moments effectively.

Sheet Music Details

Hallelujah sheet music is available in various formats‚ featuring the original key of F Major and a moderate tempo. The score includes lyrics‚ chords‚ and arrangements for piano‚ guitar‚ and other instruments‚ spanning three pages.

3.1. Key and Tempo Specifications

The sheet music for Hallelujah is originally composed in the key of F Major‚ a choice that complements the song’s emotional depth. The tempo is marked as moderate‚ typically around 56 beats per minute‚ creating a reflective and contemplative atmosphere. This key and tempo combination allows for a balanced blend of melodic simplicity and lyrical complexity‚ making it accessible for both amateur and advanced musicians. The time signature is commonly in 4/4‚ providing a steady rhythmic foundation. While arrangements may vary‚ the original key and tempo serve as a benchmark for maintaining the song’s intended feel and emotional resonance. Musicians are encouraged to adhere to these specifications to preserve the essence of Leonard Cohen’s iconic composition.

3.2. Instruments Featured

The sheet music for Hallelujah primarily features the piano‚ which serves as the foundational instrument for both melodic and harmonic accompaniment. The composition also includes arrangements for guitar‚ with chord progressions that complement the piano’s rhythmic and harmonic structure. Additionally‚ versions for flute‚ cello‚ and violin are available‚ offering musicians the flexibility to adapt the piece to various instrumental settings. Some arrangements even include duet options‚ such as piano and cello or piano and violin‚ enhancing the song’s emotional depth. The sheet music is versatile‚ catering to solo performances as well as ensemble plays. This diversity ensures that musicians of different skill levels and preferences can engage with the piece‚ whether they are pianists‚ vocalists‚ or instrumentalists. The inclusion of multiple instruments highlights the timeless appeal and adaptability of Leonard Cohen’s Hallelujah.

3.3. Difficulty Level and Musicality

The sheet music for Hallelujah is generally categorized as having a medium difficulty level‚ making it accessible to intermediate musicians while still offering depth for more advanced players. The piece is written in F Major with a moderate tempo‚ which allows for expressive interpretation. The musicality is rich‚ with intricate chord progressions and melodic lines that require attention to dynamics and phrasing. Vocalists and instrumentalists alike can explore the emotional nuances of the song‚ as the sheet music provides a solid foundation for both solo and ensemble performances. The arrangement supports a range of interpretations‚ from simple piano accompaniments to more complex instrumental duets. This balance of accessibility and depth ensures that Hallelujah remains a rewarding piece for musicians of various skill levels‚ inviting them to connect with its timeless beauty and emotional resonance.

Sources for Downloading the PDF

Popular platforms like esheetmusics.com and Sheetmusic-free.com offer high-quality Hallelujah sheet music. Users can also explore MuseScore and Musicnotes for diverse arrangements. Always prioritize trusted sources for accurate and playable scores.

4.1. Popular Platforms and Websites

Several trusted platforms offer high-quality Hallelujah sheet music. esheetmusics.com provides a variety of arrangements‚ including piano‚ guitar‚ and vocal scores. MuseScore and Musicnotes are popular for their extensive libraries‚ featuring both free and premium options. Additionally‚ Sheet Music Free and Piano Nanny offer downloadable PDFs‚ catering to both beginners and advanced musicians. These platforms ensure that users can access accurate and playable versions of Hallelujah‚ making it easier for enthusiasts to practice and perform this beloved song. Always verify the quality and authenticity of the scores before downloading to ensure the best musical experience.

4.2. Tips for Finding Quality Sheet Music

When searching for high-quality Hallelujah sheet music‚ consider several key factors. First‚ preview the score before downloading to ensure accuracy and completeness. Check for user reviews and ratings‚ as they often indicate the quality of the arrangement. Look for sheet music that matches your skill level‚ whether beginner‚ intermediate‚ or advanced. Verify that the file format‚ such as PDF or MIDI‚ is compatible with your software or device. Additionally‚ ensure the sheet music includes all necessary components‚ such as lyrics‚ chords‚ and instrumental parts. Many platforms offer free previews or samples‚ allowing you to assess the arrangement’s suitability. Finally‚ download from reputable websites or platforms to avoid low-quality or misarranged scores. By following these tips‚ you can find a reliable and enjoyable version of Hallelujah to play and perform.

Hallelujah remains a beloved and enduring piece of music‚ with its sheet music widely sought after by musicians of all levels. The availability of high-quality PDF scores ensures that both professionals and beginners can enjoy playing this iconic song. By exploring the various platforms and resources outlined‚ enthusiasts can easily access arrangements tailored to their needs. Whether for personal practice or public performance‚ Hallelujah continues to inspire and move audiences worldwide. Its timeless appeal lies in its emotional depth and versatility‚ making it a staple in musical repertoire. With the right sheet music‚ anyone can bring this masterpiece to life‚ preserving its legacy for future generations. Remember to support creators by downloading from reputable sources to ensure the highest quality and accuracy in your musical journey with Hallelujah.

167 bus schedule pdf

The 167 Bus Schedule PDF is a comprehensive guide published by NJ Transit, detailing bus stops, operating hours, and route information for efficient trip planning․

1․1 What is the 167 Bus Schedule PDF?

The 167 Bus Schedule PDF is a detailed guide published by NJ Transit, outlining the route, stops, and timetables for the 167 bus service․ It provides essential information for planning trips, including operating hours and service frequencies, helping commuters navigate efficiently․

1․2 Importance for Commuters

The 167 Bus Schedule PDF is essential for commuters, providing detailed timetables, route maps, and service alerts․ It helps plan trips efficiently, reduces waiting times, and ensures commuters stay informed about schedule changes, making it a vital resource for daily travel planning and decision-making․

Where to Download the 167 Bus Schedule PDF

The 167 Bus Schedule PDF is available for download from NJ Transit’s official website and third-party transportation apps like Metro Bus Schedule or Transit for convenient access․

2․1 Official Transit Websites

The 167 Bus Schedule PDF can be downloaded directly from NJ Transit’s official website․ Visit their homepage, navigate to the “Schedules & Maps” section, and search for the 167 route․ The PDF is readily available for download, ensuring commuters have easy access to detailed timetables and route information․

2․2 Third-Party Transportation Apps

Third-party apps like Transit or Moovit offer the 167 Bus Schedule PDF for download․ These apps provide offline access, real-time updates, and interactive maps, making them convenient for commuters who prefer digital tools over official websites․ They often include additional features like trip planning and service alerts․

2․3 Offline Access Options

The 167 Bus Schedule PDF can be downloaded for offline use, ensuring access without internet․ Commuters can save the PDF on their devices or use apps that support offline viewing, making it ideal for areas with limited connectivity․ This feature is especially useful for planning trips in advance․

Key Features of the 167 Bus Schedule PDF

The PDF includes detailed timetables, route maps, and service alerts, providing commuters with essential information for planning their trips efficiently and staying informed about schedule changes․

3․1 Detailed Timetables

The 167 Bus Schedule PDF offers detailed timetables, including departure and arrival times for each stop, operating hours from 6:40 AM to 9:30 PM on weekdays, and weekend schedules, ensuring commuters can plan their trips accurately with up-to-date information․

3․2 Route Maps

The 167 Bus Schedule PDF includes detailed route maps, visually representing the entire journey with key stops and connections, helping commuters navigate the route efficiently and understand the spatial layout of the service area for better trip planning and orientation․

3․3 Service Alerts

The PDF includes service alerts, providing updates on schedule changes, delays, or disruptions due to events like road closures or special events, ensuring commuters stay informed and adjust their plans accordingly for a smoother travel experience․

How to Read the 167 Bus Schedule PDF

This section guides users through understanding the PDF’s layout, including timetables, route maps, and service alerts, helping commuters plan efficiently․

4․1 Understanding the Timetable Format

The timetable format lists departure times for each stop, organized by time of day․ Columns show arrival times at key stops, enabling users to trace their journey from start to end efficiently․ This structured layout helps commuters identify the exact timing for their preferred route and plan accordingly․

4․2 Interpreting Route Maps

Route maps in the 167 Bus Schedule PDF visually depict the journey, marking key stops, transfer points, and service areas․ Symbols like circles for stops and arrows for directions guide users․ Color coding differentiates routes, while labels highlight major landmarks and connecting services, making navigation straightforward and intuitive for commuters․

4․3 Symbols and Codes Explained

The PDF uses specific symbols and codes to convey essential information․ Circles denote bus stops, while arrows indicate route directions․ Codes like “EXP” highlight express services, and “S” marks special schedules․ These symbols enhance readability, ensuring commuters can quickly identify transfers, delays, or service alerts without confusion․

Popular Bus Routes Covered in the PDF

The 167 bus route connects key destinations like Madison Ave and Port Authority, with stops in New Jersey and New York, offering convenient travel options daily․

5․1 Primary Stops and Destinations

The 167 bus route serves major stops including Madison Ave/River Rd, Teaneck Armory, and Port Authority, providing essential connections between New Jersey and New York for daily commuters and travelers alike․

5․2 Express and Local Services

The 167 bus offers both express and local services, with express routes bypassing certain stops for faster travel during peak hours, while local services provide frequent stops for convenience, ensuring flexibility for various commuter needs․

5․3 Night and Weekend Schedules

The 167 bus schedule PDF includes detailed night and weekend timetables, with reduced frequency compared to weekdays․ Night services typically operate from 7:00 PM to 11:00 PM, while weekends run from 6:40 AM to 9:30 PM, ensuring reliable transportation during off-peak hours for commuters․

Service Alerts and Updates in the PDF

The section provides real-time notifications about delays, detours, or service changes, ensuring commuters stay informed and adjust plans accordingly․ Updates are regularly included for accuracy․

6․1 Types of Service Alerts

Service alerts include notifications about delays, detours, schedule changes, and planned maintenance․ These updates help commuters anticipate disruptions and plan alternate routes, ensuring minimal impact on their travel schedules and daily routines․

6․2 How to Check for Real-Time Updates

Commuters can access real-time updates through the NJ Transit website, mobile apps, or electronic signs at bus stops․ These platforms provide instant notifications on delays, service changes, and disruptions, ensuring passengers stay informed and adjust their plans accordingly for a smoother journey․

6․3 Impact on Scheduling

Service alerts and updates can cause delays, rerouting, or schedule adjustments․ These changes may lead to overcrowding or require passengers to adjust travel times․ Staying informed ensures commuters can adapt plans, minimizing disruptions and maintaining efficient travel despite unexpected service modifications․

Connecting Services and Transfer Information

This section provides details about connecting bus routes and transfer points, helping commuters plan seamless journeys between destinations․ It highlights key transfer locations and service links․

7․1 Transfer Points and Connecting Routes

The PDF outlines key transfer points where passengers can switch buses, including major stops like Port Authority and Teaneck Armory, offering seamless connections to other NJ Transit routes and services, ensuring easy navigation between destinations․

7․2 How to Plan Connections Using the PDF

The PDF provides detailed timetables and route maps, enabling commuters to plan connections by identifying transfer points and estimating travel times․ Use the schedule to align arrival and departure times, ensuring smooth transitions between routes․ Look for symbols indicating transfer stops for efficient travel․

7․3 Special Services and Shuttles

The 167 Bus Schedule PDF includes information on express routes, I-95 Express Teaneck Rd services, and connecting shuttles, offering commuters additional travel options․ Seasonal adjustments and holiday schedules are highlighted, ensuring passengers can plan around special events and service changes throughout the year․

Accessibility Features in the 167 Bus Schedule PDF

The PDF highlights accessible bus stops, wheelchair-friendly routes, and special accommodations for passengers with disabilities, ensuring inclusive transit options for all commuters․

8․1 Information for Passengers with Disabilities

The 167 Bus Schedule PDF provides detailed information on accessible bus stops, priority seating areas, and boarding assistance for passengers with disabilities, ensuring seamless and inclusive travel experiences․

8․2 Accessible Bus Stops

The 167 Bus Schedule PDF highlights accessible bus stops equipped with features like wheelchair ramps and lifts․ It also provides details on tactile pathways and audio announcements, ensuring easy navigation for passengers with visual or mobility impairments․

8․3 Special Accommodation Requests

Passengers requiring special assistance can submit requests through the transit authority’s customer service․ The PDF guide outlines procedures for accommodations like priority seating and travel aids, ensuring inclusive transit services for all riders with specific needs or disabilities․

Using the 167 Bus Schedule PDF for Trip Planning

The 167 Bus Schedule PDF offers detailed timetables, route maps, and service alerts, making it an essential tool for planning efficient and stress-free commutes․

9․1 Steps to Plan Your Trip

  1. Identify your starting and ending points using the route map․
  2. Check the timetable for departure and arrival times․
  3. Note key bus stops and transfer points․
  4. Review service alerts for any disruptions․
  5. Download the PDF for offline access and real-time updates․

9․2 Tools and Resources

  • Use the offline PDF map for navigation without internet․
  • Refer to service alerts for real-time schedule adjustments․
  • Utilize the route finder tool for identifying stops․
  • Check transfer information for seamless connections․
  • Review detailed timetables for accurate trip timing․

9․3 Tips for Efficient Travel

  1. Plan your trip in advance using the PDF schedule․
  2. Check service alerts before heading out․
  3. Download the offline map for navigation․
  4. Arrive early at stops to avoid missing buses․
  5. Use symbols and codes in the PDF for clarity․

Benefits of Using the 167 Bus Schedule PDF

The 167 Bus Schedule PDF offers environmental benefits by reducing paper usage, provides consistent information across devices, and allows easy sharing and printing for convenient trip planning․

10․1 Advantages Over Digital Apps

The 167 Bus Schedule PDF eliminates reliance on internet connectivity, providing uninterrupted access to timetables and maps, making it ideal for areas with poor network coverage and ensuring commuters can plan trips without delays or lost connections anytime, anywhere, enhancing overall travel efficiency and convenience significantly․

10․2 Environmentally Friendly Option

The 167 Bus Schedule PDF is an eco-friendly choice as it reduces paper usage by allowing digital access to timetables and maps․ This minimizes environmental impact compared to printed schedules, promoting sustainability while providing essential transit information to commuters efficiently․

10․3 Offline Accessibility

The 167 Bus Schedule PDF offers offline accessibility, allowing commuters to download and view timetables without internet connectivity․ This feature is particularly useful for areas with limited service, ensuring uninterrupted access to essential transit information for seamless travel planning and execution․

Regional Variations and Special Schedules

The 167 Bus Schedule PDF includes variations in operating hours, stops, and special services across different regions․ This ensures commuters can adapt to local transit needs, including seasonal or regional route adjustments․

11․1 Seasonal Changes

The 167 bus schedule adapts to seasonal demands, with modified timetables during holidays and summer months․ Weekday and weekend services may vary, ensuring efficient travel despite seasonal fluctuations in passenger demand and traffic conditions․

11․2 Holiday Schedules

The 167 bus schedule PDF reflects holiday schedules, with reduced services on Christmas, New Year’s, and other major holidays․ Specific routes may operate on limited timetables, ensuring passengers can plan trips accordingly during festive periods․ Users are advised to verify holiday-specific adjustments for accurate travel arrangements․

11․3 Regional Route Differences

The 167 bus schedule varies by region, with specific stops and operating hours tailored to local needs․ In New Jersey, it serves areas like Madison Ave and Port Authority, while in Singapore, routes cover Yishun Ave and Sembawang Int․ Regional differences ensure efficient service for diverse commuter demands and geographical layouts․

The 167 Bus Schedule PDF remains a vital tool for commuters, offering efficiency and accessibility․ Future advancements may integrate real-time updates, enhancing user experience and sustainability in public transit systems․

12․1 Summary of Key Points

The 167 Bus Schedule PDF provides essential route details, timetables, and service alerts, aiding commuters in efficient trip planning․ It covers stops, operating hours, and special services like express routes and weekend schedules, ensuring accessibility and reliability for travelers relying on NJ Transit services․

12․2 Digital vs․ PDF Schedules

Digital apps offer real-time updates and interactive features, while PDF schedules provide offline accessibility and a clear, static format․ The PDF is environmentally friendly and ideal for planning without internet, making it a practical choice for commuters who prefer traditional or offline scheduling options․

12․3 Future Trends in Transit Scheduling

Future trends include enhanced real-time tracking via apps, integration with smart devices, and voice assistants․ Electric buses and sustainable practices are gaining prominence․ Personalized route recommendations and dynamic scheduling based on demand will likely dominate, ensuring efficient and eco-friendly transit solutions for commuters․

manual 996 carrera 4s

The Porsche 996 Carrera 4S Manual offers a unique blend of performance, style, and driver engagement, making it a standout among enthusiasts and collectors alike․

Overview of the Porsche 996 Carrera 4S

The Porsche 996 Carrera 4S is a high-performance variant of the 996 generation, known for its wide body design and all-wheel-drive capability․ It features the same 3․6-liter flat-six engine as the Carrera 4, producing 320 horsepower, and is paired with a 6-speed manual transmission․ The 4S model is distinguishable by its Turbo-style bumpers, wider fenders, and unique tailpipes, making it a visually striking option․ Designed for enthusiasts seeking both power and precision, the Carrera 4S combines the agility of a rear-engine layout with the stability of all-wheel drive․ Its blend of performance, styling, and drivability makes it a sought-after choice among Porsche fans and collectors․

Importance of the Manual Transmission in the 996 Carrera 4S

The manual transmission in the 996 Carrera 4S is a defining feature that enhances the driving experience, offering precise control and a direct connection to the vehicle․ Unlike automatics, the 6-speed manual allows drivers to fully engage with the car’s dynamics, making it a favorite among purists․ The manual gearbox is lighter, contributing to better weight distribution and handling, which is crucial for a rear-engine layout․ Additionally, the manual transmission fosters a deeper emotional connection to the driving process, emphasizing the joy of shifting gears and mastering the art of driving․ For enthusiasts, the manual option preserves the raw, unfiltered essence of Porsche’s performance legacy, making the 996 Carrera 4S Manual a timeless choice for those who value driving purity and mechanical interaction;

Design and Features of the 996 Carrera 4S

The Porsche 996 Carrera 4S features a wider body, Turbo-inspired bumpers, and distinctive tailpipes, complementing its sporty design with a precise manual transmission option․

Exterior Design: Key Differences from the Carrera 4

The Porsche 996 Carrera 4S boasts a distinctly wider body, measuring 60mm broader than the Carrera 4, with Turbo-inspired bumpers and wider fenders for a more aggressive stance․ The rear features quad tailpipes, a hallmark of the Carrera 4S, while the front includes fog lights integrated into the bumper, enhancing both functionality and aesthetics․ The design also incorporates a unique rear spoiler, further distinguishing it from the Carrera 4․ These exterior modifications not only enhance the car’s visual appeal but also reflect its performance capabilities, making the Carrera 4S a standout model in the 996 generation․

Interior Features and Ergonomics

The interior of the 996 Carrera 4S is crafted for both comfort and performance, featuring leather upholstery and sport seats designed to provide optimal support during spirited driving․ The cockpit layout emphasizes driver-centric ergonomics, with controls intuitively placed for ease of access․ The steering wheel and gearshift are ergonomically designed to enhance the driving experience, particularly with the manual transmission, which offers precise and smooth gear changes․ Additional features such as climate control and a premium audio system ensure a refined cabin environment․ The interior’s attention to detail and focus on functionality make it a well-rounded space that appeals to both enthusiasts and everyday drivers, blending luxury with the thrill of driving․

Performance Specifications of the 996 Carrera 4S

The 996 Carrera 4S delivers exceptional performance with a powerful engine, precise handling, and a responsive manual transmission, ensuring an exhilarating driving experience for enthusiasts․

Engine and Power Output

The Porsche 996 Carrera 4S is equipped with a naturally aspirated 3․6-liter flat-six engine, producing 320 horsepower at 6,800 rpm and 273 lb-ft of torque at 4,250 rpm․
This powerplant, shared with the 996 Turbo, provides exceptional acceleration and smooth power delivery․
The engine’s design features dual overhead camshafts and four valves per cylinder, ensuring optimal efficiency and performance․
With a redline of 7,000 rpm, the engine rewards drivers with a thrilling driving experience․
Paired with the manual transmission, the Carrera 4S accelerates from 0-60 mph in just 4․7 seconds, making it a formidable performer on both road and track․

Transmission and Handling

The Porsche 996 Carrera 4S Manual features a 6-speed manual transmission, offering precise control and an engaging driving experience․
Paired with all-wheel drive, the Carrera 4S delivers exceptional traction and stability, making it versatile for various driving conditions․
The manual gearbox provides crisp shifts, enhancing driver connection to the vehicle․
The Carrera 4S inherits its wider body from the Turbo model, which improves handling and cornering stability․
With a well-tuned suspension system, the car balances sporty dynamics with comfort, ensuring a refined yet exhilarating drive․
The combination of manual transmission and responsive handling makes the 996 Carrera 4S a favorite among purists who value driver involvement․

Maintenance and Technical Information

The Porsche 996 Carrera 4S Manual requires regular servicing, with specific intervals outlined in the technical manual for optimal performance and longevity of the vehicle․

Service Requirements and Recommendations

The Porsche 996 Carrera 4S Manual requires consistent maintenance to ensure peak performance and longevity․ Regular oil changes, filter replacements, and brake inspections are essential․ The technical manual provides detailed schedules for servicing, including transmission fluid checks and clutch system evaluations․ It is recommended to follow the outlined intervals to prevent premature wear on components like the IMS bearing, a common area of concern in 996 models․ Additionally, the manual transmission benefits from periodic gear oil changes and inspection of the clutch assembly․ Adhering to these guidelines ensures the vehicle remains reliable and maintains its signature driving dynamics, making it a worthwhile investment for enthusiasts and collectors alike․

Common Modifications and Upgrades

Owners of the Porsche 996 Carrera 4S Manual often pursue upgrades to enhance performance and aesthetics while maintaining the car’s original charm․ Popular modifications include aftermarket exhaust systems to improve sound and reduce weight, lightweight alloy wheels for better handling, and aerodynamic body kits to enhance downforce․ Engine tuning and ECU remapping are also common to unlock additional power․ Suspension upgrades, such as coilovers, are favored for improved cornering and ride quality․ Interior upgrades may involve sport seats and trim replacements to elevate comfort and style․ These modifications not only personalize the vehicle but also increase its appeal among enthusiasts, making it a sought-after model in both modified and stock form․

Market Presence and Collectibility

The Porsche 996 Carrera 4S Manual is increasingly sought after by collectors, with its value rising steadily․ Its unique blend of performance and rarity makes it a modern classic․

Current Market Value and Trends

The Porsche 996 Carrera 4S Manual has seen a steady rise in value, driven by growing enthusiast interest․ Prices for well-maintained models range between $40,000 to $70,000, depending on mileage and condition․ Modified examples, such as the 2005 Carrera 4S Coupe with 54,271 miles, are particularly sought after․ The 2003 model in Polar Silver and the 2002 variant highlight the demand for rare, low-mileage cars․ Market benchmarks like the CLASSIC․COM Market Benchmark underscore its increasing desirability․ Collectors favor manual transmissions for their driving experience, further boosting the 996 Carrera 4S’s appeal․ As a modern classic, it remains a smart investment for Porsche enthusiasts and collectors alike․

Popularity Among Enthusiasts and Collectors

The Porsche 996 Carrera 4S Manual has gained significant popularity among enthusiasts and collectors due to its unique blend of performance and timeless design․ Its manual transmission offers a purist driving experience, appealing to those who value precision and control․ Collectors are drawn to its rarity and the fact that it represents a bridge between classic and modern Porsche engineering․ The 2003 model in Polar Silver and the 2002 variant are particularly sought after, showcasing the car’s enduring appeal․ Enthusiasts also appreciate the wide body and Turbo-inspired aesthetics, making it a standout in the 996 lineup․ Its growing collectibility and emotional connection with drivers solidify its place as a beloved classic among Porsche aficionados․

The Porsche 996 Carrera 4S Manual remains a timeless icon, blending performance, design, and driving purity, making it a cherished choice for enthusiasts and collectors alike․

Final Thoughts on the 996 Carrera 4S Manual

The Porsche 996 Carrera 4S Manual stands as a testament to driving excellence, offering unmatched handling and power․ Its manual transmission enhances the driving experience, providing a direct connection to the road․ With its wide Turbo-style body and iconic design, it captures the essence of Porsche’s heritage․ As a collector’s item, it holds strong market value, appealing to both enthusiasts and investors․ The 996 Carrera 4S Manual is not just a car but a celebration of performance, craftsmanship, and the joy of driving․ It remains a sought-after model, embodying the spirit of Porsche’s legacy in every detail․

resistance tube workout pdf

Resistance tube workouts are a versatile, portable, and effective way to build strength and endurance; They offer convenience for home or travel use, requiring minimal equipment. Ideal for all fitness levels, resistance tubes provide a full-body workout, targeting major muscle groups like chest, back, legs, and shoulders. Whether you’re a beginner or advanced, these exercises can be easily customized to suit your goals. This guide will explore how to maximize your resistance tube training with safety tips, exercises, and a downloadable PDF for a structured workout plan.

What Are Resistance Tubes?

Resistance tubes, also known as exercise or resistance bands, are lightweight, portable equipment made from durable materials like natural latex. They provide varying levels of resistance when stretched, allowing for versatile workouts targeting multiple muscle groups. Compact and easy to use, resistance tubes are ideal for full-body exercises, making them a popular choice for home, travel, or gym use. They suit all fitness levels and goals.

Benefits of Resistance Tube Training

Resistance tube training enhances strength, endurance, and flexibility. It’s lightweight, portable, and cost-effective, making it ideal for home or travel. The tubes allow for controlled movements, reducing injury risk. They target multiple muscle groups simultaneously, offering a full-body workout. Suitable for all fitness levels, resistance tubes can be easily customized to meet individual goals, whether for beginners, seniors, or advanced users, ensuring progressive muscle development and improved overall fitness.

Safety Tips for Resistance Tube Exercises

Always inspect resistance tubes for damage before use. Wear proper footwear and ensure the tube is securely anchored. Avoid using damaged equipment and maintain controlled movements during exercises.

Inspecting the Resistance Tube Before Use

Always inspect the resistance tube for rips, tears, or frays before use. Ensure the tube is securely anchored to a stable object; Avoid using damaged equipment, as it can snap during exercise. Check for proper knots and connections to prevent accidents. Test the tube’s tension by pulling gently. Start with low resistance and gradually increase as needed for safety and effectiveness. Proper inspection ensures a safe workout experience.

Proper Footwear and Equipment Setup

Wear non-slip footwear to maintain stability during exercises. Ensure the resistance tube is anchored to a sturdy object, like a door or column. Keep the tube away from sharp edges to prevent damage. Handle the tube with a firm grip, avoiding knots or tangles. Secure the tube tightly to prevent it from slipping during use. Proper setup ensures safety and effectiveness in your workout routine.

Securing the Tube for Door Exercises

For door exercises, anchor the resistance tube at a sturdy door using a tight knot. Ensure the door is closed fully and the tube is secured at mid-height. Test the setup by gently tugging the tube to confirm it holds. Avoid sharp objects near the anchor point to prevent damage. Properly securing the tube ensures a safe and effective workout experience.

Resistance Tube Exercises by Muscle Group

Resistance tube exercises target major muscle groups like chest, back, legs, shoulders, core, and triceps. Each exercise is designed to efficiently work specific muscles for a balanced workout.

Chest Exercises

Resistance tube chest exercises, like chest presses and chest flys, effectively target pectoral muscles. Stand facing away from the anchor point, hold handles at shoulder level, and press forward. For flys, spread arms wide and bring them together. Incline presses target upper chest. These exercises build strength and definition, with adjustable resistance to suit all fitness levels. Proper form ensures maximum engagement and safety.

Back Exercises

Resistance tube back exercises, such as standing rows and shrugs, effectively target latissimus dorsi and trapezius muscles. Anchor the tube at chest height, hold handles, and pull toward your torso. Keep elbows high and engage your core. Shrugs involve holding the tube under your feet and lifting shoulders. These exercises strengthen posture, improve muscle balance, and enhance overall back definition. Proper form ensures safety and maximal muscle engagement.

Leg Exercises

Resistance tube leg exercises are excellent for strengthening muscles like quadriceps, hamstrings, and glutes. Perform squats by standing on the tube and pushing through your heels. Lunges target individual legs, while leg curls and extensions isolate specific muscles. These exercises improve balance, stability, and overall lower body strength. Proper form ensures effectiveness and prevents injury. Start with lower resistance and gradually increase as you build strength.

Shoulder Exercises

Resistance tube shoulder exercises effectively target deltoids, trapezius, and rotator cuff muscles. Perform lateral raises, front raises, and shrugs to build strength and stability. Anchor the tube for controlled movements like shoulder rotations and presses. Proper form ensures engagement of the correct muscles. Start with lower resistance and progress gradually to avoid injury. These exercises enhance posture, mobility, and overall upper body stability.

Core Exercises

Strengthen your core with resistance tube exercises like crunches, Russian twists, and leg raises. These movements target abs, obliques, and lower back muscles. Use the tube to add resistance during planks or rotational movements. Controlled, slow motions ensure effective engagement. Start with basic exercises and progress to more challenging variations as your core strength improves. This enhances stability, balance, and overall athletic performance.

Tricep Exercises

Target your triceps with effective resistance tube exercises like tricep pushdowns and overhead extensions. Anchor the tube securely and perform controlled movements to engage the tricep muscles. These exercises help improve arm definition and overall upper body strength. Start with basic pushdowns and progress to variations for increased intensity. Consistency yields visible results, enhancing both form and function.

Creating a Resistance Tube Workout Plan

A well-structured resistance tube workout plan helps achieve fitness goals. Include warm-up routines, target specific muscle groups, and incorporate cool-down stretches for optimal results and safety.

Sample Workout Plan

A sample resistance tube workout plan includes exercises like chest presses, rows, and squats. Start with 3 sets of 10-15 reps for each exercise. Warm up with light cardio, then focus on major muscle groups. Include core exercises like crunches and bends. Progress by increasing reps or resistance weekly. A downloadable PDF guide provides detailed routines and visual aids for a comprehensive workout.

Customizing the Plan for Different Fitness Levels

Customize your resistance tube workout by adjusting resistance levels, reps, and exercises based on fitness goals. Beginners can start with lighter resistance and fewer reps, while advanced users can increase intensity. Modify exercises to focus on specific muscle groups or incorporate variations for added challenge. This flexibility ensures the workout remains effective and engaging for all fitness levels, promoting continuous progress and adaptation.

Modifying Exercises for Beginners or Seniors

Modify exercises for beginners or seniors by using lower resistance levels and fewer repetitions. Focus on proper form to ensure safety and effectiveness, gradually increasing intensity;

Adjusting Resistance Levels

Begin with the lowest resistance level and gradually increase as strength improves. Test each exercise slowly to ensure proper form and control. Adjust the tube’s tension by shortening or lengthening it. For seniors or beginners, start with lighter resistance to build confidence and endurance. Monitor progress and modify as needed to maintain a safe and effective workout routine.

Reducing the Number of Reps

For beginners or seniors, start with fewer reps to build strength and endurance. Begin with 8-10 reps per exercise and gradually increase as fitness improves. Focus on maintaining proper form and technique. Reducing reps helps prevent fatigue and injury, ensuring a safe and effective workout. Adjust the number of reps based on individual progress and comfort levels.

Warm-Up and Cool-Down Routines

Warm up with light cardio and dynamic stretches. Cool down with static stretches to improve flexibility. Start exercises slowly, ensuring proper form and gradual tension.

Pre-Workout Warm-Up

A proper warm-up prepares your body for resistance tube exercises. Start with 5-10 minutes of light cardio, such as jogging in place or jumping jacks. Incorporate dynamic stretches like arm circles, leg swings, and torso twists to increase blood flow. Begin exercises with slight tension in the tube, ensuring smooth, controlled movements. This routine enhances flexibility and reduces the risk of injury during your workout.

Post-Workout Stretching

After your resistance tube workout, dedicate 5-10 minutes to stretching. Focus on major muscle groups like hamstrings, quads, chest, and shoulders. Hold each stretch for 20-30 seconds to improve flexibility and reduce muscle tension. Use slow, controlled movements to avoid strain. Incorporating post-workout stretches enhances recovery and prevents soreness, ensuring your body is ready for the next session.

Downloading a Resistance Tube Workout PDF Guide

A comprehensive resistance tube workout PDF provides detailed exercises, plans, and tips for all fitness levels. Download a printable guide to access 55 effective exercises targeting chest, back, legs, and more. Perfect for home workouts, it’s a convenient way to stay fit without gym equipment. Ensure the guide includes safety tips, muscle group focus, and customizable plans for a structured approach to your training.

Where to Find Printable Guides

Printable resistance tube workout guides can be found on reputable fitness websites, such as uhs.berkeley.edu, or through official product pages like Fit Simplify. These guides often include detailed exercise charts, safety tips, and customizable workout plans. Many are available for free download, offering a convenient way to access structured routines without registration or payment. They are ideal for home use and travel, ensuring you never miss a workout.

Key Features of a Good PDF Guide

A good resistance tube workout PDF guide should include detailed exercise charts, safety tips, and customizable plans. Look for guides with clear instructions, muscle group focuses, and progress tracking features. Ensure the PDF is portable and accessible for home or travel use. High-quality visuals and step-by-step directions are essential for proper form. A well-structured guide will cater to all fitness levels, making it versatile and user-friendly for everyone.

Tracking Progress and Increasing Resistance

Monitor your progress by tracking reps and resistance levels. Gradually increase the intensity as your fitness improves, ensuring continuous muscle engagement and growth over time;

How to Monitor Improvement

Regularly assess your workouts by tracking the number of reps, resistance levels, and exercise form. Increase resistance or reps as strength improves. Use a workout journal to document progress and identify areas for growth. Focus on maintaining proper form to ensure effective muscle engagement. Adjust your routine based on progress, and stay consistent to achieve long-term fitness goals.

Gradually Increasing Workout Intensity

Start with lower resistance levels and progressively increase as your strength improves. Gradually add more reps or sets to your routine. Incorporate more challenging exercises over time, such as single-arm movements or compound exercises. Focus on maintaining proper form to prevent injury. As you build endurance, aim to increase the intensity every two weeks to continue making progress. Stay consistent and listen to your body.

Common Mistakes to Avoid

Not inspecting resistance tubes for damage and using worn-out equipment can lead to injuries. Avoid overstretching or improper anchoring, as this may cause the tube to snap during exercises.

Improper Form

Improper form is a common mistake that can lead to ineffective workouts and potential injuries. Arching the back, using jerky movements, or not maintaining tension can reduce exercise efficiency. Always ensure smooth, controlled motions and proper body alignment. Ignoring breathing techniques or rushing through exercises can also compromise results. Start slowly, focus on form, and gradually increase intensity for optimal benefits and safety.

Using Damaged Equipment

Using damaged resistance tubes can lead to reduced effectiveness and increased risk of injury. Always inspect the tube for rips, tears, or cracks before use. Damaged equipment may snap during exercise, causing loss of tension or harm. Ensure all resistance tubes are in good condition and properly secured to avoid accidents. Replace worn-out bands promptly for safe and efficient workouts.

Portability and Convenience of Resistance Tubes

Resistance tubes are lightweight and portable, making them ideal for workouts at home, while traveling, or in small spaces. Their compact design allows easy storage and transport, offering a convenient way to stay fit anywhere without bulky equipment. They provide a total-body workout with minimal space requirements, perfect for versatility and accessibility.

Using Resistance Tubes at Home

Resistance tubes are perfect for home workouts due to their portability and versatility. They can be easily anchored to doors or used without additional equipment, making them ideal for small spaces. With a variety of exercises targeting all muscle groups, they provide a comprehensive workout. Plus, a free printable PDF guide is available, offering 55 effective exercises for legs, chest, back, and more. This ensures a convenient and effective fitness routine from the comfort of your home.

Traveling with Resistance Tubes

Resistance tubes are lightweight and compact, making them ideal for travel. They can easily fit into a bag or suitcase, allowing you to maintain your fitness routine on the go. Printable guides like the resistance tube workout PDF provide exercises that can be done in any location, ensuring consistency. This portability makes resistance tubes a practical choice for staying active while away from home.

Combining Resistance Tubes with Other Equipment

Resistance tubes can be paired with free weights or integrated into total body workouts for enhanced strength training. This versatility allows for a comprehensive fitness routine using minimal equipment, as detailed in the resistance tube workout PDF guide;

Using Tubes with Free Weights

Combining resistance tubes with free weights enhances strength training by adding dynamic tension to traditional exercises. For example, attaching a tube to dumbbells during chest presses or rows increases resistance, engaging more muscle fibers. This hybrid approach, detailed in the resistance tube workout PDF, allows for a more challenging and versatile workout, blending the benefits of both equipment types seamlessly.

Incorporating Tubes into a Total Body Workout

Incorporating resistance tubes into a total body workout creates a balanced routine that targets all major muscle groups. Use tubes for dynamic movements like chest presses, rows, and squats, while integrating free weights for added resistance. This combination, outlined in the resistance tube workout PDF, ensures a comprehensive approach to strength training, enhancing both mobility and overall fitness effectively.