Author: chaz (page 8 of 20)

bible games for youth pdf

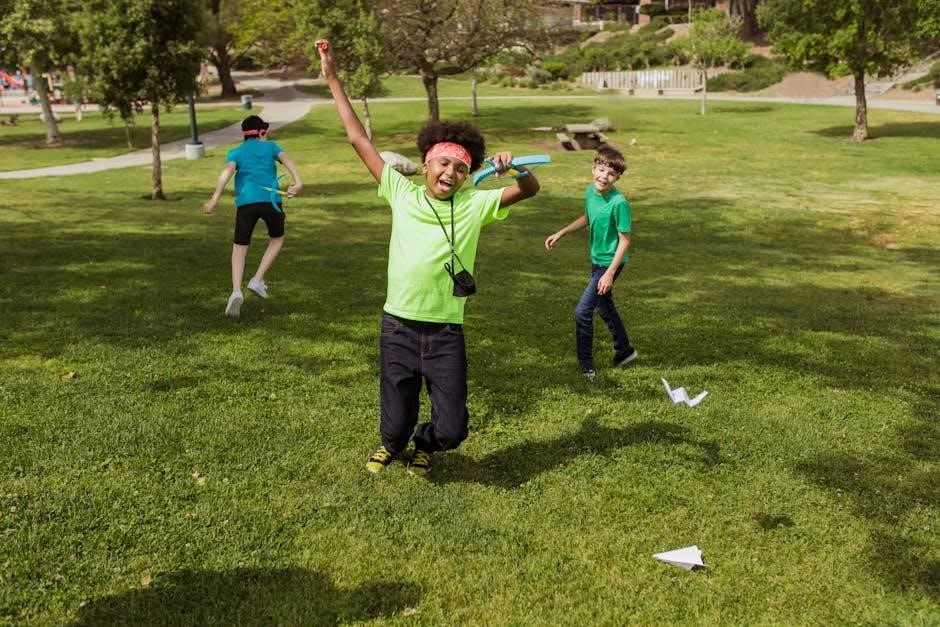
Bible games are engaging tools for making Bible study fun and interactive for young people. They help youth groups connect with scripture through creative activities and competitions‚ fostering spiritual growth and teamwork while ensuring an enjoyable learning experience. Many free printable resources‚ such as Bible games PDFs‚ are available online to simplify planning for leaders.

1.1 Importance of Bible Games in Youth Ministry

Bible games play a vital role in youth ministry by making spiritual lessons engaging and relatable. They create an interactive environment where young people can deepen their understanding of scripture while having fun. These activities foster teamwork‚ encourage participation‚ and help reinforce biblical teachings in a memorable way. Additionally‚ games like trivia‚ charades‚ and word searches provide practical tools for leaders to connect with youth‚ ensuring that Bible study is both enjoyable and impactful. By incorporating these elements‚ Bible games help young individuals build a stronger spiritual foundation while creating lasting experiences.

1.2 Overview of Printable Bible Games for Youth

Printable Bible games for youth offer a wide range of engaging and educational activities designed to deepen spiritual understanding. These resources‚ available in formats like PDF or Word documents‚ include games such as trivia quizzes‚ word searches‚ crossword puzzles‚ and charades. They are easily accessible and can be downloaded for free from various online platforms. Many of these games are tailored for different age groups‚ ensuring they are age-appropriate and relevant. They are ideal for use in youth group meetings‚ Sunday schools‚ and home Bible studies. The versatility of these games allows them to be adapted to various settings‚ making them a valuable tool for youth ministers and parents seeking to make Bible study both fun and impactful for young people.

Types of Bible Games for Youth

Popular Bible games include trivia quizzes‚ charades‚ hidden books‚ word searches‚ and crosswords‚ all designed to engage young minds in fun‚ faith-building activities.

2.1 Bible Trivia Games

Bible trivia games are a popular and interactive way to teach youth about scripture. These games often involve answering questions based on Bible verses‚ characters‚ or events. They can be played individually or in teams‚ making them ideal for group settings like youth groups or Sunday schools. Trivia questions can range from simple to challenging‚ catering to different age groups and knowledge levels; Many free printable Bible trivia games are available in PDF format‚ offering a convenient way to prepare for activities. These games not only educate but also encourage healthy competition and teamwork. They are an effective tool for reinforcing Bible lessons and making learning fun and engaging for young people.

2.2 Bible Charades

Bible Charades is a fun and interactive game where players act out Bible-related terms‚ stories‚ or characters without speaking. This game is perfect for engaging youth in a creative way while reinforcing their knowledge of scripture. It can be played in teams or individually‚ making it suitable for various group sizes. The game encourages creativity‚ teamwork‚ and physical expression‚ allowing young people to connect with Bible stories in a dynamic manner. Free printable PDF resources are available online‚ offering pre-prepared charade cards with Bible-themed words or phrases‚ such as “Noah’s Ark” or “The Ten Commandments.” This activity is both entertaining and educational‚ making it a great addition to youth ministry programs.

2.3 Hidden Books of the Bible Games

Hidden Books of the Bible games are a popular and engaging activity for youth groups‚ designed to enhance Bible knowledge and sharpens attention to detail. In this game‚ participants are given a paragraph of text containing the names of Bible books hidden within it. The goal is to locate and list all the hidden books‚ which can be a fun and challenging task. These games are often available as free printable PDFs‚ making them easy to access and use. They are ideal for youth ministry‚ Vacation Bible School‚ and small group settings‚ helping young people develop familiarity with the Bible in an interactive and enjoyable way.

2.4 Bible Word Search and Crossword Puzzles

Bible word searches and crossword puzzles are excellent tools for engaging youth in scripture-based activities. These games are designed to be both educational and entertaining‚ helping young people learn key Bible verses‚ characters‚ and themes in a fun and interactive way. Word searches typically involve finding and circling words hidden within a grid of letters‚ while crosswords require filling in answers to Bible-related questions. Many websites offer free printable PDF versions of these puzzles‚ making them easily accessible for youth leaders. They are ideal for Sunday school‚ Bible study groups‚ or family time‚ encouraging young minds to engage deeply with biblical content while enjoying the challenge of solving the puzzles.

Choosing the Right Games for Your Youth Group

Selecting age-appropriate and engaging Bible games ensures youth participate actively and benefit spiritually. Consider group size and skill levels to maximize fun and learning effectiveness for everyone involved.

3.1 Age-Appropriateness of Bible Games

Age-appropriateness is crucial when selecting Bible games for youth. Games designed for younger children‚ such as word searches or simple trivia‚ help them engage with basic biblical concepts. For teenagers‚ more complex activities like Bible charades or hidden books games challenge their knowledge and encourage deeper reflection. Ensuring the game matches the age group’s understanding and interests fosters participation and spiritual growth. Leaders should review game content to align with the maturity level of their group‚ making activities both enjoyable and meaningful. This tailored approach ensures that youth of all ages can benefit from the games and connect with the teachings effectively.

3.2 Group Size Considerations

Group size plays a significant role in selecting effective Bible games for youth. Smaller groups allow for more personalized interaction and deeper engagement‚ making games like Bible charades or word searches ideal. Larger groups benefit from team-based activities‚ such as trivia competitions or relay races‚ which promote collaboration and excitement. Leaders should choose games that accommodate the number of participants‚ ensuring everyone can actively partake without feeling overlooked. Adjusting game complexity and duration based on group size helps maintain focus and enthusiasm. Additionally‚ games that encourage participation from all members‚ regardless of group size‚ foster a sense of community and shared learning.

Benefits of Using Bible Games in Youth Ministry

Bible games make learning fun‚ engaging‚ and memorable for youth. They reinforce spiritual lessons‚ foster teamwork‚ and create an interactive environment for deeper biblical understanding and application;

4.1 Engaging Youth in Bible Study

Bible games are a powerful way to engage young people in Bible study‚ making it fun and interactive. These activities help youth connect with scripture in a relatable manner‚ fostering curiosity and participation. By incorporating games like trivia‚ charades‚ and word searches‚ leaders can create an environment where learning is enjoyable and memorable. Games also encourage teamwork and camaraderie‚ breaking down barriers and making Bible study accessible to all. This approach not only deepens understanding but also helps youth apply biblical lessons to their daily lives. With free printable resources like Bible games PDFs‚ leaders can easily plan engaging sessions that captivate young minds and inspire spiritual growth. This method ensures that Bible study is not just educational but also an exciting experience for youth.

4.2 Reinforcing Spiritual Lessons Through Fun Activities

Bible games are an effective way to reinforce spiritual lessons by making them engaging and memorable. Interactive activities‚ such as Bible charades or trivia‚ help youth apply biblical teachings to real-life situations. These games create a relaxed environment where young people can learn and reflect on scripture without feeling pressured. By incorporating fun elements‚ leaders can ensure that spiritual lessons resonate longer and inspire practical application. Games also encourage teamwork and collaboration‚ fostering a sense of community while deepening faith. With resources like Bible games PDFs‚ leaders can easily access activities that align with their teachings‚ making spiritual growth both enjoyable and impactful for youth. This approach ensures lessons are retained and lived out beyond the classroom.

How to Create Custom Bible Games for Your Group

Design games that align with your group’s interests and lesson themes. Use free Bible games PDFs as templates or create unique activities that encourage participation and learning. Incorporate scripture-based challenges‚ puzzles‚ or trivia to make sessions engaging and meaningful for youth. Ensure the games are adaptable to different ages and group sizes for maximum impact. This approach allows leaders to tailor activities to their ministry goals while keeping young people entertained and spiritually enriched.

5.1 Designing Bible Trivia Questions

Creating Bible trivia questions is a great way to engage youth in scripture. Start by selecting verses or stories relevant to your group’s current study. Ensure questions are age-appropriate‚ with a mix of easy and challenging ones to cater to all participants. Use free Bible games PDFs as inspiration or templates. Include questions about key Bible characters‚ events‚ and teachings. Consider adding fun twists‚ like team-based rounds or timed answers‚ to keep the game lively. Make sure to balance factual questions with reflective ones that encourage deeper thinking. This approach not only reinforces Bible knowledge but also fosters teamwork and spiritual growth in a fun‚ interactive way. Adapt the questions to suit your group’s size and preferences for maximum engagement. By designing meaningful and varied trivia‚ you can create a memorable experience for your youth group. This method ensures that learning is both enjoyable and impactful‚ helping young people connect with God’s Word in a relatable manner.

5.2 Creating Interactive Bible Games

Interactive Bible games are excellent for capturing the attention of young people and making Bible study dynamic. Consider creating games like Bible charades‚ where participants act out scripture verses‚ or word-based activities like word searches or crossword puzzles. Utilize free Bible games PDFs as templates for designing these activities. Ensure the games are tailored to the age and interests of your group. For example‚ younger teens might enjoy scavenger hunts or matching games‚ while older teens can engage in more complex challenges like decoding Bible verses or solving puzzles. The key is to balance fun with spiritual learning‚ ensuring the games reinforce biblical lessons while keeping everyone entertained. Incorporating teamwork and prizes can further enhance participation and enthusiasm‚ making the experience both enjoyable and meaningful for the youth. By designing interactive games‚ you can create a lively atmosphere that fosters both engagement and spiritual growth‚ helping young people connect with God’s Word in a memorable way. These activities can also be adapted to fit various group sizes and settings‚ making them versatile tools for youth ministry. Always aim to create a balance between fun and faith‚ ensuring the games serve their purpose of deepening biblical understanding while keeping the youth engaged and excited about learning. This approach not only makes Bible study more accessible but also creates lasting impressions and a stronger connection to scripture for young believers.

Keeping it Fun: Incorporating Prizes and Rewards

Incorporating prizes and rewards into Bible games motivates participation and excitement. Offer small incentives like gift cards‚ treats‚ or extra points to winners‚ ensuring fun aligns with spiritual growth.

6.1 Using Incentives to Encourage Participation

Using incentives is a powerful way to boost participation in Bible games. Offering prizes such as gift cards‚ small treats‚ or Bible-themed items motivates youth to engage actively. Many free PDF resources provide creative ideas for rewards‚ ensuring that the focus remains on spiritual growth while fostering excitement. Incentives can be tailored to the game’s theme‚ making the experience more meaningful. For example‚ awarding points or badges encourages teamwork and individual effort. Prizes also create a sense of achievement‚ helping youth feel recognized for their involvement. This approach ensures that fun and learning go hand in hand‚ keeping young participants enthusiastic and invested in the activities.

6.2 Balancing Fun and Spiritual Growth

Balancing fun and spiritual growth is essential when using Bible games in youth ministry. While games are meant to engage and entertain‚ their primary purpose is to deepen spiritual understanding. Structured activities like Bible trivia or charades can reinforce lessons and encourage reflection. Leaders should ensure that the games align with the spiritual goals of the group‚ fostering a connection between enjoyment and learning. Incorporating scripture-based challenges helps youth internalize biblical teachings. The key is to create an environment where fun leads to meaningful conversations and a stronger faith foundation. By blending entertainment with purposeful lessons‚ Bible games become a valuable tool for holistic youth development.

Bible games are a powerful tool for engaging youth in spiritual growth while fostering fun and teamwork. They provide an interactive way to explore scripture‚ making Bible study relatable and enjoyable. With resources like free Bible games PDFs‚ leaders can easily access activities tailored for various ages and group sizes. These games not only reinforce biblical lessons but also create memorable experiences that deepen faith. By balancing entertainment with spiritual learning‚ Bible games help youth ministries achieve their goals effectively. Their versatility and accessibility make them an invaluable asset for nurturing young believers and encouraging lifelong discipleship in a dynamic and engaging way.

orbit instruction manual

Welcome to the Orbit Instruction Manual‚ your comprehensive guide to understanding and utilizing the Orbit sprinkler timer system. This manual provides detailed instructions for installation‚ programming‚ and troubleshooting‚ ensuring efficient and reliable operation of your irrigation system. Designed to help you manage watering schedules effortlessly‚ the Orbit system offers advanced features for optimal water usage and convenience.

Purpose and Scope of the Manual

This manual is designed to guide users in setting up and operating the Orbit sprinkler timer effectively. It provides detailed instructions for establishing watering schedules‚ programming the timer‚ and troubleshooting common issues. Intended for homeowners and installers‚ the manual covers essential features‚ safety precautions‚ and technical specifications. It ensures proper installation‚ efficient water usage‚ and compliance with standards like UL-1951 and CE approval. By following this guide‚ users can optimize their irrigation system’s performance and maintain a healthy lawn with minimal effort.

Key Features of the Orbit System

The Orbit system offers advanced features for efficient irrigation control. It includes a user-friendly programming interface‚ multiple watering schedules‚ and manual mode operations. The system supports up to 24 VAC irrigation valves and is compatible with various accessories. With UL-1951 compliance and CE approval‚ it ensures safety and reliability. Additional features like automatic scheduling and error code alerts enhance functionality‚ making it a versatile solution for modern irrigation needs. These features simplify water management and provide a seamless user experience for both residential and small-scale commercial applications.

System Components and Accessories

The Orbit system includes a range of hardware components‚ such as timers‚ valves‚ and sensors‚ along with accessories like remote controls and mounting brackets. These components ensure seamless integration and operation of the irrigation system‚ providing users with the tools needed for efficient water management and customization of their setup.

Hardware Components of the Orbit Timer

The Orbit Timer consists of essential hardware components designed for reliable operation. The main unit houses the control board‚ managing all system functions. Solenoid wires connect to 24VAC valves‚ enabling water flow control. A rain sensor is included to prevent overwatering during rainfall. The system also features a flow control adjustment for precise water distribution. Additionally‚ a wiring harness ensures secure connections between components‚ and the timer includes a battery compartment for backup power during outages. These components work together to ensure efficient and automated irrigation management.

Software and Digital Interfaces

The Orbit Timer features an intuitive software interface for seamless programming and control. The digital interface allows users to set schedules‚ adjust watering durations‚ and monitor system status. Compatible with select Orbit models‚ the software offers advanced features like weather-based adjustments and remote access through the Orbit app. The interface supports multiple zones and enables manual overrides for flexibility. Regular software updates ensure optimal performance and compatibility with new devices‚ enhancing user experience and system reliability. This integration of software and hardware provides a user-friendly solution for modern irrigation needs.

Installation and Setup

Mount the Orbit Timer securely‚ connect wires to the appropriate valves‚ and set the clock. Test the system to ensure proper operation and secure all connections.

Preparation Steps for Installation

Before installing the Orbit Timer‚ ensure the power is off at the circuit breaker. Gather all necessary tools and components‚ including the timer‚ valves‚ and wiring. Verify compatibility with your irrigation system and check for any existing damage. Read the manual thoroughly to understand the setup process. Test the valves manually to ensure they function properly. Plan the wiring layout to avoid complications during installation. Ensure all connections are secure and follow safety guidelines to prevent electrical hazards.

Physical Installation of the Orbit Timer

Mount the Orbit Timer securely to a flat surface using the provided mounting screws. Ensure the timer is level and properly aligned with the valve wiring; Connect the wires from the valves to the corresponding terminals on the timer‚ matching the zone labels. Secure all wire connections tightly to prevent loose contacts. Verify the timer is oriented correctly‚ with the display facing upward for easy access. Double-check all connections before proceeding to power the system; Ensure the timer is installed in a location protected from direct sunlight and moisture.

Connecting the Orbit System to a Power Source

Connect the Orbit Timer to a 24VAC power source using the provided transformer. Ensure the power cord is securely plugged into both the timer and a nearby electrical outlet. Verify the voltage rating matches the transformer’s specifications to avoid damage. Turn on the power and check for any LED indicators or display lights to confirm the system is powered on. Test the timer’s basic functions to ensure proper operation. Avoid exposing the timer to direct water contact or extreme temperatures during operation.

Programming the Orbit Timer

Program your Orbit Timer by accessing the interface‚ setting the clock‚ and creating customizable watering schedules. Adjust settings and use manual mode for flexibility.

Overview of the Programming Interface

The programming interface of the Orbit Timer is user-friendly‚ featuring an LCD display and intuitive buttons for navigation. It allows users to set the clock‚ customize watering schedules‚ and adjust settings. The interface provides clear options for selecting zones‚ adjusting durations‚ and enabling manual mode. With a straightforward layout‚ it ensures easy access to all functions‚ making it simple to manage your irrigation system efficiently. Real-time feedback on the screen helps confirm your settings‚ ensuring accurate programming every time.

Setting the Clock and Basic Parameters

Setting the clock and basic parameters on the Orbit Timer ensures accurate operation. To begin‚ press the MANUAL button and use the arrow keys to select the current time and date. Adjust the time using the +/– buttons and press ENTER to save. Next‚ set the watering parameters‚ such as start time and frequency‚ by navigating through the menu options. Ensure all settings are confirmed by pressing ENTER after each adjustment. Proper setup guarantees your irrigation schedule operates smoothly and efficiently‚ aligning with your specific needs.

Creating and Managing Watering Schedules

To create a watering schedule‚ press the MENU button and navigate to the scheduling section using the arrow keys. Select the desired zone and set the start time‚ frequency‚ and duration using the +/– buttons. Press ENTER to save. For multiple zones‚ repeat the process. You can customize schedules for different days of the week or set a one-time operation. Review and modify schedules as needed to optimize water usage and adapt to weather conditions. Proper scheduling ensures efficient irrigation tailored to your lawn’s needs.

Manual Mode Operations and Adjustments

To activate manual mode‚ press the MANUAL button and use the arrow keys to select the desired zone. Adjust the watering duration with the +/– buttons and press ENTER to start. During manual operation‚ you can pause or stop watering by pressing the STOP button. For immediate adjustments‚ use the MANUAL button to override scheduled settings temporarily. This feature allows flexibility for unexpected watering needs or fine-tuning without altering the programmed schedule. Ensure proper zone selection and duration settings for accurate manual control of your irrigation system.

Troubleshooting Common Issues

Troubleshooting Common Issues with the Orbit Timer: Identify and resolve problems like error codes‚ connectivity issues‚ and system malfunctions using the detailed solutions provided in this section.

Identifying and Diagnosing Common Problems

Identifying issues with the Orbit Timer begins with checking error codes displayed on the screen. Common problems include improper watering schedules‚ faulty sensors‚ or disrupted power supply. Verify connections to ensure valves and sensors are securely linked. If the timer fails to activate‚ reset it by pressing and holding the reset button for 10 seconds. For persistent issues‚ consult the manual or contact technical support for assistance. Regularly inspecting the system and addressing minor issues promptly can prevent major malfunctions and ensure optimal performance.

Resetting the Orbit Timer to Factory Settings

To reset the Orbit Timer to factory settings‚ press and hold the reset button located on the back or bottom of the device for 10-15 seconds. This action will restore default settings‚ erasing all custom programming and schedules. After releasing the button‚ the timer will restart with initial factory configurations. Note that all previously set watering schedules and preferences will be lost. If issues persist after the reset‚ refer to the troubleshooting section or contact Orbit technical support for further assistance.

Addressing Error Codes and Alarms

If the Orbit Timer displays an error code or triggers an alarm‚ refer to the manual for specific code definitions. Common issues include faulty sensors‚ incorrect programming‚ or low power. Check wiring connections and ensure the system is properly powered. Resetting the timer to factory settings may resolve some errors. For persistent issues‚ contact Orbit technical support for assistance. Keeping the software updated can also prevent recurring alarms and ensure smooth operation of the irrigation system.

Safety Precautions and Guidelines

Ensure safe installation and operation by following electrical safety guidelines and avoiding water exposure to electrical components. Use only with cold water outdoors for optimal performance and longevity.

Electrical Safety Considerations

Always follow electrical safety guidelines to prevent hazards. Install the Orbit system outdoors‚ using only cold water to avoid damage. Keep electrical components away from water exposure to ensure safe operation. Verify proper grounding and avoid overloading circuits. Never modify the device or bypass safety features. Ensure all connections are secure and comply with local electrical codes. If unsure‚ consult a licensed electrician for installation. Regularly inspect wiring and components for damage or wear. Avoid using damaged cords or plugs‚ and keep the system out of reach of children and pets.

Environmental and Usage Guidelines

Use the Orbit system responsibly to ensure optimal performance and environmental safety. Install the timer outdoors‚ as it is designed for exterior use with cold water only. Avoid spraying water near electrical connections to prevent damage or hazards. Protect the timer from extreme weather conditions and ensure it is securely mounted to prevent damage. Regularly inspect and maintain the system to prevent leaks or water waste. Drain the system seasonally in freezing temperatures to avoid damage. Always follow local water usage regulations and consider eco-friendly settings to conserve resources.

Warranty and Technical Support

Orbit products are backed by a comprehensive warranty. For assistance‚ contact Orbit Technical Support at 1-800-488-6156. The system complies with UL-1951 standards‚ ensuring reliability and safety.

Understanding the Orbit Warranty

The Orbit warranty ensures your product is protected against defects in materials and workmanship. Most Orbit timers and accessories are covered for a minimum of one year from the date of purchase. The warranty does not cover damage caused by improper installation‚ misuse‚ or normal wear and tear. To validate your warranty‚ retain your purchase receipt and register your product online. For warranty claims or inquiries‚ contact Orbit Technical Support at 1-800-488-6156. Proper registration ensures seamless assistance and extends product reliability.

Contacting Orbit Technical Support

For assistance with your Orbit product‚ contact our dedicated Technical Support team at 1-800-488-6156. Representatives are available to address installation‚ operation‚ and troubleshooting issues. Visit the official Orbit website for additional resources‚ including manuals‚ FAQs‚ and support articles. For convenience‚ you can also submit inquiries via email or through the online support portal. Ensure you have your product model number and purchase details ready for efficient service. Orbit prioritizes customer satisfaction‚ offering timely solutions to ensure optimal product performance and user experience.

By following this manual‚ you’ve successfully set up and customized your Orbit system for efficient irrigation. Regular maintenance and adherence to guidelines ensure long-term performance. Remember to refer to troubleshooting sections for quick solutions. For further assistance‚ contact Orbit Technical Support. Happy watering!

nikon d3300 instruction manual

The Nikon D3300 is an entry-level DSLR camera designed for new photographers and hobbyists. It features a 24.2-megapixel CMOS sensor, EXPEED 4 image processor, and Nikon F-mount compatibility, offering excellent image quality and versatility. This guide provides a comprehensive overview of its features, setup, and usage, helping users master the camera’s capabilities for stunning photography.

1.1 Overview of the Camera

The Nikon D3300 is a user-friendly DSLR camera designed for beginners and hobbyists. It features a 24.2-megapixel CMOS sensor, EXPEED 4 image processor, and compatibility with Nikon F-mount lenses. The camera offers intuitive controls, Live View mode, and Full HD video recording, making it ideal for capturing high-quality photos and videos with ease.

1.2 Importance of the Instruction Manual

The instruction manual is essential for understanding the Nikon D3300’s features, settings, and troubleshooting. It provides detailed guidance on optimizing camera performance, customizing settings, and resolving common issues. Referencing the manual ensures users can fully utilize the camera’s capabilities and enhance their photography skills effectively. It is available in both physical and digital formats.

Key Features of the Nikon D3300

The Nikon D3300 boasts a 24.2-megapixel CMOS sensor, EXPEED 4 image processor, and compatibility with Nikon F-mount lenses, delivering sharp images and enhanced performance for photographers of all skill levels.

2.1 24.2-Megapixel CMOS Sensor

The Nikon D3300 features a 24.2-megapixel CMOS sensor, capturing detailed and vibrant images. This sensor excels in various lighting conditions, delivering crisp photos with minimal noise. Its high resolution ensures sharpness and clarity, while advanced noise reduction technology enhances image quality, making it ideal for photographers seeking professional-grade results with ease and precision.

2.2 EXPEED 4 Image Processor

The EXPEED 4 processor enhances image quality, reduces noise, and improves processing speed. It supports high-speed shooting and advanced autofocus, enabling precise subject tracking. This processor also optimizes battery life and supports Full HD video recording, making it a crucial component for capturing sharp, detailed images efficiently in various shooting conditions.

2.3 Nikon F-Mount Compatibility

The Nikon D3300 supports the Nikon F-mount, enabling compatibility with a wide range of lenses, including AF-S DX and AF-S FX lenses. This versatility allows photographers to choose from various focal lengths and specialized optics, enhancing creativity and flexibility in capturing diverse subjects and scenes with precision and clarity.

Setting Up the Camera

Unpack and inspect the camera, ensuring all components are included. Attach the lens securely, insert the battery, and install memory cards. Set basic preferences like language and time zone for optimal functionality.

3.1 Unpacking and Initial Inspection

When unboxing the Nikon D3300, carefully inspect the camera body, lens, battery, charger, neck strap, and manual. Ensure all components are undamaged and accounted for. Verify the camera’s exterior for any visible defects before proceeding with setup.

3.2 Attaching the Lens

Align the lens mount with the camera’s F-mount, ensuring the white alignment marks match. Gently twist the lens clockwise until it clicks into place. Secure the lens firmly to ensure proper AF contacts connection. Handle the lens by its edges to avoid smudging the glass or damaging the mount.

3.3 Charging and Inserting the Battery

Charge the EN-EL14a battery using the supplied MH-24 charger until the indicator turns green; Align the battery’s terminals with the camera’s compartment and insert it securely until it clicks. Ensure the battery is fully seated to avoid power issues. Always use Nikon-approved chargers to prevent damage and maintain battery health.

3.4 Inserting Memory Cards

Insert a compatible SD, SDHC, or SDXC memory card into the camera’s card slot. Open the compartment on the right side, ensure the card is oriented correctly, and gently push it in until it clicks. The camera will recognize the card, allowing you to store and capture images efficiently.

3.5 Basic Camera Settings

Set the mode dial to Auto for point-and-shoot simplicity. Adjust ISO sensitivity (default 100-6400) based on lighting. Set white balance to match your environment (e.g., Auto, Daylight, or Tungsten). Choose autofocus modes like AF-A for versatile focusing. Use the INFO button to access quick settings for customization and optimal image capture.

Shooting Modes

The Nikon D3300 offers essential shooting modes for enhanced creativity and control. Auto Mode captures stunning images effortlessly, while Manual Mode (M) provides full control over aperture and shutter speed. Customize your photography experience with these versatile options for perfect shots.

4.1 Auto Mode

In Auto Mode, the Nikon D3300 automatically adjusts settings like exposure, autofocus, and ISO sensitivity, making it ideal for beginners. The camera detects the scene and optimizes settings for sharp, well-balanced images. Users can rely on this mode for hassle-free photography, ensuring great results without manual adjustments. Perfect for capturing life’s fleeting moments effortlessly.

4.2 Manual Mode (M)

Manual Mode (M) on the Nikon D3300 grants full control over aperture, shutter speed, and ISO sensitivity, allowing photographers to tailor settings to their creative vision. This mode is ideal for experienced users seeking precise control over image exposure, enabling artistic expression and technical accuracy in various lighting conditions and subjects.

4.3 Aperture Priority (A/Av)

Aperture Priority mode (A/Av) allows you to set the aperture, while the camera automatically adjusts the shutter speed. This mode is ideal for controlling depth of field, with higher f-stops for landscapes and lower f-stops for portraits. Adjust the aperture using the dial, and the camera ensures proper exposure, balancing creativity with convenience.

4.4 Shutter Priority (S/Tv)

Shutter Priority mode (S/Tv) lets you set the shutter speed, while the camera adjusts the aperture. This mode is perfect for capturing motion, such as freezing fast-moving subjects or creating motion blur. Use the dial to select speeds, ideal for sports, wildlife, or artistic effects, giving you control over time and movement in your photos.

4.5 Scene Modes

Scene Modes optimize camera settings for specific scenarios. Choose from options like Portrait, Landscape, Night Portrait, and more. Each mode adjusts aperture, shutter speed, and ISO for ideal results. Portrait mode softens backgrounds, while Landscape mode enhances depth; Use the mode dial to select, ensuring your photos capture the mood and details of the moment perfectly.

Custom Settings

Custom Settings allow photographers to tailor camera functions to their preferences. Adjust ISO sensitivity, white balance, and autofocus modes to enhance control and creativity in various shooting conditions.

5.1 ISO Sensitivity Settings

ISO sensitivity settings on the Nikon D3300 range from 100 to 12,800, enabling photography in diverse lighting conditions. Lower ISOs (100-400) are ideal for bright lighting, minimizing noise. Higher ISOs (6400-12,800) capture images in low light but may introduce grain. Auto ISO allows the camera to adjust sensitivity automatically based on lighting conditions for optimal results.

5.2 White Balance

White balance on the Nikon D3300 adjusts color tones to match lighting conditions. Options include Auto, Direct Sunlight, Incandescent, Fluorescent, Cloudy, and Shade. Custom White Balance allows setting a specific color temperature using a reference object. Adjustments can be fine-tuned in the camera menu for precise control over image color accuracy and visual appeal.

5.3 Autofocus Modes

The Nikon D3300 offers multiple autofocus modes to suit various shooting scenarios. Single AF (AF-S) focuses on stationary subjects, while Continuous AF (AF-C) tracks moving subjects. Manual Focus (MF) allows precise control. Users can switch modes via the camera menu or dedicated buttons, ensuring sharp images in diverse conditions, from portraits to dynamic action shots.

Using Flash and External Lighting

The Nikon D3300 features a built-in flash for low-light conditions and supports external flash units. Adjust flash settings via the camera menu for optimal lighting control and enhanced photography results.

6.1 Built-In Flash

The Nikon D3300’s built-in flash provides convenient lighting in low-light conditions. It automatically pops up and fires when enabled. Users can adjust flash settings like sync speed (1/320s or 1/250s) and mode (Auto FP) via the camera menu for balanced exposures and reduced shadows in various shooting scenarios.

6.2 External Flash Units

External flash units enhance lighting control and versatility for the Nikon D3300. Compatible with the Nikon Creative Lighting System, they offer advanced features like wireless operation and manual adjustments. Models like the SB-500 can be synced with the camera’s settings, providing professional-grade illumination for diverse shooting scenarios and creative effects.

Image Quality and Settings

The Nikon D3300 offers high-quality imaging with a 24.2-megapixel CMOS sensor, allowing for detailed photos. Users can adjust image resolution, choose between JPEG and RAW formats, and select color modes to customize output, ensuring optimal results for various photography needs.

7.1 Image Resolution

The Nikon D3300 captures images in multiple resolutions, including 6000 x 4000 pixels for maximum detail. Lower resolutions, such as 4496 x 3000 and 2992 x 2000, are ideal for sharing and storage. Adjust resolution via the Shooting Menu to balance quality and file size according to your needs.

7.2 Compression Formats (JPEG, RAW)

The Nikon D3300 supports JPEG for compressed, shareable images and RAW for uncompressed files with maximum detail. Choose JPEG for convenience or RAW for professional editing. Settings are adjustable via the Shooting Menu, allowing customization to suit your workflow and creative needs.

7;3 Color Modes

The Nikon D3300 offers multiple Color Modes to enhance your images. Options include Standard, Neutral, Vivid, Monochrome, Portrait, and Landscape. These modes adjust color saturation, contrast, and sharpness. Customize settings in the Shooting Menu to match your creative vision, ensuring images reflect your desired aesthetic with precision and clarity.

Playback and Review

The Nikon D3300 allows you to review images on its LCD screen. Use the playback button to view photos, zoom in for details, and delete unwanted images. The camera also features a slideshow option for viewing your photos in sequence, making it easy to share or review your work on the go.

8.1 Reviewing Photos

Press the playback button to review captured images on the LCD screen. Use the multi-selector to scroll through photos, zoom in for details, or skip to the next image. The camera also allows you to delete unwanted photos during playback, ensuring your memory card remains organized with only your best shots.

8.2 Deleting Images

Press the playback button to enter playback mode. Use the multi-selector to navigate to the image you wish to delete; Press the trash can button (labeled DELETE) to delete the image. Confirm deletion by selecting Yes in the dialog box. Note that deleted images cannot be recovered, so use this feature cautiously.

8.3 Slideshow

To create a slideshow, access the Playback Menu and select Slideshow. Choose images from the memory card or a specific folder. Adjust the interval between images (2-10 seconds) and select transition effects. Start the slideshow by pressing the OK button. Pause or exit using the menu button or turning the camera off.

Menu Navigation

Navigate the Nikon D3300 menu system using arrow keys and the OK button. Access Shooting, Setup, Retouch, and My Menu tabs. Customize settings efficiently for personalized control and optimal performance.

9.1 Shooting Menu

The Shooting Menu allows customization of image capture settings. Adjust ISO sensitivity, white balance, and autofocus modes. Set image quality, compression formats (JPEG, RAW), and color modes. Access advanced options like noise reduction and Active D-Lighting for enhanced control over your photography.

9.2 Setup Menu

The Setup Menu offers tools for camera configuration. Customize monitor brightness, adjust time zones, and set language preferences. Format memory cards, reset shooting settings, and enable firmware updates. Options like auto shutdown and battery monitoring help optimize performance and extend battery life for efficient photography sessions.

9.3 Retouch Menu

The Retouch Menu allows in-camera editing of photos. Options include trimming, resizing, and applying filters like monochrome or sepia tones. Red-eye correction and image overlay are also available. This feature enables quick enhancements without a computer, making it ideal for photographers who want to refine their images directly on the camera.

9.4 My Menu

My Menu allows you to customize a list of frequently used settings for quick access. You can add, reorder, and remove items based on your preferences. Commonly added options include ISO sensitivity, white balance, and autofocus modes. This feature streamlines your workflow, enabling faster adjustments during shoots and enhancing overall efficiency.

Troubleshooting Common Issues

Resolved issues like camera not turning on or memory card errors by checking settings, cleaning contacts, and ensuring proper battery installation. Consult the manual for detailed solutions.

10.1 Camera Not Turning On

If the Nikon D3300 won’t turn on, ensure the battery is fully charged and properly inserted. Check for damaged battery terminals or corrosion. Verify the memory card is correctly inserted and not causing power issues. Consult the manual for additional troubleshooting steps to resolve the problem effectively.

10.2 Memory Card Errors

If the Nikon D3300 displays memory card errors, ensure the card is compatible and properly formatted. Try cleaning the card’s contacts or reformatting it in the camera. If issues persist, replace the card. Always back up data before formatting. Consult the manual for detailed troubleshooting steps to resolve memory card-related problems effectively.

Accessories and Compatibility

The Nikon D3300 is compatible with a wide range of accessories, including Nikon F-mount lenses, external flash units, and tripods, ensuring enhanced functionality and versatility for photographers.

11.1 Compatible Lenses

The Nikon D3300 supports a variety of Nikon F-mount lenses, including AF-S DX and AF-S FX lenses. Popular options include the AF-S DX 18-55mm VR II and AF-S DX 35mm f/1.8G. These lenses enhance image quality and provide flexibility for different shooting scenarios, from portraits to landscapes.

11.2 External Flash Units

The Nikon D3300 supports external flash units like the SB-300, SB-400, SB-600, and SB-700, enhancing lighting control and versatility. These units can be mounted on the camera’s hot shoe or used wirelessly for creative lighting setups. Set the flash sync speed to 1/320s or 1/250s for optimal results. The Nikon Manual Viewer app provides detailed guidance.

11.3 Tripods and Remote Shutter Release

For stability, the Nikon D3300 can be mounted on a tripod using its standard tripod socket. Remote shutter release options, like the ML-L3 remote or third-party devices, minimize camera shake. Enable remote shutter mode via the Shooting Menu. The Nikon Manual Viewer app provides detailed instructions for setup and optimal use of these accessories.

The Nikon D3300 is a powerful yet user-friendly DSLR camera, ideal for capturing life’s precious moments. By mastering its features and settings, photographers can unlock its full potential. This guide has provided a comprehensive overview of the camera’s operation, ensuring users can confidently navigate and utilize its capabilities for exceptional photography experiences.

Additional Resources

For further learning, download the Nikon Manual Viewer 2 app or access the official Nikon website for detailed guides, firmware updates, and troubleshooting tips. Additionally, online forums and photography communities offer valuable insights and support for mastering the Nikon D3300;

chamberlain liftmaster professional formula 1 instruction manual

Overview of the Chamberlain LiftMaster Professional Formula 1 Instruction Manual

The Chamberlain LiftMaster Professional Formula 1 manual provides comprehensive guidance for models 1280, 1280r, 2280, and 3280, ensuring reliable and user-friendly installation, operation, and maintenance. Available in PDF format for easy access.

The Chamberlain LiftMaster Professional Formula 1 series is a line of garage door openers known for their reliability, durability, and user-friendly design. Designed with advanced technology, these models, including the 1280, 1280r, 2280, and 3280, offer smooth and quiet operation. The series is engineered to meet various garage door needs, featuring a powerful 1/2 HP motor and a reinforced belt drive system. With a focus on safety and convenience, the Formula 1 series includes features like the Motor Vibration Isolation System (MVIS) and compatibility with Chamberlain’s myQ smart home technology. These openers are designed to provide years of trouble-free service, making them a popular choice for homeowners seeking high-quality garage door solutions.

Key Features of the Chamberlain LiftMaster Professional Formula 1 Models

The Chamberlain LiftMaster Professional Formula 1 models are equipped with a powerful 1/2 HP motor, ensuring smooth and efficient operation. The belt drive system minimizes noise, while the Motor Vibration Isolation System (MVIS) further enhances quiet performance. These models feature a reinforced drive belt for durability and long-lasting reliability. Security Plus technology offers rolling code encryption for enhanced protection against unauthorized access. The openers are compatible with a range of accessories, including remotes, keyless entry systems, and smart home integration via myQ technology. With features like courtesy lights and intuitive programming, the Formula 1 series provides a seamless user experience, making it a top choice for homeowners seeking dependable and advanced garage door solutions.

Installation and Setup Guidelines

The manual provides detailed installation steps, emphasizing safety precautions, balanced door requirements, and proper tool usage. Professional installation is recommended for optimal performance and reliability.

Step-by-Step Installation Instructions for the Chamberlain LiftMaster Professional Formula 1

The manual outlines a detailed, step-by-step guide for installing the Chamberlain LiftMaster Professional Formula 1 series. It begins with gathering necessary tools and ensuring the garage door is properly balanced. The instructions then walk through assembling components, securing the opener to the ceiling, and aligning the rail system. Users are guided to attach the door arm and test the opener’s limits for smooth operation. Safety precautions are emphasized throughout, including avoiding DIY installation if unsure. The manual also provides troubleshooting tips for common issues and recommends professional assistance for complex setups to ensure reliability and performance.

Safety Precautions and Warnings During Installation

Always read and follow all safety materials and installation instructions carefully. Ensure the garage door is properly balanced and lubricated before installation, as an unbalanced door can cause damage or injury. Avoid installing the opener yourself if unsure, as improper installation may lead to hazards. Keep children and pets away from the installation area. Never attempt to operate the door during installation without ensuring all components are securely fastened. Test the opener’s limits after installation to ensure smooth operation. Fasten the manual near the garage door for future reference. Failure to adhere to these precautions may void the warranty or result in safety risks. Always prioritize caution and consider professional installation for complex setups.

Troubleshooting and Maintenance

Troubleshoot common issues like misalignment or sensor problems. Reset the opener if necessary. Regularly lubricate moving parts and check belt tension for optimal performance. Ensure safety always.

Common Issues and Solutions for the Chamberlain LiftMaster Professional Formula 1

The Chamberlain LiftMaster Professional Formula 1 series is reliable, but some common issues may arise. Misaligned sensors can prevent the door from closing properly; simply adjust the sensors for proper alignment. Remote controls may stop working due to dead batteries or interference; replace batteries or reprogram the remote. The belt drive system, while durable, may squeak if improperly lubricated; apply silicone-based lubricant to moving parts. If the door reverses unexpectedly, check for obstructions or adjust the force settings. For persistent issues, consult the manual or contact customer support. Regular maintenance, such as lubricating hinges and tightening bolts, ensures smooth operation. Always follow safety guidelines during troubleshooting.

Programming Remotes and Keyless Entry Systems

Programming remotes and keyless entry systems for the Chamberlain LiftMaster Professional Formula 1 is straightforward. Start by locating the “learn” button on the motor unit, typically orange in color. Press and release the button to enter programming mode. Next, press the desired button on your remote control to sync it with the opener. For keyless entry systems, enter your chosen code on the keypad and press the “enter” button. Ensure compatibility with models like 971LM, 973LM, and 977LM. If issues arise, reprogramming or resetting the system may be necessary. Always refer to the manual for specific instructions tailored to your model. Proper programming ensures secure and convenient garage door operation.

Technical Specifications and Compatibility

The Chamberlain LiftMaster Professional Formula 1 models (1280, 1280r, 2280, 3280) feature a 1/2 HP motor, belt drive, and Security Plus technology. Compatible with 971LM, 973LM, and 977LM remotes.

Model Differences: 1280, 1280r, 2280, and 3280

The Chamberlain LiftMaster Professional Formula 1 series includes four distinct models, each designed for specific needs. The 1280 and 1280r models feature a 1/2 HP motor, belt drive system, and Security Plus technology for enhanced security. The 1280r additionally includes a keyless entry system for convenience. The 2280 model offers a 3/4 HP motor, making it suitable for heavier garage doors, while the 3280 combines a 3/4 HP motor with an advanced belt drive for quieter operation. All models are compatible with Chamberlain and LiftMaster accessories, such as remotes and keyless entry systems, ensuring versatility and ease of use. These differences allow users to choose the model that best fits their garage door requirements and preferences.

Compatibility with Chamberlain and LiftMaster Accessories

The Chamberlain LiftMaster Professional Formula 1 models are designed to work seamlessly with a range of Chamberlain and LiftMaster accessories. These include remote controls such as the 971LM, 973LM, and 970LM, as well as keyless entry systems like the 977LM. Compatibility ensures that users can enhance their garage door opener’s functionality with additional features like remote access and secure keyless entry. However, it’s important to note that some older remote and keyless entry models have been discontinued, so compatibility should be verified before purchasing. This wide range of accessory options allows for a customized and convenient garage door operating experience tailored to individual needs and preferences.

Enhanced Features and Benefits

The Chamberlain LiftMaster Professional Formula 1 series features advanced technologies like the Motor Vibration Isolation System (MVIS) and belt drive for quieter, smoother operation, enhancing overall performance and reliability.

Motor Vibration Isolation System (MVIS) for Quieter Operation

The Motor Vibration Isolation System (MVIS) is a cutting-edge feature in the Chamberlain LiftMaster Professional Formula 1 series, designed to minimize noise during operation. By absorbing motor vibrations, MVIS ensures a quieter and smoother performance, making it ideal for homes where noise reduction is a priority. This innovative system is integrated into the motor assembly, effectively isolating vibrations from the rest of the garage door opener. The result is a significant reduction in operational noise, creating a more peaceful environment. MVIS also contributes to the overall durability and reliability of the system, ensuring long-lasting performance. This feature is a testament to LiftMaster’s commitment to delivering high-quality, user-friendly solutions for garage door automation.

Belt Drive System for Smooth and Reliable Performance

The Chamberlain LiftMaster Professional Formula 1 series features a robust belt drive system designed for smooth and reliable operation. This system utilizes a reinforced belt to minimize wear and tear, ensuring consistent performance over time. Unlike chain-driven systems, the belt drive operates with significantly less noise, making it ideal for homes where quiet operation is essential. The belt drive also reduces vibrations, contributing to a more stable and durable garage door opener. With its advanced engineering, the belt drive system requires minimal maintenance while delivering exceptional reliability. This feature underscores the series’ commitment to providing a seamless and trouble-free user experience, aligning with the overall quality and innovation expected from Chamberlain and LiftMaster products.

Downloading and Accessing the Manual

The Chamberlain LiftMaster Professional Formula 1 manual is readily available in PDF format for easy download from the official Chamberlain website and other trusted sources online.

Availability of the Chamberlain LiftMaster Professional Formula 1 Manual in PDF Format

The Chamberlain LiftMaster Professional Formula 1 manual is widely available in PDF format, ensuring easy access for users. It can be downloaded directly from the official Chamberlain website or through trusted online sources. The PDF format allows for convenient viewing on computers, tablets, and smartphones, making it a versatile option for users. Additionally, the manual is searchable and can be printed for offline reference. This accessibility ensures that users can quickly find the information they need for installation, troubleshooting, or maintenance. The PDF manual is free to download and does not require registration, making it a hassle-free resource for all Chamberlain LiftMaster Formula 1 users.

Safety Guidelines and Best Practices

Always follow the safety guidelines in the manual to ensure proper installation and operation. Keep the garage door balanced and lubricated to prevent accidents and maintain functionality.

Important Safety Information for Garage Door Opener Installation and Use

Always read and follow the safety guidelines in the manual before installing or operating the garage door opener. Ensure the door is properly balanced and lubricated to prevent accidents. Never allow children to operate the door or remote controls unsupervised. Keep emergency release handles accessible and test the door’s reversal mechanism regularly. Avoid installing the opener on uneven or unstable surfaces. If unsure about any step, consult a professional installer. Improper installation can lead to serious injury or equipment damage. Regularly inspect and maintain the opener to ensure smooth operation. Failure to adhere to these precautions may result in unsafe conditions. Refer to the manual for detailed troubleshooting and maintenance instructions.

Warranty and Support Information

The Chamberlain LiftMaster Professional Formula 1 models come with a limited warranty for parts and labor. Registration is required for warranty activation. Contact customer support for assistance or repair.

Chamberlain LiftMaster Warranty Details and Customer Support Options

The Chamberlain LiftMaster Professional Formula 1 series offers a limited warranty covering parts and labor for a specified period. Registration is required to activate the warranty. Customers can access support through phone, email, or the official website. Online resources, including FAQs and downloadable manuals, are available for troubleshooting. Additional support options include live chat and a network of authorized dealers. The warranty does not cover damage caused by improper installation or misuse. For extended assistance, users can contact Chamberlain LiftMaster customer service directly or visit authorized service centers. This ensures comprehensive support for installation, maintenance, and repairs.

Professional Installation Recommendations

Professional installation is highly recommended for the Chamberlain LiftMaster Professional Formula 1 series to ensure optimal performance and safety. Certified technicians can properly balance and align the garage door opener, reducing the risk of malfunctions. They will also verify that all safety features, such as the auto-reverse mechanism, are functioning correctly. Additionally, professionals can handle complex wiring and programming, ensuring seamless integration with accessories like remotes and keyless entry systems. For models with advanced features like the Motor Vibration Isolation System (MVIS) and belt drive, precise installation is crucial for quiet and smooth operation. Users can contact Chamberlain LiftMaster customer support to find authorized installers in their area, guaranteeing a reliable and warranty-compliant setup.

plumbing flat rate pricing pdf

Plumbing flat rate pricing offers transparency‚ with predetermined fees for specific services‚ ensuring no surprises․ Based on industry averages and time/material costs‚ it provides upfront clarity‚ benefiting both customers and businesses․

Definition and Overview

Flat rate pricing in plumbing involves charging customers a fixed‚ predetermined fee for specific services‚ regardless of the time taken․ This model provides upfront cost clarity‚ eliminating surprises․ Based on industry averages‚ it covers labor‚ materials‚ and overheads for tasks like repairs or installations․ Unlike hourly rates‚ it offers a straightforward payment structure‚ fostering trust and simplicity for both homeowners and plumbing professionals․

History and Evolution in the Plumbing Industry

Flat rate pricing emerged as a response to customer demand for transparency and predictable costs․ Historically‚ plumbing services used hourly rates‚ which often led to billing disputes․ The shift to flat rates began in the early 2000s‚ with companies adopting predefined pricing based on industry standards․ This model gained popularity due to its simplicity and trust-building potential‚ becoming a standard practice supported by specialized software like ServiceTitan․

How Flat Rate Pricing Works in Plumbing

Flat rate pricing charges customers a fixed fee based on time and materials‚ with costs predetermined by industry standards․ ServiceTitan and similar tools help businesses create and manage these price books efficiently․

Upfront Cost Transparency for Customers

Flat rate pricing provides customers with clear‚ upfront costs for plumbing services‚ eliminating surprise charges․ This transparency builds trust and ensures customers understand the total fees before work begins‚ reducing billing anxiety․ ServiceTitan and similar tools help create detailed price books‚ making it easier for customers to review and approve quotes․ This approach streamlines communication and fosters satisfaction․

Time and Material Basis for Pricing

Flat rate pricing calculates costs based on the average time and materials required for specific tasks․ This method ensures consistency‚ as it reflects industry standards․ By standardizing labor times and material costs‚ plumbers can offer predictable pricing․ Customers benefit from knowing the exact breakdown of charges‚ fostering trust and clarity in the billing process․

Pros and Cons of Flat Rate Pricing

Flat rate pricing offers transparency and upfront costs‚ reducing customer uncertainty․ It simplifies billing but may not suit all businesses or complex jobs․

Advantages for Plumbing Businesses

Flat rate pricing enhances customer trust and satisfaction through upfront transparency․ It streamlines estimates‚ reduces disputes‚ and ensures consistent revenue․ Businesses benefit from predictable income and simplified financial planning․ Additionally‚ flat rate pricing allows companies to showcase professionalism and organization‚ setting them apart from competitors․ Tools like ServiceTitan further support efficient price book management‚ enabling businesses to thrive in a competitive market․

Drawbacks and Challenges

Flat rate pricing requires accurate job assessments to avoid undercharging or overcharging․ Misestimating labor or materials can lead to financial losses․ Additionally‚ complex jobs may exceed standard time frames‚ causing customer dissatisfaction․ Regular price book updates are essential to reflect market changes‚ adding administrative work․ Balancing customer expectations with profitability remains a key challenge for plumbing businesses using flat rate pricing systems․

Common Plumbing Services Offered with Flat Rate Pricing

Flat rate pricing covers repairs‚ installations‚ and maintenance for fixtures‚ water heaters‚ pipes‚ and appliances․ Emergency services are also included‚ ensuring predictable costs for essential plumbing needs․

Examples of Repairs and Installations

  • Faucet and toilet repairs‚ including replacement of worn-out parts․
  • Water heater installations and maintenance services․
  • Pipe leak repairs and complete system overhauls․
  • Garbage disposal installations and drain cleaning․
  • Emergency services for burst pipes and sewer backups․

These services are typically included in flat rate pricing‚ ensuring customers know the exact cost upfront․

Emergency and Overtime Services

Flat rate pricing for emergency and overtime services ensures upfront costs‚ eliminating surprise charges․ Common fees include $170 for limited access and high-rise shutdowns․ These charges are added to standard repair costs‚ providing transparency during urgent situations․ Customers appreciate knowing the total fee beforehand‚ even for after-hours or complex scenarios․

Flat Rate Pricing Software and Tools

Flat rate pricing software‚ like ServiceTitan‚ helps contractors create and manage custom price books․ These tools enable easy updates and ensure pricing transparency for customers‚ improving trust․

ServiceTitan and Other Platforms

ServiceTitan is a leading software for flat rate pricing‚ allowing contractors to upload existing price books or create new ones․ It simplifies pricing management‚ ensuring transparency for customers․ Other platforms offer similar tools‚ enabling contractors to streamline their pricing processes and maintain consistency․ These solutions are user-friendly‚ accessible via the internet‚ and designed to help plumbing businesses thrive efficiently while maintaining customer trust and satisfaction․

Creating a Custom Price Book

Creating a custom price book involves listing fixed fees for specific plumbing services‚ parts‚ and labor․ Based on industry averages‚ it ensures consistency and transparency․ Templates‚ like Google Sheets‚ simplify the process‚ allowing businesses to tailor prices to their operations․ This approach helps in setting clear expectations for customers while maintaining profitability for the company‚ ensuring satisfaction and trust in the services provided․

How to Create a Plumbing Flat Rate Price Book

Use industry standards and time/material calculations to set fixed fees․ Include labor‚ parts‚ and overhead․ Utilize tools like ServiceTitan or Google Sheets templates for accuracy and ease․

Industry Averages and Research

Research industry standards and regional pricing trends to establish fair rates․ Analyze labor costs‚ material markups‚ and average repair times․ Utilize resources like ServiceTitan or plumbing associations for accurate data․ Incorporate feedback from competitors and customer expectations to refine pricing․ Ensure your flat rate reflects the market while covering overhead and profit margins․ Regular updates keep pricing competitive and aligned with industry benchmarks․

Template and Software Solutions

Utilize plumbing flat rate pricing templates and software like ServiceTitan to streamline pricing management․ These tools allow creating custom price books‚ ensuring consistency and accuracy․ Google Sheets templates offer flexibility for small businesses‚ while dedicated software provides advanced features for large operations․ These solutions help contractors efficiently manage pricing‚ ensuring transparency and profitability․

Flat Rate Pricing vs․ Hourly Rate Pricing

Flat rate pricing offers fixed‚ upfront costs based on industry averages‚ while hourly rates vary with time spent․ Flat rates typically provide better customer clarity and budgeting․

Comparison of Models

Flat rate pricing charges a fixed fee per job‚ while hourly rates bill based on time spent․ Flat rate offers upfront cost clarity‚ reducing customer anxiety about escalating costs․ Hourly rates may lead to higher bills for complex tasks‚ but can be fair for unpredictable jobs․ Flat rate is often preferred for standard repairs‚ while hourly suits longer‚ uncertain projects․

Which is Better for Customers?

Flat rate pricing is typically better for customers as it provides upfront‚ predictable costs with no hidden fees․ This transparency builds trust and avoids bill shocks․ Hourly rates can lead to higher charges‚ especially for complex tasks‚ making flat rate more customer-friendly for standard plumbing services․

Common Fees and Charges in Flat Rate Pricing

Flat rate pricing includes fixed fees for specific tasks‚ with additional charges for materials‚ labor‚ and special circumstances like limited access or high-rise services․

Limited Access and High-Rise Fees

Flat rate pricing often includes additional fees for limited access or high-rise jobs․ These fees‚ typically around $170‚ cover the extra time‚ specialized equipment‚ and logistical challenges involved in such locations․ They ensure fair compensation for the complexity and additional resources required in these specific scenarios‚ maintaining transparency and fairness in the billing process․

Material Markups and Labor Costs

Flat rate pricing includes markups on materials and labor‚ typically adding 50% to material costs and charging labor based on industry averages․ This ensures contractors cover expenses and profit margins․ The fixed fee combines these elements‚ providing clarity and preventing billing disputes‚ while allowing businesses to maintain profitability across various service scenarios and customer demands effectively․

Best Practices for Implementing Flat Rate Pricing

Implement flat rate pricing using software like ServiceTitan for accuracy․ Ensure clear communication of costs to build customer trust and regularly update your price book to reflect market changes․

Customer Communication and Trust

Clear communication is key to building trust with customers․ Explain the flat rate pricing structure upfront‚ ensuring transparency about costs and services․ Provide detailed estimates and involve customers in decision-making to avoid misunderstandings․ Honest and upfront pricing fosters loyalty‚ as customers appreciate knowing exactly what they’re paying for without hidden fees․ Regular updates and clear explanations reinforce trust in your plumbing services․

Regular Updates and Adjustments

Regular updates to your flat rate pricing ensure accuracy and relevance․ Stay informed about industry changes‚ material costs‚ and labor rates to adjust prices accordingly․ Use software tools like ServiceTitan to streamline updates and maintain consistency․ Clear communication of any changes to customers and technicians is essential for transparency․ Regular adjustments help balance profitability while keeping pricing fair and competitive in the market․

mcat mnemonics pdf

Mnemonics are powerful tools for MCAT prep, helping students remember complex concepts efficiently. Popular examples include “My Poor Friend Picks Apples” for biological kingdoms and “Little Nancy Kissing Rascal Carlos Frankly” for alkali metals. These memory aids simplify tough topics, making them easier to retain. With resources like MCAT Mnemonics PDF guides and digital apps, learners can master high-yield information effectively.

Biological and Biochemical Mnemonics

Mastering amino acids and biochemistry concepts with mnemonics like “Trust vs. Mistrust” simplifies complex topics. These tools, found in MCAT Mnemonics PDF guides, enhance retention of high-yield information efficiently.

Kingdoms of Life Mnemonic: “My Poor Friend Picks Apples”

The mnemonic “My Poor Friend Picks Apples” is a popular tool for remembering the six kingdoms of life: Monera, Protista, Fungi, Plantae, Animalia, and Archaea. Each word in the sentence corresponds to the first letter of a kingdom, making it easier to recall during exams. This method is particularly effective because it associates abstract concepts with relatable phrases. Students often use MCAT Mnemonics PDF guides to find such memory aids, which simplify complex biological classifications. By leveraging this technique, learners can quickly organize and remember the diverse range of life forms studied in biology. This mnemonic is widely recommended in study materials and is a favorite among MCAT preparers for its simplicity and effectiveness.

Amino Acids and Biochemistry Concepts

Mnemonics are invaluable for mastering amino acids and biochemistry concepts on the MCAT. For example, the phrase “Trust vs. Mistrust” helps differentiate between similar terms, while “Bun (One)” aids in recalling clinical biochemistry concepts. Specific mnemonics for amino acids, such as associating “Tyr” with “Tyrosine” using creative sentences, simplify memorization. These techniques are widely shared in MCAT Mnemonics PDF guides, which organize high-yield information into digestible formats. By leveraging these tools, students can efficiently retain complex biochemical pathways and structures, ensuring a strong foundation for exam success. Mnemonics transform abstract concepts into memorable associations, making biochemistry more manageable and less overwhelming for MCAT preparers.

Chemistry Mnemonics

Chemistry mnemonics simplify complex concepts like the periodic table and diatomic elements. Tools like mnemonics for alkali metals and gas states aid in quick recall. PDF guides offer organized study strategies for mastering these concepts efficiently.

Periodic Table and Alkali Metals Mnemonic: “Little Nancy Kissing Rascal Carlos Frankly”

This mnemonic helps students remember the order of alkali metals in the periodic table. Each word corresponds to the first letter of an element: Lithium (Li), Sodium (Na), Potassium (K), Rubidium (Rb), Cesium (Cs), and Francium (Fr). By visualizing the sentence, learners can effortlessly recall these elements, which are crucial for understanding chemical reactions and properties. This method is particularly effective for high-yield topics on the MCAT, where quick recall of periodic trends is essential. Mnemonics like this one are widely used in study guides and MCAT Mnemonics PDF resources to enhance retention and simplify complex information.

Diatomic Gases Mnemonic: “Have No Fear Of Ice Cold Beer”

The mnemonic “Have No Fear Of Ice Cold Beer” is a popular tool for remembering diatomic gases. Each word represents the first letter of a gas: Hydrogen (H₂), Nitrogen (N₂), Oxygen (O₂), Fluorine (F₂), Chlorine (Cl₂), Bromine (Br₂), Iodine (I₂), and Carbon dioxide (CO₂). This phrase simplifies the memorization of these molecules, which are essential for understanding chemical bonding and properties. Many MCAT Mnemonics PDF guides include this mnemonic, making it easier for students to retain this information during their studies. By using such memory aids, learners can focus more on applying concepts rather than just memorizing them.

Physics Mnemonics

Physics mnemonics simplify complex concepts like motion, mechanics, and thermodynamics. Examples include energy conservation and torque formulas, aiding in quick recall during MCAT prep. Use MCAT Mnemonics PDF guides for effective learning.

Motion and Mechanics Mnemonics

Motion and mechanics mnemonics are essential for mastering key physics concepts on the MCAT. For example, the equation F = ma can be remembered using “Frank’s Mighty Arm,” associating force with mass and acceleration. Another useful mnemonic is “Kinematic Kings Enjoy Smooth Velocities,” helping to recall the order of kinematic equations. Additionally, “Energy Conserves Nationally, Saves Energy Regularly” aids in understanding energy conservation principles. These memory aids simplify complex equations and relationships, making them easier to recall during high-pressure exams. By using mnemonics like these, students can efficiently retain and apply physics concepts, ensuring a strong foundation for success on the MCAT.

Thermodynamics Mnemonics

Thermodynamics mnemonics help simplify complex concepts like entropy, Gibbs free energy, and the laws of thermodynamics. For the first law, “ΔU = Q ─ W,” use “Duke Uses Quarters Wisely” to remember the equation. For entropy, “Entropy Stings, Q Divided by Temperature” aids in recalling ΔS = q_rev/T. The second law’s arrow of time is captured by “Second Law Arranges Reality, Unveiling Nature’s End.” These mnemonics make abstract ideas more tangible. Additionally, “Gibbs Gives Heat, Taking Temperature Seriously” helps with ΔG = ΔH ― TΔS. By associating formulas with memorable phrases, students can master thermodynamics efficiently, ensuring clarity and confidence during the MCAT. These tools are invaluable for retaining key concepts in a structured and organized manner.

Creating Your Own MCAT Mnemonics

Creating personalized mnemonics is a powerful strategy for MCAT success. Start by identifying complex concepts that challenge you, such as biochemical pathways or physics formulas. Use acronyms, rhymes, or visual associations to make these ideas memorable. For example, turn “Catabolism” into “Cats Break Things” to recall its destructive processes. Alternatively, create stories linking facts together. The key is to make mnemonics meaningful to you. Mnemonics work best when they are vivid, absurd, or emotionally charged. Review and refine your creations regularly to ensure long-term retention. By crafting your own mnemonics, you tailor your study material to your unique learning style, enhancing comprehension and recall during the exam.

Practicing and Retaining Mnemonics

Effective practice and retention of mnemonics are crucial for MCAT success. Begin by reviewing your mnemonics daily, using techniques like active recall and spaced repetition. Test yourself by reconstructing concepts without notes. Incorporate visual or emotional associations to strengthen memory. For example, link mnemonics to vivid images or personal experiences. Use flashcards or apps to reinforce memorization. Group similar mnemonics together to create mental frameworks. Regularly revisit and refine your mnemonics to prevent forgetting; Practice teaching the concepts to others, as this reinforces understanding. Consistent review ensures that mnemonics become second nature, aiding in quick recall during the exam. Over time, these strategies will help solidify even the most complex information.

MCAT Mnemonics Formats

MCAT mnemonics are available in various formats, including digital tools and printable PDFs. Digital formats offer interactive features, while printables provide organized, visually appealing study aids.

Digital Tools and Apps for Mnemonics

Digital tools and apps are essential for modern MCAT prep, offering interactive and customizable ways to learn mnemonics. Platforms like Anki and Quizlet provide flashcard decks with pre-made mnemonics for high-yield concepts. Apps such as Magoosh and Kaplan feature interactive lessons and mnemonics tailored to specific subjects. Additionally, Google Sheets and digital note-taking apps allow students to create and organize their own mnemonics. These tools are particularly useful for tracking progress and reviewing material on-the-go. Many resources, like MCAT Mnemonics PDF guides, can be imported into these apps for seamless integration. Digital formats enhance retention by making mnemonics accessible and engaging, ensuring students can master complex concepts efficiently.

Printable PDF Resources

Printable PDF resources are invaluable for MCAT prep, offering organized and visually structured mnemonics. Websites provide free downloads like the MCAT Mnemonics PDF, which covers high-yield topics such as kingdoms of life (“My Poor Friend Picks Apples”) and diatomic gases (“Have No Fear Of Ice Cold Beer”). These PDFs are designed for easy printing, allowing students to study offline and annotate key points. Many resources, such as those from the University of California, Berkeley, include comprehensive lists of biochemistry and chemistry mnemonics. Printable formats enable students to create physical study guides, enhancing retention through tactile learning. PDFs are also customizable, letting users focus on weak areas or organize information to suit their study style. This accessibility makes printable PDFs a popular choice for efficient MCAT preparation.

Mastering MCAT mnemonics is a game-changer for exam success. By using tools like MCAT Mnemonics PDF guides, students can efficiently retain complex concepts. Consistent practice and customization of mnemonics boost long-term retention. Combine mnemonics with active recall and spaced repetition for optimal results. Organize your study materials, whether digital or printable, to stay focused. Regularly review and update your mnemonics to adapt to new information. Lastly, stay confident and patient—mnemonics are a powerful strategy to conquer the MCAT. With dedication and the right tools, achieving your goals becomes achievable.

millburn school calendar 2024 pdf

The Millburn School Calendar 2024 PDF is a comprehensive guide for students‚ parents‚ and staff‚ offering a clear overview of the academic year’s important dates and events.

1.1 Overview of the Calendar’s Importance

The Millburn School Calendar 2024 PDF serves as a vital planning tool for students‚ parents‚ and staff. It provides a detailed schedule of school events‚ holidays‚ and academic milestones‚ ensuring everyone stays informed and aligned. By offering a clear timeline‚ it helps in organizing daily routines‚ setting priorities‚ and meeting deadlines effectively. Its importance lies in fostering better time management and communication within the school community.

1.2 Key Features of the 2024 PDF Version

The 2024 PDF version of the Millburn School Calendar offers a user-friendly layout with clear date markings‚ color-coded categories‚ and a legend for easy reference. It includes interactive features like digital synchronization options and a downloadable format for convenience. The PDF is also printable‚ making it suitable for both digital and physical planning. These features ensure accessibility and flexibility for all users.

Key Dates and Holidays in the 2024 Calendar

The 2024 Millburn School Calendar highlights major holidays‚ school closures‚ and important academic milestones‚ ensuring families and staff stay informed about key dates throughout the year.

2.1 Major Holidays and School Closures

The 2024 Millburn School Calendar outlines major holidays‚ including Thanksgiving Break‚ Winter Break‚ and Spring Break‚ ensuring families can plan ahead for school closures and vacations. Additionally‚ the calendar highlights federal holidays and other non-instructional days‚ providing a clear schedule for students and staff to prepare for time off during the academic year.

2.2 Important Academic Milestones

The 2024 calendar highlights key academic dates‚ such as the start of each semester‚ final exam periods‚ and standardized testing windows like the SAT and ACT. It also notes deadlines for course selections‚ graduation ceremonies‚ and parent-teacher conferences‚ helping students and families stay aligned with critical academic events throughout the year.

How to Access the Millburn School Calendar 2024 PDF

The Millburn School Calendar 2024 PDF is available for download on the official school website and district portals‚ ensuring easy access for students‚ parents‚ and staff.

3.1 Official Sources for Download

The Millburn School Calendar 2024 PDF can be downloaded from the Millburn School District’s official website‚ typically found under the “Resources” or “Calendars” section. Additional sources include the district’s BoardDocs portal or Google Drive. Visit the official website link provided on the district’s homepage for direct access. The PDF is free to download and is regularly updated by the school administration.

3.2 Steps to Download and Save the PDF

To download the Millburn School Calendar 2024 PDF‚ navigate to the official Millburn School District website. Locate the “Calendars” or “Resources” section‚ where you’ll find a link to the 2024 calendar; Click the link to open the PDF‚ then right-click and select “Save As” to download it to your device. Ensure the file is saved in a easily accessible location for future reference. Printing is also an option for a physical copy.

Understanding the Calendar’s Structure

The Millburn School Calendar 2024 PDF is designed for clarity and ease of use‚ featuring a structured layout that highlights important dates‚ events‚ and holidays throughout the academic year.

4.1 Monthly Layout and Formatting

The Millburn School Calendar 2024 PDF presents each month in a clear‚ grid-style layout‚ with dates and events organized by day. Holidays and notable school events are prominently displayed‚ while weekends and non-school days are distinctly formatted for easy identification. The design ensures that all essential information is readily accessible‚ making it simple for users to navigate and plan accordingly.

4.2 Color Coding and Legend

The Millburn School Calendar 2024 PDF incorporates vibrant color coding to differentiate between various types of events‚ such as holidays‚ academic milestones‚ and extracurricular activities. A detailed legend is provided to explain the meaning behind each color‚ ensuring users can quickly identify and prioritize important dates. This visual system enhances readability and helps the community stay informed and organized throughout the academic year.

Important Deadlines and Events

The Millburn School Calendar 2024 PDF highlights critical deadlines‚ including semester start/end dates‚ parent-teacher conferences‚ and key academic milestones‚ ensuring everyone stays informed and prepared.

5.1 Semester Start and End Dates

The 2024 Millburn School Calendar outlines the first semester starting in late August‚ concluding in mid-December‚ while the second semester begins in early January and ends in late June. These dates are crucial for academic planning‚ ensuring students and staff are aware of the timeline for courses‚ exams‚ and breaks throughout the year. Proper scheduling is essential for a smooth academic experience.

5.2 Parent-Teacher Conferences and Meetings

Parent-Teacher Conferences are scheduled throughout the 2024 academic year‚ with key dates in November and March. These meetings provide opportunities for parents and educators to discuss student progress‚ set goals‚ and address concerns. The Millburn School Calendar 2024 PDF ensures these events are clearly marked‚ helping the community stay informed and engaged in their children’s education. Regular communication fosters a collaborative learning environment.

Special Events and Extracurricular Activities

The Millburn School Calendar 2024 PDF highlights special events‚ including the annual AP Art Show on May 29th and the High School Forum‚ showcasing student talents and achievements.

6.1 Sports and Club Schedules

The Millburn School Calendar 2024 PDF provides detailed schedules for sports and clubs‚ ensuring students and parents stay informed about practices‚ games‚ and events throughout the academic year. It includes specific dates for team meetings‚ tournaments‚ and club activities‚ helping students manage their time effectively while balancing academics and extracurricular involvement. This feature is essential for active participation and organization.

6.2 School Performances and Competitions

The Millburn School Calendar 2024 PDF highlights key dates for performances and competitions‚ showcasing the school’s vibrant arts and academic programs. From theater productions to music recitals and debate tournaments‚ the calendar ensures students‚ parents‚ and staff are aware of upcoming events‚ fostering community engagement and support for student achievements throughout the year.

Teacher Workdays and Professional Development

Teacher workdays and professional development days are essential for staff training and planning‚ ensuring educators are well-prepared to support student success throughout the academic year.

7.1 Dates for Teacher Workdays

Teacher workdays are scheduled throughout the 2024 academic year‚ typically at the beginning and end of the school year‚ and during select breaks. These days are crucial for professional development‚ curriculum planning‚ and staff collaboration‚ ensuring educators are prepared to meet student needs effectively;

7.2 Impact on Student Schedules

Teacher workdays result in school closures‚ affecting student schedules by providing longer breaks or days off. These days allow students to rest‚ catch up on assignments‚ or engage in extracurricular activities‚ while ensuring a balanced academic calendar that supports both student and staff well-being throughout the year.

Exam and Testing Schedules

The Millburn School Calendar 2024 PDF details key exam periods and testing windows‚ ensuring students and parents are informed to prepare and track academic progress effectively.

8.1 Final Exam Dates

The Millburn School Calendar 2024 PDF outlines final exam dates‚ typically scheduled in late May and early June. These exams are crucial for assessing student performance. The calendar provides specific dates for each subject and grade level‚ ensuring students and parents can prepare accordingly. Additional details‚ such as exam materials and schedules‚ are also included to support academic success.

8.2 Standardized Testing Windows

The Millburn School Calendar 2024 PDF highlights standardized testing windows‚ ensuring students and parents are aware of key assessment periods. These windows are strategically scheduled to align with curriculum milestones‚ allowing for thorough preparation. The calendar provides specific dates for tests like the SAT‚ ACT‚ and state exams‚ helping students and educators plan effectively for these critical evaluations.

Downloading and Printing Tips

Ensure optimal clarity by adjusting printer settings to high resolution. For digital access‚ sync the PDF with your calendar app to stay organized and informed.

9.1 Recommended Settings for Printing

For optimal printing‚ use a standard printer with letter-sized paper (8.5×11 inches). Set orientation to “Portrait” and margins to “Narrow” or “Normal” to ensure all details are visible. Select “High Resolution” in print quality settings for clarity. Use standard fonts like Arial or Times New Roman to maintain readability. Avoid scaling the document to prevent text distortion. Ensure your printer has sufficient ink levels before printing the calendar.

9.2 Digital Calendar Sync Options

Easily sync the Millburn School Calendar 2024 PDF with digital calendars like Google Calendar‚ Apple Calendar‚ or Microsoft Outlook. Extract key dates and events using calendar extraction tools or manually input important deadlines. This ensures seamless integration with your personal or family digital planner‚ keeping you organized and up-to-date throughout the academic year. Regular syncs help maintain accuracy and prevent scheduling conflicts.

Frequently Asked Questions

Addressing common queries about the Millburn School Calendar 2024 PDF‚ this section provides clarity on downloading‚ syncing‚ and interpreting the calendar effectively for all users.

10.1 Common Queries About the Calendar

Common questions include how to download the calendar‚ syncing it with digital tools‚ understanding color codes‚ and resolving errors. Users often ask about event details‚ holidays‚ and academic milestones. Queries also cover accessibility features‚ printing tips‚ and troubleshooting download issues. This section addresses these concerns‚ ensuring clarity and ease of use for all stakeholders.

10.2 Troubleshooting Download Issues

Common download issues include slow speeds‚ incomplete files‚ or corrupted documents. Ensure a stable internet connection‚ use a compatible browser‚ and clear cache. If the PDF fails to open‚ check Adobe Acrobat is updated. For persistent problems‚ contact the school’s IT support or refer to the official website for alternative download links or troubleshooting guides.

Calendar Planning and Organization Tools

Utilize digital tools like Google Calendar or Apple Calendar to sync the Millburn School Calendar 2024 PDF‚ ensuring seamless organization and reminders for key dates and events.

11.1 Digital Tools for Staying Organized

Digital tools like Google Calendar or Apple Calendar can sync with the Millburn School Calendar 2024 PDF‚ enabling easy organization. Use reminders for deadlines and events. Additionally‚ apps like Any.do or Trello help manage tasks and share schedules with family. These tools allow integration with the calendar‚ offering real-time updates and a seamless planning experience. They also provide features like color-coding‚ alerts‚ and task prioritization to keep everyone on track.

11.2 Physical Planners and Accessories

Physical planners offer a tactile way to stay organized alongside the Millburn School Calendar 2024 PDF. Choose from various styles‚ such as daily‚ weekly‚ or monthly layouts. Accessories like stickers‚ tabs‚ and highlighters can enhance customization. Binder systems or spiral-bound planners are popular choices‚ allowing users to personalize their organization. These tools complement the digital calendar‚ providing a hands-on approach to tracking events and deadlines effectively.

The Millburn School Calendar 2024 PDF is a vital resource for staying informed and organized. It ensures everyone is aligned with key dates and events throughout the year.

12.1 The Value of a Well-Planned Calendar

A well-organized calendar like the Millburn School Calendar 2024 PDF is essential for maintaining clarity and structure. It helps students‚ parents‚ and staff stay informed and aligned with key dates‚ reducing confusion and stress. By providing a clear roadmap of the academic year‚ it ensures everyone can plan effectively‚ fostering productivity and collaboration within the school community.

12.2 Staying Connected with Millburn School Updates

Staying connected with Millburn School updates is crucial for remaining informed about events‚ deadlines‚ and important announcements. The 2024 PDF calendar serves as a reliable resource‚ ensuring the community stays proactive and engaged. By regularly checking the calendar and syncing it with digital tools‚ families can stay aligned with school activities‚ fostering a connected and informed environment throughout the academic year.

awc deck guide

The AWC Deck Guide provides prescriptive design and construction details for single-level residential wood decks‚ ensuring safety and compliance with the International Residential Code (IRC).

It offers guidance on materials‚ load calculations‚ and proper fastening methods‚ helping builders and homeowners create durable‚ code-compliant outdoor structures that enhance living spaces.

Overview of Deck Safety and Construction

Deck safety and construction require careful planning to ensure structural integrity and durability. Proper load calculations‚ material selection‚ and fastening techniques are essential to prevent failures. The AWC Deck Guide emphasizes adherence to IRC standards‚ focusing on critical components like ledger boards‚ footings‚ and beams. By following these guidelines‚ builders can construct decks that are both safe and visually appealing‚ minimizing risks and enhancing outdoor living spaces effectively.

Purpose of the AWC DCA 6 Guide

The AWC DCA 6 Guide provides detailed prescriptive construction methods for residential wood decks‚ ensuring compliance with the IRC. It addresses design‚ materials‚ and installation‚ offering solutions for common challenges. The guide helps builders‚ engineers‚ and homeowners create safe‚ durable decks by outlining best practices and updated code requirements‚ ensuring structural reliability and aesthetic appeal in outdoor living spaces while minimizing risks and enhancing safety standards effectively.

Understanding the AWC DCA 6 Updates

The AWC DCA 6 updates align with the 2015 IRC‚ introducing revised decking standards and new details for I-joists and perpendicular joists‚ enhancing safety and compliance.

Key Changes in the 2015 IRC Provisions

The 2015 IRC introduced updated provisions for deck construction‚ including changes to hold-down tension devices and ledger board connections to hollow masonry. The IRC now requires specific detailing for lateral load connections‚ particularly for I-joists and perpendicular joists. Additionally‚ the code includes revised span limits for beams and joists‚ with clearer guidelines for overhangs and post face extensions. These updates aim to enhance deck safety and structural integrity.

Hold-Down Tension Devices and Revisions

The AWC DCA 6 guide emphasizes the importance of hold-down tension devices for ensuring lateral load resistance. Revisions include updated detailing for I-joists and perpendicular joists‚ enhancing connection strength. The guide also clarifies requirements for anchor locations in hollow masonry‚ ensuring proper grouting for stability. These revisions aim to improve deck safety and compliance with the latest IRC standards‚ providing clear guidance for builders and designers.

Ledger Board Installation and Details

Proper ledger board installation ensures secure attachment to the house. Fasteners must meet code requirements‚ and boards should be sealed to prevent moisture damage. Detailed guidance provided.

Proper Ledger Board Fastening Methods

Proper ledger board fastening involves using through-bolts or lag screws to secure the ledger to the house. Fasteners must meet IRC requirements for load capacity and spacing. The ledger should be flashed to prevent water infiltration. Correct installation ensures structural integrity and prevents detachment risks. The AWC guide provides detailed fastening patterns and spacing requirements to comply with building codes. Additionally‚ the ledger must be aligned with the house framing for stability.

Connecting Ledger to Hollow Masonry Requirements

Connecting a ledger to hollow masonry requires proper anchorage to ensure structural integrity. The AWC guide specifies that ledger boards must be securely fastened using approved fasteners‚ such as through-bolts or anchor straps‚ to prevent detachment. Flashing is mandatory to protect against water infiltration. The guide also provides details for grouting cells at anchor locations‚ ensuring a stable and durable connection. Compliance with these requirements is critical for safety and code adherence.

Deck Framing Plan and Layout

A deck framing plan outlines the layout of joists‚ beams‚ ledger boards‚ posts‚ and footings‚ ensuring structural integrity and compliance with building codes.

Joist and Beam Layout Considerations

The layout of joists and beams is critical for distributing weight evenly and ensuring structural integrity. Joists should be spaced consistently‚ typically 16 or 24 inches on-center‚ depending on the decking material. Beams must span between posts or footings‚ adhering to IRC span limits. Properly connecting joists to beams and beams to posts is essential for safety. Ensure all connections are secure and meet code requirements to prevent issues like sagging or instability over time.

Importance of Footings and Post Placement

Properly placed footings and posts are vital for a stable deck structure. Footings must extend below the frost line to prevent shifting due to soil movement. Posts should be anchored securely to footings‚ typically with post-base connectors‚ ensuring vertical load transfer. Incorrect placement can lead to structural failure‚ making adherence to IRC guidelines and local building codes crucial for safety and durability in deck construction.

Footing and Post Design Options

Footing and post designs must meet prescriptive requirements‚ with footings extending below the frost line and posts sized to handle structural loads‚ ensuring IRC compliance and stability.

Minimum Post Size and Height Requirements

The minimum post size for deck construction is 6×6 nominal‚ ensuring adequate load-bearing capacity. Post height must not exceed the maximum specified in Table 4‚ maintaining structural integrity. Proper sizing ensures stability and safety‚ adhering to IRC standards for residential decks. This guidance helps builders avoid common errors in post installation‚ ensuring durable and secure deck support systems that meet all regulatory requirements for single-level wood decks.

Footings Design and Load-Bearing Capacity

Footings must be designed to distribute deck loads evenly‚ preventing settling or failure. The AWC Deck Guide provides design options‚ ensuring compliance with IRC standards. Load-bearing capacity depends on soil conditions and deck weight. Proper sizing and reinforcement are critical to avoid structural issues. The guide offers tools‚ like span calculators‚ to help determine footing sizes and depths for safe and durable deck construction‚ meeting local building codes and safety requirements effectively.

Beam and Joist Span Requirements

Beam spans must comply with Table 3‚ allowing extensions up to LB/4. Joists can overhang beams up to LO or L/4‚ ensuring structural integrity and safety.

Beam Span Limits and Post Face Extensions

Beam spans must adhere to Table 3‚ with extensions beyond the post face limited to LB/4. The maximum span for beams used with DCA 6 guidelines is 18 feet. Proper design ensures structural integrity and safety‚ preventing overloading. Always refer to the latest AWC updates for precise calculations and compliance with residential building codes.

Joist Span Allowances and Overhang Limits

Joist spans are determined by load requirements and wood species‚ with overhangs limited to LO or L/4. Maximum overhangs ensure stability and prevent structural failure. Proper fastening methods‚ like joist hangers‚ are crucial for safety and code compliance.

Free-Standing Deck Considerations

Free-standing decks‚ or non-ledger decks‚ require proper engineering and IRC compliance to ensure stability and safety‚ as they rely solely on their own framing‚ footings‚ and posts for support.

Non-Ledger Deck Construction Basics

Non-ledger decks‚ or free-standing decks‚ are structures not attached to a building‚ relying on their own framing‚ footings‚ and posts for support. These decks require careful engineering to ensure stability and safety‚ as they lack the added stability provided by a ledger board connection to a house. Proper design must account for all loads‚ including dead‚ live‚ and lateral forces‚ to prevent structural failure. IRC compliance is critical‚ and builders must ensure all components‚ such as footings‚ posts‚ and beams‚ are adequately sized and spaced. Unlike ledger-connected decks‚ free-standing decks must be self-sufficient‚ making their construction more complex and requiring additional planning and expertise to meet safety standards. Builders should consult the AWC DCA 6 guide for specific prescriptive details and engineering requirements. Additional resources like FPInnovations and WoodWorks can also provide valuable insights and tools for designing non-ledger decks effectively.

Structural Requirements for Free-Standing Decks

Free-standing decks require robust structural design to ensure stability and safety. Footings must be adequately sized and spaced to distribute loads evenly‚ while posts and beams must meet minimum size and span requirements. Lateral load connections are critical to prevent deck movement. Engineering is essential for non-ledger decks‚ as they rely solely on their own framing system. IRC compliance is mandatory‚ and builders must consult the AWC DCA 6 guide for specific prescriptive details and design recommendations.

Lateral Load Connections and Safety

Hold-down devices are crucial for resisting lateral loads‚ ensuring deck stability. New details address I-joists and perpendicular joists‚ enhancing connection strength and safety.

Hold-Down Devices and Their Importance

Hold-down devices are essential for resisting lateral loads and ensuring deck stability. They prevent deck movement and uplift forces‚ critical for safety. The AWC DCA 6 guide highlights updated details for these devices‚ particularly for I-joists and perpendicular joists‚ ensuring proper connections and alignment with IRC requirements. These updates enhance structural integrity and provide clearer guidance for builders to meet modern engineering standards‚ ensuring safer deck construction practices nationwide.

New Details for I-Joists and Perpendicular Joists

The AWC DCA 6 guide introduces new details for I-joists and perpendicular joists‚ enhancing structural integrity. These updates provide specific guidance on installations‚ ensuring proper alignment and secure connections. The revisions address lateral load requirements‚ offering clearer instructions for builders to meet modern engineering standards. This ensures safer and more reliable deck constructions‚ aligning with the latest IRC provisions for residential wood decks.

IRC Compliance and Deck Construction

The AWC DCA 6 guide aligns with IRC requirements‚ providing prescriptive methods for deck construction. It ensures compliance with safety standards‚ aiding builders in meeting code provisions effectively.

Relevant IRC Sections for Deck Building

The IRC sections R301 (Design Loads)‚ R302 (Fire-Resistant Construction)‚ and R303 (Light and Ventilation) are critical for deck construction. Section R404 covers foundation requirements‚ while R502 addresses wood floor framing. These sections ensure decks meet safety and structural standards. The AWC DCA 6 guide aligns with these codes‚ providing prescriptive methods for load calculations‚ material specifications‚ and connections‚ ensuring compliance and durability in deck projects.

Aligning DCA 6 with IRC Requirements

The AWC DCA 6 guide aligns with IRC requirements‚ providing prescriptive methods for deck construction. It references IRC sections R301 (Design Loads) and R404 (Foundation Requirements)‚ ensuring compliance through detailed guidance on load calculations and material specs.

By adhering to DCA 6‚ builders ensure their decks meet IRC standards‚ guaranteeing safety‚ durability‚ and structural integrity through proper fastening and material selection.

Additional Resources and Support

Additional resources include the American Wood Council (AWC)‚ FPInnovations‚ USFPL‚ and WoodWorks for comprehensive guidance on deck construction and materials. These organizations provide detailed guides‚ technical support‚ and tools for ensuring compliance with IRC standards and best practices in deck building.

The AWC website offers a span calculator and downloadable guides. Hard copies of the DCA 6 are available through their official portal for further assistance.

Where to Find Updated Guides and Tools

Updated guides and tools for deck construction are available through the American Wood Council (AWC) website at www.awc.org. The AWC provides a span calculator‚ downloadable PDF versions of the DCA 6 guide‚ and other technical resources. Additional support can be found through organizations like FPInnovations‚ USFPL‚ and WoodWorks‚ which offer detailed guides and tools for deck building. Hard copies of the DCA 6 are also available through AWC.

References to FPInnovations‚ USFPL‚ and WoodWorks

For additional resources‚ refer to organizations like FPInnovations and USFPL‚ which provide technical support and research on wood construction. WoodWorks offers design resources and webinars specific to deck building. These organizations‚ along with the American Wood Council‚ ensure deck designs meet safety and code requirements. Their materials complement the AWC DCA 6 guide‚ offering comprehensive support for builders and designers.

carta de recomendacion laboral pdf

A labor recommendation letter is a formal endorsement of a candidate’s skills, work ethic, and achievements. It is typically written by employers to support job or academic applications, highlighting the individual’s professional strengths and suitability.

Structure of a Labor Recommendation Letter

A labor recommendation letter typically includes the sender’s information, introduction, details about the candidate’s qualifications, and a closing statement. It is written in a formal tone and includes the sender’s contact information for follow-up.

Elements of the Letter

A labor recommendation letter contains essential elements that ensure its effectiveness. It begins with the sender’s information, including their name, position, and company details. The letter should have a clear subject line indicating its purpose. The body introduces the candidate, outlining their job title, duration of employment, and key responsibilities. It highlights the candidate’s skills, achievements, and work ethic, providing specific examples to demonstrate their capabilities. The letter also expresses confidence in the candidate’s ability to excel in future roles. Finally, it includes a closing statement with the sender’s contact information for any follow-up. These elements collectively create a compelling and professional recommendation, making the letter a powerful tool for job seekers.

Information About the Employer

The labor recommendation letter must include detailed information about the employer to establish credibility. This typically involves the employer’s name, position, and company name, along with their contact information, such as email and phone number. The letter should also briefly describe the employer’s relationship with the candidate, including the duration of their professional interaction and the capacity in which they worked together. This section is crucial as it provides context for the recommendation and assures the recipient of the employer’s authority to endorse the candidate. By including specific details about the employer’s role and experience, the letter gains authenticity and strengthens the candidate’s credibility. This information helps the recipient understand the employer’s perspective and trust their assessment of the candidate’s skills and qualifications.

Information About the Candidate

The labor recommendation letter should include specific details about the candidate to highlight their qualifications and suitability for the position. This section typically includes the candidate’s name, job title, and duration of employment with the employer. It should also outline the candidate’s key responsibilities, major achievements, and skills demonstrated during their tenure. The letter may emphasize the candidate’s work ethic, leadership abilities, and problem-solving skills, providing concrete examples to support these claims. Additionally, it should mention any specific projects or contributions the candidate made that benefited the employer. This information helps the recipient understand the candidate’s qualifications and how they align with the requirements of the position they are applying for. By providing a clear and detailed overview of the candidate’s professional background, the letter strengthens their credibility and increases their chances of success.

Importance of a Labor Recommendation Letter

A labor recommendation letter is a crucial document that validates a candidate’s professional skills, performance, and suitability for a position. It serves as a formal endorsement from employers or supervisors, providing credibility to the candidate’s qualifications. This letter bridges the gap between the candidate and potential employers, offering insights into their work ethic, achievements, and leadership abilities. By highlighting specific examples of the candidate’s contributions, the letter strengthens their application and differentiates them from others. It is particularly important for job seekers to stand out in competitive markets. Additionally, it builds trust with employers, assuring them of the candidate’s reliability and potential to excel. A well-crafted labor recommendation letter is essential for career advancement, academic applications, and professional growth, making it a vital tool in securing new opportunities. Its impact cannot be overstated, as it often determines the first impression of a candidate. Thus, it is a cornerstone of professional and academic pursuits.

How to Write a Labor Recommendation Letter

Writing a labor recommendation letter involves several key steps to ensure its effectiveness. Start with your contact information at the top, followed by the date and recipient’s details. Use a formal salutation to address the reader. In the introduction, state your relationship with the candidate and the purpose of the letter. The body should highlight the candidate’s key skills, achievements, and work ethic, supported by specific examples. Mention their responsibilities and how they contributed to your organization. Conclude by reaffirming your confidence in the candidate and offering to provide additional information. Keep the tone professional and concise, ensuring the letter is no more than one page. Finally, proofread the document for clarity and accuracy before signing and dating it. A well-structured letter enhances the candidate’s credibility and strengthens their application. Always maintain a formal tone and avoid personal biases.

Templates for a Labor Recommendation Letter

Templates provide a structured format for writing recommendation letters, ensuring clarity and professionalism. They are available in Word and PDF formats, allowing easy customization to suit specific needs and maintain a polished presentation.

Types of Templates

Templates for labor recommendation letters are diverse, catering to different needs. General templates offer a broad structure, while job-specific templates are tailored to particular roles or industries. Academic templates emphasize educational achievements, and character-focused templates highlight personal qualities. Additionally, some templates are designed for specific situations, such as internships or freelance work. These variations ensure that users can select the most appropriate format for their circumstances. Many templates are customizable, allowing individuals to personalize content while maintaining a professional tone. They often include placeholders for key details like the candidate’s name, job title, and accomplishments. By providing a clear framework, these templates help streamline the process of writing a compelling recommendation letter. This variety ensures that users can find a template that aligns with their specific requirements, making the letter-writing process efficient and effective. The availability of multiple types also caters to different audiences, ensuring the letter meets the desired professional standards.

Word vs PDF Templates

When choosing between Word and PDF templates for a labor recommendation letter, it’s important to consider their respective advantages. Word templates are highly customizable, allowing users to easily edit text, format, and structure to suit specific needs. This makes them ideal for tailoring the content to highlight particular skills or experiences. On the other hand, PDF templates are more static but offer a professional, polished appearance. They are often used when the content doesn’t require significant changes, as they preserve formatting and layout. PDFs are also more secure and less likely to be altered unintentionally. Users can choose based on their preference for flexibility or presentation. Word templates are better for personalization, while PDFs are preferred for a finalized, professional look. Both options are widely available online, offering convenience and accessibility for creating effective recommendation letters. This choice ensures that the final document meets the desired aesthetic and functional standards.

Customizing Templates

Customizing templates for a labor recommendation letter allows users to tailor the document to the candidate’s specific strengths and experiences. Most templates provide placeholders for key information such as the candidate’s name, position, achievements, and the employer’s details. Users can modify the tone and content to align with the candidate’s qualifications and the job requirements. Additionally, sections like the introduction, body, and conclusion can be adjusted to emphasize particular skills or experiences. It’s important to ensure the language matches the company’s professional branding while maintaining clarity and sincerity. After customization, proofreading is essential to avoid errors and ensure the letter accurately reflects the candidate’s capabilities. Online resources often provide tips and guides to help users personalize their templates effectively, making the process straightforward and efficient. This step ensures the recommendation letter stands out and genuinely supports the candidate’s goals. Proper customization enhances the letter’s credibility and impact.

Examples of Labor Recommendation Letters

Examples of labor recommendation letters provide clear guidance on how to structure and write effective endorsements. These samples typically include specific details about the candidate’s job responsibilities, achievements, and personal qualities. For instance, a letter for a managerial role might highlight leadership skills and team management abilities, while one for an entry-level position could focus on adaptability and willingness to learn. Many online templates offer real-life scenarios, such as recommending a colleague for a similar role or endorsing a departing employee for future opportunities. These examples often include placeholders for personalization, making it easy to adapt them to individual circumstances. By reviewing these samples, users can understand the appropriate tone, content, and format to use when drafting their own recommendation letters. This helps ensure the final document is professional, persuasive, and tailored to the candidate’s strengths and the job requirements. These examples serve as valuable references for creating impactful labor recommendation letters.

Common Mistakes to Avoid

When drafting a labor recommendation letter, there are several common mistakes to avoid to ensure its effectiveness. First, avoid including irrelevant or overly generic information, as it diminishes the letter’s impact. Secondly, do not omit specific details about the candidate’s responsibilities, achievements, or work ethic, as these are crucial for a strong endorsement. Grammatical errors or poor formatting can also undermine professionalism, so thorough proofreading is essential. Additionally, avoid writing overly lengthy letters, as conciseness is key to maintaining the reader’s attention. Finally, ensure the letter is personalized and tailored to the candidate’s qualifications and the job they are applying for, rather than using a one-size-fits-all template. By addressing these pitfalls, the recommendation letter becomes a powerful tool in supporting the candidate’s career goals.

Best Practices for Using a Labor Recommendation Letter

When utilizing a labor recommendation letter, it is essential to follow best practices to maximize its impact. First, ensure the letter is tailored to the specific job or opportunity the candidate is pursuing, highlighting relevant skills and experiences. Personalize the content to reflect the candidate’s unique contributions and achievements. Use specific examples and anecdotes to illustrate their capabilities, as generic statements lack credibility. Additionally, ensure the letter is written by a credible professional, such as a direct supervisor or colleague, who can attest to the candidate’s work ethic and accomplishments. Maintain a professional tone and format, avoiding grammatical errors or informal language. Finally, proofread thoroughly to ensure clarity and accuracy. By adhering to these guidelines, a labor recommendation letter becomes a powerful tool in supporting a candidate’s career advancement. Its effectiveness lies in its authenticity, specificity, and professionalism.

post op extraction instructions spanish

Immediate Post-Operative Care

  • Bite firmly on the gauze for 30-60 minutes to control bleeding. Replace if necessary, but stop if bleeding subsides.
  • Avoid spitting, rinsing, or suction activities for 24 hours to protect the surgical site and promote healing.

1.1 Biting on Gauze

Immediately after the procedure, bite firmly on the gauze for 30–60 minutes to control bleeding. Replace the gauze if necessary, but discontinue once bleeding subsides. Avoid spitting, rinsing, or using a straw for the first 24 hours to protect the clot and ensure proper healing. Maintain gentle pressure to stabilize the surgical site and promote recovery. Follow these steps carefully to minimize complications and support the healing process effectively.

1.2 Avoiding Spit or Suction Activities

Refrain from spitting, rinsing, or using straws for at least 24 hours after the procedure. Avoid activities that create suction, such as drinking through a straw or vigorous coughing, as they can dislodge the blood clot. Do not rinse your mouth forcefully or spit out saliva, as this may disrupt the healing process. Instead, gently wipe your mouth with a clean napkin if needed. Keeping the surgical site undisturbed is crucial for proper clot formation and recovery. Adhering to this guideline minimizes the risk of complications and promotes faster healing.

Pain Management

  • Take prescribed painkillers as directed to manage discomfort. Start with over-the-counter options if recommended.
  • Monitor pain levels and adjust medication use accordingly. Contact your dentist if pain worsens or persists unusually.

2.1 Use of Prescribed Medications

  • Take prescribed pain medications as directed by your dentist to effectively manage post-operative discomfort and inflammation.
  • If prescribed, start with over-the-counter pain relievers like ibuprofen or acetaminophen, following the recommended dosage.
  • Use narcotic painkillers only if necessary and as instructed to avoid dependency or side effects.
  • Monitor your pain levels and adjust medication use accordingly, ensuring proper healing and comfort during recovery.

2.2 Monitoring Pain Levels

  • Monitor pain levels closely after extraction to ensure comfort and proper healing.
  • Assess severity and adjust medication use as needed, following prescribed guidelines.
  • Report persistent or worsening pain to your dentist, as it may indicate complications.
  • Track discomfort to determine if pain relievers are effective or if additional measures are required.

Dietary Recommendations

  • Stick to soft foods and liquids for the first 24-48 hours after surgery to avoid dislodging the clot.
  • Opt for cool or lukewarm foods to minimize discomfort and aid healing.

3.1 Soft Foods and Liquids

Following dental extraction, it is crucial to adopt a diet rich in soft foods and liquids to avoid disturbing the surgical site. Opt for items like yogurt, scrambled eggs, and smooth soups. Cold liquids, such as water or clear broths, can help reduce swelling. Avoid anything requiring chewing, as this can dislodge the blood clot essential for healing. Stick to a soft-food diet for the first 24-48 hours to ensure proper recovery and minimize discomfort.

3.2 Avoiding Hot or Carbonated Drinks

Hot or carbonated beverages should be avoided for at least 24 hours after the procedure. These can dislodge the blood clot, delay healing, or irritate the surgical site. Opt for cool or room-temperature liquids, such as water or clear broths, to stay hydrated without risking complications. Avoid using straws, as the suction motion can also disrupt the healing process. Resuming hot or carbonated drinks should only occur after the initial healing phase, typically within a few days, when the site is more stable.

Oral Hygiene

  • Resume gentle brushing with a soft toothbrush 24 hours post-procedure, avoiding the surgical site to prevent irritation.
  • Start saltwater rinses the day after surgery to keep the area clean and promote healing.

4.1 Resuming Brushing

Resume brushing gently with a soft toothbrush 24 hours after the procedure. Avoid the surgical site to prevent irritation or dislodging the blood clot. Use mild toothpaste and focus on cleaning other teeth thoroughly. Gradually increase brushing intensity over the next few days. This helps maintain oral hygiene without interfering with the healing process.

4.2 Saltwater Rinses

Start saltwater rinses the day after surgery to promote healing and reduce inflammation. Mix 1/2 teaspoon of salt in 8 ounces of warm water. Swish gently 2-3 times daily, focusing on the surgical area. Avoid vigorous rinsing to prevent dislodging the blood clot. Continue this routine for several days or as instructed by your dentist. Saltwater rinses help maintain cleanliness and support the recovery process without irritating the site.

Swelling and Bruising

Swelling is common after surgery, peaking around the second or third day. Apply a cold compress to minimize it. Bruising may appear as black, blue, green, or yellow due to blood under the skin, which is a normal post-operative occurrence.

5.1 Applying Cold Compresses

Apply a cold compress to the swollen area to reduce swelling and bruising. Use an ice pack wrapped in a cloth to avoid direct skin contact. Apply for 15-20 minutes every hour during the first 24 hours. This helps minimize swelling and discomfort. Continue as needed beyond the first day to aid in healing. Avoid pressing too hard on the surgical site to prevent further irritation or complications.

5.2 Expectation of Discoloration

Discoloration, such as black, blue, green, or yellow marks, may appear under the skin due to blood spreading beneath the tissues. This is a normal post-operative reaction and not harmful. Swelling typically peaks around the second or third day and gradually subsides. To minimize discoloration, continue using a cold compress as directed. The discoloration will fade naturally over time. Monitor the area and ensure no further irritation occurs. This is part of the healing process and should resolve without additional intervention.

Smoking and Alcohol

  • Avoid smoking for at least 5 days after surgery, as it can delay healing and increase complications. Refrain from tobacco products during recovery.
  • Do not consume alcohol for 24 hours post-procedure, as it can interfere with healing and interact with medications. Avoid carbonated and alcoholic beverages entirely.

6.1 Avoiding Smoking

  • Smoking should be avoided for at least 5 days after surgery to promote healing and prevent complications.
  • Nicotine and tobacco can delay recovery, increase the risk of infection, and reduce blood flow to the surgical site;
  • Smoking can dislodge the blood clot, leading to dry socket, a painful condition that prolongs recovery.
  • Avoid secondhand smoke as well, as it can also interfere with the healing process.

6.2 Avoiding Alcohol Consumption

  • Avoid consuming alcohol for at least 24 hours after the procedure to ensure proper healing.
  • Alcohol can interfere with blood clot formation, increasing the risk of bleeding and complications.
  • It can also interact with pain medications, reducing their effectiveness and prolonging recovery.
  • Alcohol thins the blood, which may delay the healing process and affect the surgical site.
  • Refrain from alcohol during the initial healing phase to minimize risks and promote a smooth recovery.

Follow-Up Care

  • Schedule follow-up appointments as directed by your dentist to monitor healing progress.
  • Attend these appointments to ensure proper recovery and address any concerns promptly.

7.1 Scheduling Follow-Up Appointments

It is crucial to schedule follow-up appointments as directed by your dentist. These visits ensure the healing process is progressing as expected. Your dentist will monitor the surgical site for proper recovery and address any concerns or complications promptly. Regular check-ups help prevent infections and ensure the best possible outcome. By adhering to the recommended schedule, you support a smooth and effective recovery journey.

7.2 Monitoring Healing Progress

Monitor the healing progress by observing the surgical site for signs of infection, swelling, or unusual discharge. Ensure the area remains clean and follow the dentist’s instructions for post-operative care. Apply ice if swelling persists and maintain a soft diet to avoid irritating the site. Attend follow-up appointments to allow your dentist to assess the healing and address any concerns promptly. Proper monitoring ensures a smooth recovery and minimizes the risk of complications.